

The $tingy Sailor
Diy trailerable sailboat restoration and improvement without throwing your budget overboard.

How to Step a Mast Single-Handed With or Without Using the Boom as a Gin Pole
How do you step the mast on your trailerable sailboat? With a gin pole? With the trailer winch? With the help of friends or family? With your fingers crossed? No single system works for every sailboat or for every skipper. If you’re new to mast stepping, you don’t like your current method, or you just want to simplify or speed up the process, this post is for you. I must warn you though, this is a long post, even for me. To make it as short as possible, I’ve included five YouTube videos that show how this system works. By the end of this post, you’ll know everything about how I step the mast on Summer Dance single-handed in minutes, even on the water.
I’ll describe two ways that I step the mast, including one way that doesn’t use a gin pole at all. Both are fast and mostly use the boat’s own rigging and very little extra gear.
I’ll also explain some topics that lead up to and follow mast stepping, like how I:
- Use a DIY telescoping mast crutch for easier stepping and secure trailering.
- Tie down the mast and rigging for trailering.
- Keep my mast in tune without having to loosen and re-tighten the shroud turnbuckles to step the mast.
What do you really need?
When I started trailering Summer Dance years ago, I researched a lot about mast stepping. The Catalina 22 Owner’s Manual and General Handbook is pretty brief on the subject.
Walk the mast aft and drop the mast foot into the mast step on top of the deck, keeping the mast in center line of boat, insert the pivot bolt and locking nut. One crew member should pull on a line tied securely to the forestay while another pushes up on the mast and walks from the cockpit forward. With the mast erect, attach the forestay and forward lower shrouds.
Poorly written but pretty simple, huh? One crew member pulls on the forestay while another pushes on the mast. That’s how the mast was designed to be stepped and it works well if you’re young, strong, and there are two or more of you to do the job.
But what if you don’t normally have a second able crew member? What if you need to step the mast on the water? What if you want to lower the mast to go under a bridge? What if you or your crew have a physical impairment that prevents them from performing one of the tasks? That system may not work for you and you need an alternative. If you believe in the rule that you should have a backup for every critical part and system, then you also need a backup mast stepping plan even if you normally step the mast with the factory recommended method.
I’ve read about lots of different systems. Maybe you have too:
- Factory-built gin poles, braces, guy wires, and mast-ups
- DIY wooden gin poles with winches, bridles, and brace poles
- Blocks attached to the pulpit to reuse the trailer winch cable
- Electric winches on the trailer or in the tow vehicle
- Jumbo bungee cord connected to the forestay
- Assorted Rube Goldberg variations on all the above
They all struck me as overkill for the real problem. What do you really need once you have the mast bolted to the step? What do all of these system have in common? Some mechanical advantage to raise the mast and a way to keep it from swinging too far sideways until the shrouds tighten.
If you’ve read this blog for very long at all, you know that I’m really big on reusing or repurposing things for other uses. It’s something of a prerequisite to be a stingy sailor. If you’re lucky, it’s in your DNA and it comes easily to you. Being an armchair engineer qualifies too.
Let’s see — sailboat design is all about capturing, multiplying, and redirecting forces for mechanical advantage: the hull, keel, rudder, mast, sails, rigging, almost everything. What’s the most compact, portable piece of gear on a sailboat that creates mechanical advantage? The main sheet or the boom vang typically multiplies the force applied to it by three or four times. What are all gin poles in their most basic form? A big stick. Is there already a long, stiff, portable, stick onboard? The boom. Can we raise and lower the mast single-handed with the main sheet and the boom?
As it turns out, it’s really pretty easy to do. But it’s not very easy to describe in words, so rather than write an entire book about it, I’ve made a series of short videos that each show a different aspect of my mast stepping system. I’ll give you an overview of each aspect in the text below but to really get it, you should watch the videos.
Getting it to the water
Besides being simpler, one of the basic principles of this system is to make launching and retrieving the boat as quick as possible while also being safe. That starts with securing the mast and rigging for trailering. For me, it has to be secure enough to tow for a hundred miles over bumpy state highways and county backroads to my favorite cruising spots. This is in north Idaho, mind you, which is relatively remote compared to the Florida coast or southern California.
I use a combination of DIY mast supports, motorcycle straps, and inexpensive ball cords to secure the rig. The mast is supported on both ends and in the middle. This follows closely the Catalina 22 Owner’s Manual and General Handbook recommendation.
Tie the mast and boom securely to the bow and stern pulpits. The spars should also be supported in the middle by the cabin top. Pad the mast at all contact points to prevent damage.
No tools or knot tying are needed for my system and any one of them works in seconds and stows easily either onboard or in my pickup.
Here’s a tour of the rig tied down just before I step the mast.
The previous video mentions my DIY mast stepper, also called a Mastup by a popular online Catalina parts retailer. I haven’t yet devoted a blog post to it but it was pretty easy to make. If you’re interested in a fabrication drawing and materials list, keep reading to the end of this post and a special offer.
I bought the steel myself from the cutoff pile at a local metal distributor. I took the metal and my drawing to a local welder who advertised on craigslist.com. I painted and assembled it myself. The total cost was half the price of the commercial version and in some ways, works even better. I especially like the D rings, which make it simple to secure the top of the mast stepper to the aft mooring cleats while trailering. It holds the mast very solid that way. And because the pintles are welded in place instead of adjustable, they can’t accidentally loosen and drop the mast.
Following is a close-up video of just the mast stepper. You can see it in action in the last two videos.
Setting up the boom as a gin pole
The basic theory of a gin pole is to lift a heavy object below one end while it remains stationary at the other end. Support lines called guys position the lifting end over the object that is raised. A mast raising gin pole has one end stationary near the base of the mast, uses the forestay to support the lifting end, and uses a winch or a block and tackle to theoretically raise the bow of the sailboat to the end of the gin pole. In reality, the bow stays stationary and the entire gin pole system including its base (the mast) are raised towards the bow.
Most C-22 gin poles use one of two methods to attach the gin pole to the mast:
- A peg on one end of the pole that fits in a hole in the mast (the factory system for 2nd generation C-22s)
- A saddle on the end of the gin pole that fits around and is strapped to the mast (most DIY systems)
Neither of those gin poles serve any purpose after the mast is raised. They’re useless extra weight that takes extra storage space.
The system I use attaches using a small right angle bracket. I fabricated it out of a piece of scrap aluminum I already had. One side of the bracket is bolted through the mast step and the cabin top in front of the mast. The other side the bracket points upward and has a 1/4″ hole through it to act as a hinge for the gooseneck (stationary lower) end of the boom. If you’re a follower of this blog and have the password, you can find a scale drawing of this bracket on the Downloads page.

I connect the gooseneck fitting to the bracket with the same quick pin (drop cam or toggling bimini type) that I use to connect the gooseneck fitting to the mast slide while sailing. The pin is tethered to the boom with a stainless steel lanyard so it can’t get lost and it’s always near at hand.
I connect the forestay to a shackle on the top side of the (upper) end of the boom. On the opposite (bottom) side of the boom from the forestay, I connect the end of my main sheet tackle that doesn’t have the cam cleat. This is the same configuration as when the main sheet is attached for sailing. I connect the other end of the main sheet (that’s normally attached to the traveler car) to the stem plate where the forestay is normally attached.
To hold the boom vertical during raising, I sometimes use two pieces of pre-tied accessory cord. They connect to the sides of the boom with clips through the eye straps where my boom topping lift and jiffy reefing lines attach. The other ends of the cords have loops tied into them that I tie to the upper ends of the midship lifeline stanchions with girth (cow) hitches. The mast step is nearly in-line with the tops of the stanchions, so the cords rotate around the same pivot point as the mast and the boom.
If your sailboat doesn’t have the same style of gooseneck fitting as a Catalina 22 or you can’t use your boom for some other reason but you do have a spinnaker pole, you might be able to use it instead as this picture from a Westerly 21 owner shows. This picture also shows that a gin pole can be a great help with lifting the extra weight added by a furler.

That’s kind of hard to visualize, so here’s a short video that takes you on a tour of the setup.
This is a stickup with a boom!
After I rig the boom like shown above, the hard part is over. The rest is just pulling the main sheet with one hand while I steady the mast with my other hand. I also watch the stays and shrouds to be sure they don’t catch on anything as they raise off the deck.
With the main sheet cam cleat at the stem plate, I can easily stop raising the mast at any point, cleat the line with a sharp tug, and then clear snags or move to a better lifting position. Then I uncleat the main sheet at the stem plate first and hold light tension on the main sheet while I get into position to resume raising the mast.
The mast only needs to be held centered until it reaches about a 45° angle. Then the upper shrouds begin to tighten and they hold it centered the rest of the way up.
When the mast is vertical, I reconnect the forestay and forward lower shrouds using quick release levers . The mast is back in tune and requires no further adjustment. I disconnect the boom from the system and attach it in its normal place between the mast slide and the topping lift or backstay pendant. I disconnect the main sheet and attach it to the traveler car. All I need to put away are the two accessory cords if I used them, which I typically only do when it’s windy, when I’m setting up in a unlevel area, or on the water when its choppy.
Here’s a video showing the entire process completed in about 4 and a half leisurely minutes.
Single-handed speed stepping
In good conditions (light breeze, level area, or calm water), I skip over using the boom as a gin pole entirely and just use the main sheet to pull the mast up by the forestay. It saves several minutes and is nearly as easy to do but you should be fitter than average to attempt it. It’s the single-handed equivalent of having a crew member in front of the boat pull a line attached to the forestay. Bystanders seem to enjoy watching me raise the mast by myself in seconds.
Here’s what it looks like when it’s done on the water.
Back to the beginning
At the end of a road trip, I never look forward to tearing down Summer Dance , pulling her out of the water, and tying her down for the ride home. I’ve had a great time but I’m tired and there’s many miles to go before I sleep. I don’t want to spend an hour lowering the mast and tying the rig down. I want it to be quick and simple.
Almost always, I lower the mast without using the boom as a gin pole even if I raised it that way. A gin pole is just not usually necessary so long as the mast comes down slow enough and lands in the crutch. You might not want to do it that way your first few times, so here’s what it looks like using the boom as a gin pole.
Then I tie it all down in a few minutes like shown in the first video.
Special offer for blog followers
Whew! That’s a lot of info. If you stuck with me through it, I really appreciate it. I want to thank you by offering not one, but two free bonuses to my blog followers.
The first is the launch checklist that I use to prepare and launch Summer Dance . It’s two pages of items that can help make sure you don’t forget something important for your next cruise — everything from an umbrella for the first mate while she waits for you to step the mast, to step-by-step instructions that you can have on deck for the gin pole method described above. Use it as a starting point to add and remove items to make your own checklist.
The second bonus is a dimensioned drawing and materials list for my DIY mast crutch that is described at the beginning of this post. Use it to build your own and save some money for something else.
If you’re already a subscriber to this blog, you can download both of the free bonuses from my Downloads page using the password that you received when you subscribed. If you’re not already a subscribed to this blog, sign up and you’ll join the thousands of other stingy sailors. Just enter your email address in the box at the bottom of this page and then click the Subscribe button. You can unsubscribe at any time and I won’t share your address with anyone, ever.
I hope you’ve picked up some tips from this post that you can use to optimize your mast stepping system and spend more time on the water.
Would you like to be notified when I publish more posts like this? Enter your email address below to follow this blog and receive notifications of new posts by email. You will also receive occasional newsletters with exclusive info and deals only for followers and the password to the Downloads page. It’s free and you can unsubscribe at any time but almost nobody does!
Subscribe to Blog via Email
Enter your email address to subscribe to this blog and receive notifications of new posts by email.
Email Address:
Share this:
58 thoughts on “ how to step a mast single-handed with or without using the boom as a gin pole ”.
Love your vids on raising mast. Could you send a pic of quick release on forward shrouds and forstay and the pin you spoke of in vid.
Stay tuned here for a separate post on the quick releases and maintaining mast tune that’s coming soon!
I like the idea of using PVC tube & fence to make mast supports.
Just some scraps I had on hand; lightweight, strong, and they don’t look too ghetto.
Hey $tingy,
Thanks for another great post.
You mention the newsletter. I am definitely a long time blog follower, and look forward to every post, but I have never gotten a newsletter. Could you add me to whatever email list you use? I don’t want to miss any more.
Hi, CapnRehab
You weren’t receiving the newsletter initially because you’re a WordPress user so if you follow, my posts should show up in your Reader list instead of by email. But I added your email address to the newsletter recipient list back on May 11. The last newsletter went out on May 21 titled What’s Your Favorite DIY Project? Did you get that one? I’ll probably shoot out the next one at the end of the month. If you don’t get it, I don’t know what more I can do on my end.
Brilliant repurpose of mainsheet. I’ve struggled with this procedure for years, just man-handling it up there. Can’t wait to try this!
I hope it works for you. Let me know how it goes!
For mast raising and lowering, I have it a little easier with a 16ft boat, and can raise the mast single handed juat by manually lifting and walking forward in the cockpit and onto the keel case with the hatch slid forward, although I usually have my wife tension the forestay for some extra assurance.
I like your use of the “ball ties” for securing the rigging on the trailer. I usually use the halyards to tie everything up, but that takes more time than it should. I use some “sail ties” which are very similar to your ball ties to secure the sail on the boom and the boom is stowed inside the cabin. I think I will either get some more sail ties for securing the rigging on the trailer, or make up some velcro webbing straps. At the bow, my mast is tied down using my bowline and the DIY timber A frame mast crutch tied down at the rear with a rope tied to cleats on either side of the transom. The boat is held to the trailer using a stern ratchet strap and a turnbuckle on the bow, and the winch cable attached.
I really like the idea of using the boom as a gin pole. Brilliant. I wonder if you could post a picture of the L-shaped aluminum bracket that you fabricated and how it is attached to the boom? Making that may be the tricky part for me to get this thing. I could not really see a clear picture of it in your videos. Thanks!
I’ll add a close-up shot of it soon.
I added a close-up picture of the hinge bracket about midway through the post.
Excellent blog and report. I struggle with the mast raising and have an assistant. I will give your system a try. I finally understand the function of a gin pole and how to use it.
That’s awesome, Richie. I’m really glad it helped. In the case of a sailboat, it’s just a long, temporary lever. Aha moments are great!
Excellent report and diagram on the mast stepper. What would you think about using aluminum to build it instead of steel?
I think aluminum would work great so long as the wall thickness of the tubes is adequate. You wouldn’t need to be concerned about painting or rust. The critical area is where the outer tube overlaps the inner tube when the crutch is extended. Depending on how close the fit is and how much overlap, when you’re rolling the mast back to set it in the step, there can be considerable strain on that “joint.” A thin wall or soft aluminum might deform so make it beefy there.
Thanks for your comment, Michael!
I spoke to my fabricator friend about using aluminum and, him not knowing about the stepping process was most concerned about the hinges holding weight while trailering over the road. He also suggested using a beefier thickness if choosing aluminum just like your suggestion.
thanks for all you do!!!
The gudgeons can easily handle the weight so long as the pintles on the crutch are sturdy.
Send us a good picture of the final product and I’ll add it at the end of the post as an example!
Great post. Just started following your site. You have a lot of good projects on here. Where did you find such thin-walled square tubing for your mast stepper? All I can find is telescoping 1-3/4 & 1″ tubing. I don’t think I need that much strength or weight. Also, I receive the posts by e-mail but I never received the password for the download section. Thanks
There are a couple of industrial metal suppliers in my area that sell their cut-offs retail to the public by the pound. One of them also sells small quantities of standard sizes. I found all the sizes I needed with very little cutting. You definitely don’t need much strength and as little weight as possible. Aluminum would be even better if you can get it welded.
I’ll send you the password by email.
Thanks for your question.
I really like the simplicity of raising the mast without a gin pole. I use a gin pole now but prefer a simpler approach. How to you lower your mast? Do you use your mainsheet tackle when lowering? Thanks for the great video.. Jim Mathews
That’s right, Jim. I lower the mast by the same method but in reverse, which helps to remember the steps in both directions.
Thanks for your question!
Hi. I’m making the mast crutch and downloaded the drawing. How far down is the second hole in the 1″ tubing? ie. the hole where I would put the lock pin when the crutch is raised. Thanks.
That’s an excellent question, Jim, since it wasn’t shown on the drawing. I’ve since revised the drawing to show the hole 2″ up from the bottom of the inner tube.
The distance isn’t critical but depending on how tight the fit is between the inner and the outer tube, the hole might work better even farther up the inner tube. Try it at 2″ and if the top tube is too loose for you and it wobbles around, drill another hole farther up the inner tube, say at 4″ and try that. The mast will sit 2″ lower but it shouldn’t affect how you step the mast other than by making the crutch sturdier. Then you will have two holes to choose from. You can even drill more holes at different heights for different purposes.
Hi Thanks for the blog. Some pretty interesting ideas here, I’m borrowing some, especially related to the sails… Seeing your “system” to step the mast, I’m trying to adapt it to my boat, a ’82 French Rocca Super Chausey. The mast step has no pin to lock to the mast foot, it just falls into place between two pins that limit its longitudinal travel. Hence, nothing for the mast to pivot on. Any thoughts on how I could achieve that effect? Thanks.
If you have the tools and the ambition, you could replace your existing tabernacle with a custom made pivoting one. Find a piece of heavy gauge aluminum channel that you can cut into a shape similar to the C-22 tabernacle shown in the picture above. The channel should be just wide enough for the mast to sit into and the height a couple of inches. Cut slots in the sides for the through bolt to slide up and down. Cut the channel long enough and drill holes in the bottom of the channel to fit your existing deck bolts.
Then drill a hole through the base of the mast to accept the through bolt. It should be close to the bottom of the mast, 1/4″-1/2″ from the bottom. Angle the aft edge of the end of the mast so that it will rotate without binding in both directions. As it rotates backward during unstepping, the bottom end of the mast and the through bolt should ride up in the slots. Put a wingnut on the end of the through bolt for easy removal and you’ve got a pivoting mast.
If you don’t have the resources to make one yourself, maybe you can find a friend or a metal fabricator to help.
Good luck with your projects and thanks for your question! $tingy
When installing the gin pole hinge bracket you drill through the cabin roof. Have you experienced any water penetration through this hole?
I sealed the plate and hole perimeters with butyl tape, so no problems.
Wow! Love the post and videos!! So clear and easy to follow. I’m going to try this for my Columbia 8.3. I tried to follow you but got an error code. Can you manually add me, please?
Please try following again and if the error repeats, send me the text or a screenshot of the error so I can investigate.
My Venture 21 tabernacle and mast look like yours (sans the plate for your swivel blocks) and I have often wondered if there is wear on the trailing edge of the mast foot after repeated raising/lowering? Or does yours have some reinforcement?
Also, have you ever noticed the boom baby stays pulling too much on the stantions? I wonder if mounting the ropes at the base would be less apt to damage them if the mast were to go somewhat off-center (to the exrent the upper shrouds allowed)?
Love your site. I shared the 2017 DIY competition on Small Craft Advisor Magazine’s Facebook page and I noticed the 10 most popular projects link…most of which are on my to-do list!
There is a tiny bit of wear after 36 years but not enough to matter. Tying the baby stays to the stanchion bases would be more solid but then their pivot points would be too low. The reason that I tie them up at the top of the stanchions is so that the baby stays keep in relatively constant tension throughout the range of motion of the mast/boom. They’re almost perfectly aligned with the tabernacle. The stanchions aren’t in much danger because the boom doesn’t weight much and it can’t wander very far at all since it’s held in tension between the forestay (running aft) and the main sheet (running forward). They really just help to hold the boom vertical while you’re setting the system up until you begin to raise the mast. The mast can wander side to side some until its raised about halfway, then the upper shrouds come taught and keep it centered.
Thanks for the share!
Your site has been a tremendous help and inspiration for me and my 1988 Cat 22. My mast step has welded loops fore and aft. Can you suggest a structurally sound way to secure the boom to the loop for lifting/lowering?
Link showing the step: http://www.catalinadirect.com/index.cfm/product/345_18/mast-step-c-22-cp-22brcp-18-wwelded-vang-loop.cfm
Hello, KGUNN
Since the loop is perpendicular to the line of the mast/boom rotation, it won’t work well using only off the shelf parts. I suggest you consider mounting a tang like the Garhauer BT-1 to the bottom of the mast instead. You can pin the boom to it similar to how I do it to my bracket. The boom will then rotate with the mast as it raises and lowers.
Great suggestion. Thanks!
Hmmm, this asks more questions for than answers. I don’t have the lower stays, nor do I have any of the attachment point on the mast that I can see. The thing is the boat is smaller 20′ vs 22′ I have no lifelines nor a rear rail, walking down the side of the boat would be a challange, never mind running lines while doing so. The mini stays have no place to attach to. Not sure how to go about raising the mast without help…even with this setup…
A smaller sailboat could indeed be trickier to step the mast single-handed since it has less rigging to aid the process. If you’re not committed to perfecting a single-handed technique, I’d suggest you consider a two-handed process with one crew member in the cockpit to steady the mast laterally while the second crew member pulls the mast up by the forestay or foresail halyard from the bow or on the ground in front of the bow. A mast crutch would also help in that case. Otherwise, you might be looking at extensive fabrications or commercial mast stepping hardware with a winch.
Where there’s a will, there’s a way!
How could your system be used with a furling 150 genoa on a Catalina 25?
Hello, Thomas
It could be used in a similar way on your C-25 with a couple of adjustments. First, your mast is longer and heavier than a C-22 so I would always use the boom as a gin pole. You’ll need the leverage for the extra weight, especially with the addition of the furler. Second and more importantly, you’d need to lift the furler as well as the mast somehow. I’d suggest using a main or spinnaker halyard to hold the mast and furler together. Wrap it around them from top to bottom before you lower the mast, then handle them as one unit until after you raise the mast again and unwrap the halyard to reconnect the forestay/furler. Use the jib halyard with its working end securely tied off instead of the forestay to connect the masthead to the boom/gin pole. The rest of the process would work the same.
Stay tuned because I’ll be publishing a post soon about choosing and using a furler with a trailerable sailboat.
Appreciate your reply Stingy. I need to carefully review your technique but it seems one’s boom would remain upward; although I’m sure you lower it when finished? Sorry for my ignorance. I’m also looking at the idea from the clever MacGregor 26 mast raising pole that uses a winch on the pole with baby stays with a special one to automatically keep the lowered furler up off the deck. I read about it on TropicalBoating ( https://www.tropicalboating.com/2010/04/the-perfect-solo-mast-raising-system-for-small-sailboats ). I’ll have a look at your mast crutch but I can’t use the gudgeons for the rudder as I’ll need to motor over to the Cave Run Lake (KY) boat launch for the haul out. Thanks!!
Winch-powered mast raising systems are a good choice for owners with impaired physical abilities. I might have to resort to one as I get older and am not able to do everything I once could. Beats giving up sailing!
One needs to attach a mast bail with the MacGregor 26 solo mast stepping system. I’m reluctant to drill into the mast though. This is my first cruiser (purchased in July) and I’ve much to learn from your blog. I was only introduced to sailing two years ago when I bought a Sunfish.
My C-25 teak companionway/hatchboards need replacement after 20 years, probably all standing rigging needs replacement even though it all looks fine at deck level (in the Lake continuously since ‘08), etc., etc. I pulled two through hull Airmar transducers out to check them and found only thin layer of algae on them – tells me the lake water has been very clean. The old KVH display is dead so I’ll switch it out (plugging holes with marine plastic and epoxy) with a new RayMarine i40.
I see that the boom is removed of course in your video. I also see the stress on the mast crutch essentially dictates one use the transom gudgeons for support. I had thought I could use 1” pipe secured to the stanchions but then there would not be enough telescoping height available either. You’ve devised a very clever approach- I’ve never remounted my boom so will need how I can attach it to the fore ring on the step plate.
You might consider modifying my crutch design so that the bottom end rests in the cockpit sole forward of the transom instead of on the rudder gudgeons. It would probably need additional support or to be fastened to the mast to keep it from falling over. Offset to one side a little, you should still be able to use your rudder to steer. That, or use the outboard tiller instead of the rudder to get to the ramp if you can. I do that sometimes.
Just what I have been looking for to give me some information to guide me in raising and lowering the mast for maintenance on my 26 foot Grampian without the expensive use of a crane this spring.
Hi, I like your idea of the mast raising system without a gin pole. Does your block & tackle include a ratchet or brake? Thanks!
Hello, Laura
Since I use my mainsheet tackle, no, but if you want to use a separate tackle, that would be a good idea.
Thanks, $tingy
Sure beats my system of using 2 sons to help out, they’re never around when you need them !
Thanks for the video on the no pole lift, that’s pretty much how I need to do it though I usually am working on the hard before getting a lift in.
I have tried raising the mast as you show in the video. I have the same quick release. But when I try to lift the mast with the forstay can’t do. I’m wondering maybe your mast is lighter or do I have the wrong set up to raise mast. I have the mast step which I can raise for a better angle…but it’s not happening.
Hello, Mark
Are you using a gin pole or trying to lift it only by the forestay? Either way, it takes quite a bit of strength to get the mast up that first few feet since you’re not pulling directly vertically on the masthead. If you’re not able to do it by yourself, you might need a helper for at least that part of the setup.
Dear sir My name is Mark Monteverdi. I have followed your web site for a while…and always turned out good. I have looked at the mast rising video countless times. I have the quick release for the shrouds. I’m guessing you are using a basic vang ? Well either I’m very weak or i have the vang set up incorrect or my mast is made of different material …when i go to raise my mast it will fall off to one side it just feels as though I’m pulling a truck up a hill. If you would be kind enough to send a pic of what ever type of pulley system i would greatly appreciate that very much. It’s hard to get any one to go sailing with me and that’s more just so i have some one to push and one work the winch. Thank you Mark
I’m sorry to hear you’re having trouble. When raising or lowering my mast, it too will tend to swing to one side or the other until it’s about half way up and the upper shrouds tighten and hold it centered the rest of the way up. That’s why I always have at least one hand on the mast to keep it centered during the lower half of the lift. I use the standard C-22 main sheet tackle which has a 3:1 mechanical advantage. You could use a stronger tackle (try 4:1) if you need the additional lifting power. You can see the whole main sheet in the video in Quit Spending Setup Time on Turnbuckles .
Hope that helps, $tingy
Hi Stingy Sailor, First of all, thanks for all your tips, tricks, and videos. Your site is awesome and very helpful! I have a C-25 with swing keel so most of all your tips are applicable, very nice, and handy. I really like your mast securing device located at the bow for trailering; easy and simple. I was wondering if you do have the drawings available for it so I could use it to build my own? Thanks! Alex
I did not make a fabrication drawing for the pulpit saddle because of the complex angles of the railing cutouts. Most readers wouldn’t be able to cut them accurate enough, so it’s a trial and error fit. Lay your material centered across the top of the pulpit, trace the railing edges onto the underside of the material, then cut a little at a time until the saddle sits down securely over the rails. Do the same with the mast on top of your material and you’re done.
Good morning, what a beautiful boat you have there ! that is an ingenious way to raise a mast,nice work ! I am curious about what the black,plastic/rubber item is that looks like it’s attached to the stern rail by the mast crutch @ 2:45 of the first video Please respond because my curiosity is killing me because I don’t get it. Thanks, Mick
You can read all about it in Add a Solar-Powered Flood Light in Your Cockpit .
Hi! I just subscribed to your blog, and I’d like the instructions for building a mast crutch like yours. Wasn’t sure whether that would be sent out automatically, or whether I needed to specifically ask for them. Thanks!
Lenny, You can find a dimensioned drawing of the mast crutch on my Downloads page if you’re a subscriber. The password to open that page was sent to you when you subscribed. $tingy
Leave a comment Cancel reply
This site uses Akismet to reduce spam. Learn how your comment data is processed .
- Already have a WordPress.com account? Log in now.
- Subscribe Subscribed
- Copy shortlink
- Report this content
- View post in Reader
- Manage subscriptions
- Collapse this bar
Practical Boat Owner
- Digital edition

Do-it-yourself mast stepping
- Rupert Holmes
- May 23, 2024
If you’re thinking of hiring a boatyard crane to step your mast, why not consider this low-tech, low-cost alternative? Rupert Holmes shows how it’s done

Raise or lower your mast with a boat either side and a few willing helpers
Mast stepping without a crane may sound impossible – but it’s quite straightforward given a couple of willing friends with boats and reasonably flat water.
The basic idea is to raft your boat between the other two, and use their halyards to lift your rig .
With practice, little more than half an hour is needed: this technique is standard practice among charter fleets in the Eastern Med , where often there are no cranes available if mid-season repairs are needed at short notice.
However, I’ve never seen this method employed anywhere in the UK or other parts of northern Europe.
Yet it could be really cost effective for clubs that store yachts on the hard over the winter, as a crane only needs to be hired to put the first two rigs up.
Indeed, if two of the boats have tabernacles , it may be possible to step the masts of the entire fleet without recourse to a crane.
Of course, mast raising is never without risk, even using a crane, so it’s important to allow plenty of time – especially on a first attempt – and approach the task in a logical and organised fashion.
Mast stepping: Weight worries
An 11m (36ft) rig for a typical 9-10m (30-34ft) cruiser weighs about 75kg (165lb), maybe a little more if there are halyard winches mounted on the spar.
That’s around the same weight as hoisting an average-size person aloft, but with the load spread between two rigs, of course.
This means hoisting the spar is well within the design capabilities of the rig of a similar-size or larger vessel and does not need to be a strenuous operation.
Raft the three boats together, with yours in the middle.
Here we’re raising the mast on my own Discovery 3000, Ammos .

1. Tie halyards from the neighbouring yachts under your spreaders
We pointed her in the opposite direction to the others, enabling the main halyards of the outer vessels to be used, but you could also use spinnaker halyards, especially if they are fitted with a swivelling pulley at the masthead, in which case it’s best to have all three boats facing in the same direction.
Tie a halyard from each of the other boats under your spreaders, and include a retrieval line so you can get the halyards back down once the mast has been stepped.
Never be tempted to use a snap shackle to secure the halyards – although generally reliable they can fail without warning under load, and the danger of that happening when supporting the mast is too great a risk.
A large bowline tied in the end of the halyard is a much more secure method.
Don’t worry if the halyards on the neighbouring boats are a little too short – simply attach an extra length of line to make up the difference and form a strop.
Also, securely tie a guide rope around the mast foot – this is to control the heel of the rig as it’s lifted.
Rig raising
Simultaneously hauling the halyards of the neighbouring boats will not lift the rig.
You’ll need a couple of people on the deck of your boat to guide and control the spar as well.
If it’s a single-spreader mast, as was with Ammos, it will initially rise almost horizontally, but as the rig gains altitude, the foot of the mast can be guided towards the mast step on deck, or the partners if it’s a keel-stepped rig.

2. Start hoisting the rig – when doing it the first time it helps to have a few extra people on your deck to lend a hand – and allow plenty of time
In an ideal world, each of the halyards would be hauled at the same rate so that, once the mast is standing more or less upright, it is always vertical in the athwartship plane.
However, this is rarely the case so you’ll need to check on the angle of the rig as it’s lifted, directing each winch grinder as necessary to keep it in line.

3. As the rig rises, you can start walking the foot of the mast forwards, towards the mast step
With a two-spreader rig, it’s best to put the strop below the top spreaders if possible.
This will lift the top of the mast first, so the heel will then need to be ‘walked’ along the deck of your boat towards the mast step as the rig is lifted.
Three-spreader rigs can be lifted by the upper or middle spreaders – the former is easier, providing the rigs of the boats assisting you are tall enough.
Delicate stage
Locating the mast on its step is the most precise stage of the operation, requiring good communication between the crew on your boat, who are manoeuvring the foot of the mast into place, and the halyard operators manning the winches on the adjacent yachts.
The rig needs to be lifted until it’s just clear above the mast step – around 2cm-3cm (an inch or so) of clearance is fine.
Once it’s in position, the halyards can be eased a fraction – tell each operator exactly how much – until the rig is sitting firmly on the mast step, still supported by the two halyards.

4. The rig rarely goes up exactly vertically, but that’s easy to tweak by adjusting the load on the two halyards
If you have a keel-stepped mast it’ll have to be carefully lowered through the partners to the keel below.
Once the mast is correctly located, put each of the cap shrouds into their bottle screws, spinning the first one by only a couple of turns to give the maximum chance of settings its opposite number connected.
If the rig is canting over to one side and it’s not possible to connect the second cap shroud to its bottlescrew, the halyard on the boat on the opposite side to that shroud is a little too tight.
Ease the halyard a fraction, then take up the slack on one of the other supporting boats, being careful not to lift the rig off the mast step.

With the mast held aloft it’s time to connect the cap shrouds
Once both shrouds are connected, and tensioned enough for the threads to be fully covered, connect the forestay and backstay.
If the rig is not sufficiently upright in the fore and aft plane, and one won’t reach its bottlescrew, one of your own halyards can be taken down to a suitably stout deck fitting and tensioned to tilt the mast in the correct direction.
Once the forestay, backstay and cap shrouds are connected their bottlescrews should be wound up hand-tight – this will secure the rig sufficiently for the supporting halyards to be released and returned to their respective boats.
After that, the lower shrouds and babystay can be connected.
Tensioning and tuning
Next tension the rig to its normal settings, or as close as you can manage, using a pair of well-fitting spanners to turn the bottlescrews once they’re too tight to wind by hand.
Don’t be tempted to turn a bottlescrew under tension by using a screwdriver poked through the body as a lever – they’re not designed for those sort of forces.
On larger boats it may not be possible to achieve the full tension needed without going sailing – this allows the lee shrouds to be tensioned when they are slack.
If you do this and plan to leave the bottlescrews unpinned while adjusting the rig, each pair of cap and lower shroud bottlescrews can be tied together with line to prevent them unscrewing.
Lowering the rig
It’s also possible to lower a mast by reversing this method. Less muscle power is needed, but it’s still important to take care.
Start by tying a halyard from each of the supporting boats under the spreaders – making sure these are outside the lower shrouds and babystay – then tension the halyards to support the rig.
At this stage, the rigging can be disconnected. Ensure you record the number of turns on each bottlescrew so the rig can be tuned with the same settings next time it is stepped.
Continues below…

How to set up your rig: tension your shrouds on masthead or fractional
How to set up your rig: tension your shrouds on masthead or fractional If boats were cars, many of those…

Rig tuning: a practical guide for sailors
Correct rig tension will maximise the efficiency of your boat’s sails as well as reduce stresses on the mast. David…

Rebuilding a damaged mast step
Rupert Holmes repairs a compressed water-damaged mast step – a common problem for boats with a deck-stepped mast - and

Coping with a dismasting & rig checks
Faced with a sudden dismasting in 40-knot gusts, Rupert Holmes explains how he and his crew saved his boat, and…
It also helps to clean and oil the threads before starting work.
The critical part is when the rig lifts off the mast step.
The mast heel will start to swing, especially if it’s a single spreader rig that will want to lie horizontally from the strop, though it’s no different in this respect to using a crane.
It’s worth having two people standing opposite each other, both holding a line to control the mast foot.
That way, they can arrest its progress, whichever direction it wants to move.
Once the rig has been lifted off its step, all that’s needed is the halyard operators on each of the adjacent boats to coordinate lowering the spar to the deck.
Enjoy reading Do-it-yourself mast stepping?
A subscription to Practical Boat Owner magazine costs around 40% less than the cover price .
Print and digital editions are available through Magazines Direct – where you can also find the latest deals .
PBO is packed with information to help you get the most from boat ownership – whether sail or power.
- Take your DIY skills to the next level with trusted advice on boat maintenance and repairs
- Impartial in-depth gear reviews
- Practical cruising tips for making the most of your time afloat
Follow us on Facebook , Instagram, TikTok and Twitter
- Navigating the High Seas: A Comprehensive Guide to Sailboat Masts
Sailboat masts are the unsung heroes of the sailing world, silently supporting the sails and ensuring a smooth journey across the open waters. Whether you're a seasoned sailor or a novice, understanding the intricacies of sailboat masts is essential for a safe and enjoyable voyage. In this comprehensive guide, we will delve into the world of sailboat masts, discussing their types, maintenance, and everything in between.
Types of Sailboat Masts
Sailboat masts come in various configurations, each with its advantages and drawbacks. The two primary types are keel-stepped and deck-stepped masts.
Keel-Stepped Masts
Keel-stepped masts are the most common type, extending through the deck and resting on the boat's keel. They provide excellent stability and are suitable for larger sailboats. However, they require careful maintenance to prevent water intrusion into the boat's cabin.
Deck-Stepped Masts
Deck-stepped masts rest on the deck of the boat, making them easier to install and remove. They are commonly found on smaller sailboats and are more forgiving in terms of maintenance. However, they may offer slightly less stability than keel-stepped masts.
Components of a Sailboat Mast
To understand mast maintenance better, it's essential to know the various components of a sailboat mast. The key parts include the masthead, spreaders, shrouds, and halyard sheaves.
The masthead is the topmost section of the mast, where the halyards are attached to raise and lower the sails. It also often houses instruments such as wind indicators and lights.
Spreaders and Shrouds
Spreaders are horizontal supports attached to the mast to help maintain the proper angle of the shrouds (cables or rods that provide lateral support to the mast). Properly adjusted spreaders and shrouds are crucial for mast stability and sail performance.
Mast Materials: Choosing the Right One
Sailboat masts are typically constructed from three primary materials: aluminum, wood, and carbon fiber. Each material has its unique characteristics and is suited to different sailing preferences.
Aluminum Masts
Aluminum masts are lightweight, durable, and relatively easy to maintain. They are commonly used in modern sailboats due to their cost-effectiveness and longevity.
Wooden Masts
Wooden masts, while classic and beautiful, require more maintenance than other materials. They are best suited for traditional or vintage sailboats, where aesthetics outweigh convenience.
Carbon Fiber Masts
Carbon fiber masts are the pinnacle of mast technology. They are incredibly lightweight and strong, enhancing a sailboat's performance. However, they come at a premium price.
Mast Maintenance
Proper mast maintenance is essential for safety and longevity. Regular cleaning, inspection, and addressing minor issues promptly can prevent costly repairs down the line.
Cleaning and Inspection
Regularly clean your mast to remove salt, dirt, and grime. Inspect it for signs of corrosion, wear, or damage, paying close attention to the masthead, spreaders, and shrouds.
Common Repairs and Their Costs
Common mast repairs include fixing corroded areas, replacing damaged spreaders, or repairing shrouds. The cost of repairs can vary widely, depending on the extent of the damage and the materials used.
Extending the Lifespan of Your Mast
Taking steps to prevent damage is essential. Avoid over-tightening halyards, protect your mast from UV radiation, and keep an eye on corrosion-prone areas.
Read our top notch articles on topics such as sailing, sailing tips and destinations in our Magazine .
Check out our latest sailing content:
Stepping and Unstepping a Mast
Stepping and unstepping a mast is a crucial skill for any sailboat owner. This process involves removing or installing the mast on your boat. Here's a step-by-step guide for safe mast handling.
Step-by-Step Guide for Safe Mast Handling
- Gather the necessary tools and equipment.
- Disconnect all electrical and rigging connections.
- Use a crane or mast-stepping system to safely lower or raise the mast.
- Secure the mast in its proper place.
- Reconnect all electrical and rigging connections.
When and Why to Unstep a Mast
You may need to unstep your mast for various reasons, such as transporting your sailboat or performing extensive maintenance. It's crucial to follow the manufacturer's recommendations and ensure a safe unstepping process.
Sailboat Mast Boot: Protecting Your Mast
A mast boot is a simple yet effective way to protect your mast from water intrusion and damage caused by the elements. Here's what you need to know.
The Purpose of a Mast Boot
A mast boot is a flexible material that wraps around the mast at the deck level. It prevents water from entering the cabin through the mast opening, keeping your boat dry and comfortable.
Installing and Maintaining a Mast Boot
Installing a mast boot is a straightforward DIY task. Regularly inspect and replace it if you notice any signs of wear or damage.
Replacing a Sailboat Mast
Despite your best efforts in maintenance, there may come a time when you need to replace your sailboat mast. Here's what you should consider.
Signs That Your Mast Needs Replacement
Common signs include severe corrosion, structural damage, or fatigue cracks. If your mast is beyond repair, it's essential to invest in a replacement promptly.
The Cost of Mast Replacement
The cost of mast replacement can vary significantly depending on the type of mast, materials, and additional rigging needed. It's advisable to obtain multiple quotes from reputable marine professionals.
Yacht Masts: Sailing in Style
For those looking to take their sailing experience to the next level, upgrading to a yacht mast can be a game-changer.
Differences Between Sailboat and Yacht Masts
Yacht masts are typically taller and offer enhanced sail performance. They are often equipped with advanced rigging systems and technology for a more luxurious sailing experience.
Upgrading to a Yacht Mast
Consult with a marine professional to determine if upgrading to a yacht mast is feasible for your sailboat. It can be a significant investment but can transform your sailing adventures.
Sailboat Mast Steps: Climbing to the Top
Mast steps are handy additions to your mast, allowing easier access to perform maintenance or enjoy panoramic views. Here's how to use them safely.
Using Mast Steps Safely
Always use proper safety equipment when climbing mast steps. Make sure they are securely attached to the mast and regularly inspect them for wear or damage.
The Advantages of Mast Steps
Mast steps provide convenience and accessibility, making sailboat maintenance tasks more manageable. They also offer an elevated vantage point for breathtaking views while at anchor.
Mast Maintenance Tips for Beginners
If you're new to sailboat ownership, these mast maintenance tips will help you get started on the right foot.
Essential Care for First-Time Sailboat Owners
- Establish a regular maintenance schedule.
- Seek advice from experienced sailors.
- Invest in quality cleaning and maintenance products.
Preventing Common Mistakes
Avoid common pitfalls, such as neglecting inspections or using harsh cleaning agents that can damage your mast's finish.
Sailing with a Mast in Top Condition
A well-maintained mast contributes to a safer and more enjoyable sailing experience. It enhances your boat's performance and ensures you can rely on it in various weather conditions.
How a Well-Maintained Mast Improves Performance
A properly maintained mast helps maintain sail shape, reducing drag and improving speed. It also ensures that your rigging remains strong and secure.
Safety Considerations
Never compromise on safety. Regularly inspect your mast, rigging, and all associated components to prevent accidents while at sea.
Sailboat masts are the backbone of any sailing adventure, and understanding their intricacies is crucial for a successful voyage. From choosing the right mast material to proper maintenance and upgrading options, this guide has covered it all. By following these guidelines, you can sail the high seas with confidence, knowing that your mast is in top condition.
So what are you waiting for? Take a look at our range of charter boats and head to some of our favourite sailing destinations.
I am ready to help you with booking a boat for your dream vacation. Contact me.


Denisa Nguyenová

- Forums New posts Unanswered threads Register Top Posts Email
- What's new New posts New Posts (legacy) Latest activity New media
- Media New media New comments
- Boat Info Downloads Weekly Quiz Topic FAQ 10000boatnames.com
- Classifieds Sell Your Boat Used Gear for Sale
- Parts General Marine Parts Hunter Beneteau Catalina MacGregor Oday
- Help Terms of Use Monday Mail Subscribe Monday Mail Unsubscribe

Un-stepping and re-stepping a mast.
- Thread starter Damifudo
- Start date Nov 6, 2015
- Tags mast stepping
- Catalina Owner Forums
- Catalina 30
I am running through the jobs I need to do, on the new to us Catalina 1988 Tall rig, One need is to remove the mast and do a complete check and replacement of the standing rig. I have never done this but I am a bit do it yourself person and I have access to a bucket truck from work that the bottom of the bucket goes 37 feet and the lifting capacity is 300 lbs. Would you think this could handle a mast removal and install or should I plan on a crane. The nice thing with the bucket truck is you can get back up the mast to unstrap it. I hope to do this next fall unless someone tells me I need to replace some shrouds sooner rather than later. I am surprised there is no videos on youtube of someone doing a mast stepping on a Catalina 30. If you have any please share them. List for a mast service that I am aware of at this point. 1. new standing rig. 2. new antenna wires and maybe antenna. 3. inspect and replace mast head pulleys as needed 4. seal around mast base 5. Wind vane or Garmin G wind if I have any $ left.
Unless you have detected corrosion damage or broken strands or have knowledge of any accidental damage to the rigging I would not decide to replace it until a thorough inspection was concluded. I'm assuming the rigging is original and is 27 years old. If in doubt get a rigger to do the inspection. There is a maxim about boats in general and that is "if it ain't broken, don't fix it" as there is a significant risk when tinkering with something that something else will break or will be weakened to where it may need a future repair in a short time. All the other maintenance items that you have listed are usually conducted from the crunching comfort of a bosum chair and do not require dropping the mast. Replacing the standing rigging in materials alone is expensive so if after a thorough inspection you find that there is no need to replace it at this time you may have the money, even after paying a rigger for the inspection, to get that coveted Garmin G Wind. I don't really know the capabilities of the bucket truck so I will not comment on its use but if this is the first time that you could be dropping the mast why not pay to have the marina or yard do it and watch and learn. I imagine you will be hauling the boat out anyway so just pay a little more and let them do it. It is not rocket science but it does have it's doe's and don'ts.
We had to take our mast down, due to leaks in the cabin through the compression post, and had a rigging spe ialist come out to assess. After 27 years in service, I would just replace the main shrouds. Also, check the bobstay. Ours was broken, but there was virtually no way of knowing it until i took of the old one. Just lucky! Also consider replacing lights, with either LEDs or newer ones...again, if needed. We also replaced jib halyard and ran a new coax cable. After that many years, these things are at or beyond life expectancy. I also agree that once you start touching things, you will end up replacing them. We have an 85 tall rig as well.
Damifudo said: I have access to a bucket truck from work that the bottom of the bucket goes 37 feet and the lifting capacity is 300 lbs. Click to expand
Richard Bryer
Interesting- the boom truck thing. Our club bought a polcat boom truck several years ago just for that reason- to remove masts. I don't know the weight capacity but it handles the heaviest masts in the club- including a Whitby 45. If the weight capacity was more than 300 lbs I would say it is a good solution. The bucket is removed on ours and the height is probably more than 37 feet- however we lift with a line around the mast just above the balance point and tied off at the bottom. This means on my 45 foot mast the boom is probably about 23 feet above the deck/ ground level. It works well- we remove masts each fall and raise them each spring.
Richard Bryer said: Interesting- the boom truck thing. Our club bought a polcat boom truck several years ago just for that reason- to remove masts. I don't know the weight capacity but it handles the heaviest masts in the club- including a Whitby 45. If the weight capacity was more than 300 lbs I would say it is a good solution. The bucket is removed on ours and the height is probably more than 37 feet- however we lift with a line around the mast just above the balance point and tied off at the bottom. This means on my 45 foot mast the boom is probably about 23 feet above the deck/ ground level. It works well- we remove masts each fall and raise them each spring. Click to expand
The line to hoist the mast is simply run under itself at the hoist point and then run straight down the mast and tied around it under the gooseneck fitting to keep it from sliding up. It does require hoisting someone up the mast to the hoist point in a bosun's chair when taking the mast down. When raising the mast the line can be pulled away from the mast with the polcat boom after untieing the bottom. There are ways of attaching the sling line without having to climb or be hoisted- Claude do you still have your documentation of how you do it?
To step and unstep the mast on my Cat 30TR we make up a sling using a large bowline sufficiently loose to allow it to slide up the mast to the required height just below the spreaders. Another loop in the line attaches to the hook or whatever is used to raise the line. From the loops the line descends to be secured at the bottom of the mast within easy reach. When re positioning the mast the loop will drop down to the base once the shrouds have been secured.
Claude L.-Auger
Richard Bryer said: The line to hoist the mast is simply run under itself at the hoist point and then run straight down the mast and tied around it under the gooseneck fitting to keep it from sliding up. It does require hoisting someone up the mast to the hoist point in a bosun's chair when taking the mast down. When raising the mast the line can be pulled away from the mast with the polcat boom after untieing the bottom. There are ways of attaching the sling line without having to climb or be hoisted- Claude do you still have your documentation of how you do it? Click to expand
Attachments
- Installing sling for un-stepping of mast on B & R rigging.pdf 1.8 MB Views: 1,398
Elysium_Van_Isl
Hey, Im late getting on this thread, but I'm getting set to pull he mast on my standard rig this winter. I'll be using the marina's staff and crane to lift the mast, so am less concerned with the 'equipment' and more with the process. The internal wires on my '82 all seem to go down into the deck where they're laminated into the headliner. When the stick is lifted a bit, what's to be expected? Some type of quick-connect on the wires just before they enter the deck, or am I going to be cutting? Thanks!
Elysium_Van_Isl said: Hey, Im late getting on this thread, but I'm getting set to pull he mast on my standard rig this winter. I'll be using the marina's staff and crane to lift the mast, so am less concerned with the 'equipment' and more with the process. The internal wires on my '82 all seem to go down into the deck where they're laminated into the headliner. When the stick is lifted a bit, what's to be expected? Some type of quick-connect on the wires just before they enter the deck, or am I going to be cutting? Thanks! Click to expand
From what I understand there is a connector.
The mast is more than 300 lbs and I am guessing it's taller than 37 ft.
We step and unstep every season because the top of the crane at the launch is too low to allow the mast to remain standing. (most of the boats at the marina are powerboats) As has been pointed out, once it is lifted it must steered so that the foot of the mast goes forward to a support resting on the pulpit, and the mast head rests on a support resting on the pushpit. Accomplishing this is always an adventure, and I never relax until it is resting horizontal on the two supports. However often you choose to step and unstep it, disconnecting and connecting the wiring at the mast can be a struggle or at the very least inconvenient. Years ago, probably after the first year of stepping and unstepping, I decided to do something about the spaghetti that gets disconnected at unstepping, and at stepping,reconnected and crammed into the mast just before it is set onto the mast step. I drilled out the hole through the step angling it so that it would pass through into the top of the cabin at the junction of the ceiling and the port bulkhead on the salon side. I then fitted a 1" piece of PVC pipe into the hole,letting the top of the piece project above the step 1" or so, sealing it with silicone to prevent leakage. I then built a teak junction box next to the mast post to conceal the connections. As I recall, there was enough wire inside the mast to feed it through the tube and into the junction box. If not you could splice and extend the wires. The VHF wiring uses the existing connectors , the mast head instrument wiring and all the lighting are connected to a terminal block. Before the mast is unstepped, everything from the junction box into the mast is disconnected. When the mast is raised, all the mast wiring is pulled up and out and stuffed into the foot of the mast. After the first year I stuffed towels into the mast foot and cut a bleach bottle up to make a cap... the starlings had made a comfortable home inside and did not install indoor plumbing... Stepping is simply the reverse, When the mast is raised into position, replace the wiring through the conduit and pull out the slack from below as the mast is lowered into place. Reconnect at your leisure after the mast is stepped and a beer has eased the tension. Hope this isn't too much information. I'm not a camera person, so I use a thousand words to create a picture ;>)
How much would you say the mast and rigging weigh?
Damifudo said: How much would you say the mast and rigging weigh? Click to expand
25yearslater
I might be able to help with this. I shipped my mast to Charleston Spar for the reanodize and powdercoat. Because I was using USF Holland the weight had to be determined. The mast without rigging was 105 LBS. This is 33' 1/2". Masts are relatively light being extruded aluminum. Here is a link to Rig Rite and the weight per foot table for masts. If your mast is different return to spars and click on the appropriate mast and section. http://www.rigrite.com/Spars/Spartan_Spars/SPARTAN.html
Damifudo, you are going to need help no matter what technique you use. You would be well served to find some people who have experience at this on boat's your size or bigger. And since there's a risk of injury there should be insurance for your helpers. While friends may be willing and able to help, if they are injured and can't work, or worse, you will have a very bad situation. From a practical point of view, this may mean paying the yard to do it would be wise.
When the mast comes down from a fully rigged bout it has all the rigging hard and soft along with all the hardest and antennas and electronic accessories mounted and can be quite heavy so always allow for that then double the weight to creat a Safty factor and use a crane that can handle twice that amount you never know when the weight is on the hook ..... There may be a hard blow start up when you are suspending the weight un attached with only a tag line and that can get Harry as hell till you land the load
A lot of good advice here. I would certainly second the thought of having someone help who has done it before. Or go and help a couple of people do theirs. It is a good idea to know what to expect. I have known a couple of masts at our club to topple overboard during the process and it is very scary and dangerous. Don't rush the process and pick as calm a day as possible. Yours is a deck stepped mast and there should be a connector for each of the wiring cables under the mast. You need to lift it a few inches to see- there is probably enough slack to lift it about a foot then reach under and disconnect. That is the part I did NOT like- the reaching under. I cut a small- about 2"X4" in the side of the base and made a ss cover to screw on it. I pull the cables out and disconnect before hoisting the mast- then all you have to do is stuff the boat end back in after lifting a bit. When putting the mast back up, leave the mast ends out the opening and push the boat ends up and out the opening when you have the mast a foot or so off the base. Minimizes the hand time spent under the hoisted mast. If you look at Fred Ficarra's rebuild site for Epitome in the owner mods section here you should be able to find a picture of the opening and cover panel he made on his mast
- This site uses cookies to help personalise content, tailor your experience and to keep you logged in if you register. By continuing to use this site, you are consenting to our use of cookies. Accept Learn more…

- LNG Fundamentals
- LNG Shipping Knowledge
- Gas Tankers Familiarisation
- Prevention of Rollover in LNG Ships
- Rules for Ships Carrying Liquefied Gases
- Conversion of Ship to LNG as Fuel
- LPG Tanker Practice
- LNG Bunkering Operation
- Simulation Model for an LNG ferry
- Gas Production Operations
- Liquefied Gas Handling Principles
- Effects of Fire on LNG Carrier Containment Systems
- Transportation of Liquefied Natural Gas
- Gas Carrier Course
- Ship to Shore Access
- LNG Trade and Transport
- Quality Control of Cargo Handling Work in LNG Carriers
- Training for Liquefied Gas Tanker Cargo Operations
- ESD Arrangements for Liquefied Gas Carriers
- Types of ships
- Rules for Safe Carriage of Cargoes by Sea
- How to Buy the Best Sailboat?
- Sell Your Boat in 30 Days
- RONOMAR GMDSS Course
- CES/CBT tests
Masts and Rigging Systems for Sailing Ships
Masts and rigging are essential components of sailing vessels, serving crucial roles in both the structure and functionality of the ship. The masts are the vertical poles, typically made of wood or metal, that rise from the deck of the ship and support the sails. They come in different types depending on the size and design of the vessel, including the mainmast, foremast, and mizzenmast. These masts must be strong and flexible enough to withstand the forces exerted by the wind on the sails. The height and placement of the masts are meticulously planned to optimize sail efficiency and balance the ship’s stability.
Standing rigging
Running rigging, lifting/hauling systems.
Rigging refers to the complex system of ropes, cables, and chains used to support the masts and manipulate the sails. There are two main types of rigging: standing rigging and running rigging. Standing rigging consists of the fixed lines that hold the masts upright, such as stays and shrouds, providing stability to the vessel. Running rigging, on the other hand, includes the movable lines that control the raising, lowering, and adjusting of the sails, like halyards and sheets. The rigging must be carefully maintained and adjusted to ensure the ship can harness the wind effectively and navigate safely through various sea conditions.
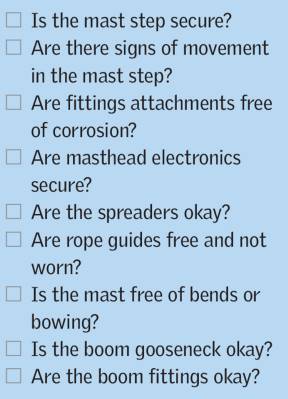
THIS ARTICLE IS mainly for the sailboat owner or prospective owner of a boat in which the Technical Advice on the Boat Inspection Process and Why Survey Your Own Boat mast and rigging is a very important part of the structure; however, it also applies to motorboats fitted with a boat launching derrick or fishing boats on which you need to survey the trawling gear or similar equipment.
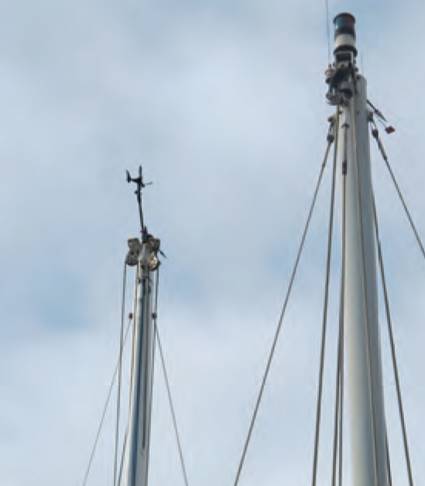
The rigging of a boat can be quite a complex structure, and there are various options for its set-up, so one of the first things to do during a survey of the mast and rigging is to pin down what system is being used and how it all hangs together. It can often look very fragile, with thin strands of wire and the seemingly impossibly thin mast supporting the stress and strain of the sails.

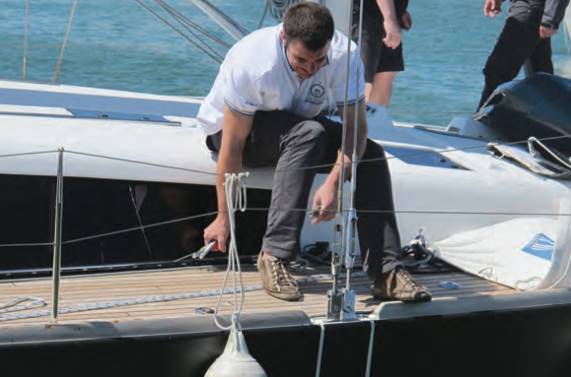
The first dilemma you’ll face when surveying the mast and rigging is whether to check it with the mast up or down. In some ways you want to have the mast erected to see how the whole system works and to reveal any existing weak points or wear, but it’s difficult to do a full check on rigging that is under tension since most of the wear points will be in the « nip », the point where two fittings, such as a shackle or clevis pin, link at the top or bottom of a wire. This can be a particular problem at the masthead fittings; you could examine them with binoculars or even make a trip up the mast in a bosun’s chair, but unless the rigging is slack enough so that the links in the system can be opened you won’t be able to determine if there is wear here.
Therefore, in order to examine the fittings in detail the mast needs to be down. It’s unlikely the sails will be erected during a survey, but the mainsail may be on the boom or in the mast with a mast reefing system, and a roller reefing jib could still be in place.
Mast Installation
IF THE MAST is erected, start your survey by studying it closely. Look at how the mast is fitted in the boat. On older boats it may go through the deck with the heel connecting with a mast step just above the keel. The alternative, and the system used on most modern yachts, is to have the mast step on the deck or on the coachroof, which in turn is supported by a tube or column between the coachroof and the keel or bottom framing.
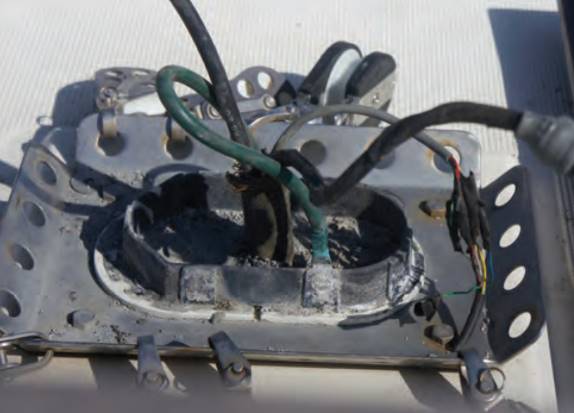
This latter arrangement does away with the need to have some sort of seal around the point where the mast passes through the coachroof or deck, which has traditionally always been a source of trouble and leaks: the mast is always going to move slightly under the stresses and strains of sailing and so trying to seal this joint adequately is difficult. The traditional fix was to place mast wedges in the hole around the mast before fitting a canvas cover over them to keep the water out. A more modern system might employ a rubber boot as the seal, held in place by worm drive clips. In either case look below for signs of leaks, and if there is staining check the condition of the seal. If the seal has been removed you may see signs of movement around the joint where the mast passes through the deck/ coachroof, which will be revealed by shiny areas on an aluminium mast or wear on a wooden mast. This isn’t a serious problem (since there is always a certain amount of movement at this point) unless the wear looks considerable.
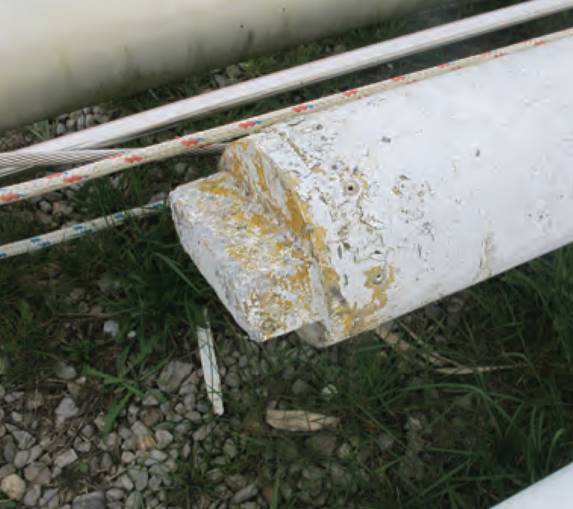
The mast step, whether it is inside or outside the boat, is a critical part of the installation as it takes the considerable downward stress of the mast and transmits it to the hull structure. There will often be a pad of some sort in the mast step, which acts as a shock absorber. On the rare occasions when the mast is removed, check the mast step and mast heel for cracks or distortion. You may find corrosion at the base of the mast, since water can lie in this area. If the mast is stepped on deck, the supporting pillar below it will normally be a rigid structure in metal, so check its base for corrosion. To be certain that it is taking the downward strain, use a straight edge to make sure it’s not bent or bowed in any way.
The Basic Equipment of a Sailboat and Their Characteristics mast is a complex structure requiring detailed examination. It is likely to be constructed from wood or aluminium, with carbon fibre composites usually only seen on racing yachts. You’ll find many fixtures and fittings attached to the mast in the way of the:
- slots for pulleys;
- antenna(e);
- and rigging wire attachments.
The complication is increased when there is in-mast reefing for the mainsail.
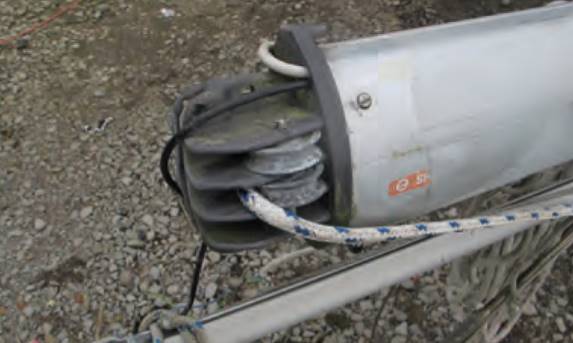
Hollow wooden masts are designed to reduce weight but even here most or all of the attachments and ropes will be on the outside so examination is relatively straightforward, provided you can get close access.
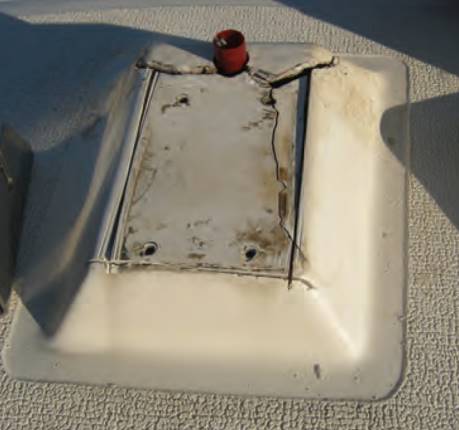
Check fittings for any sign of movement, such as slight abrasion in the varnish surface or the wood itself. Certain designs may encourage water to collect behind the fitting, which could start to rot, so look for discolouration of the wood. In particular, check the base of a wooden mast if it lies inside rather than on the boat. Close examination of discoloured fittings may require removal.
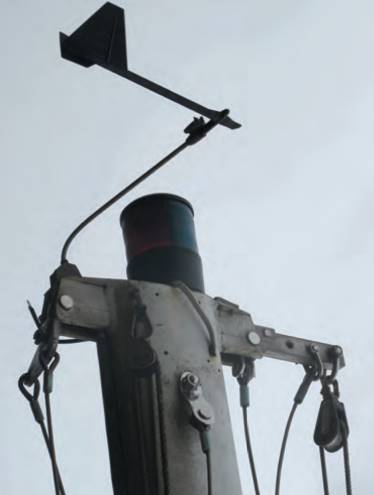
If you’re examining an aluminium mast, you should focus on detecting corrosion. Aluminium is extremely durable but most mast fittings will be made from stainless steel, meaning you have two dissimilar metals in the presence of sea water which could start electrolytic corrosion (seen in the creation of a grey/white powder around the meeting point).
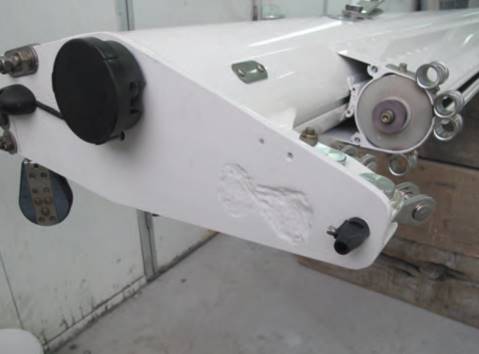
The aluminium will suffer more than the stainless steel, although if the latter is low quality you may also see some rust coloured surface corrosion. Fittings are usually fastened to the mast with rivets, which could be a different type of metal again, so you must check all of them for the same signs of corrosion. Of course, if the mast is erected you will only be able to see the bottom part of the fitting as you look up with your binoculars.
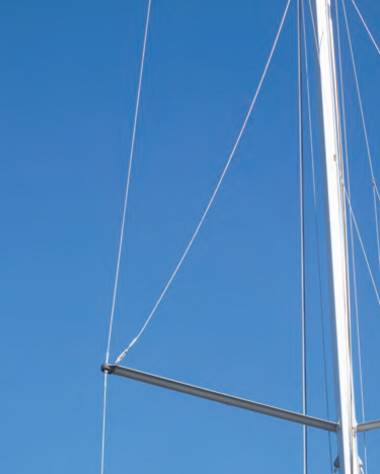
If the mast is still up, stand back from the boat to examine the rigging. This will enable you to detect any fittings that are out of line, which could place them under additional strain. Modern rigging tends to allow for a degree of unevenness via the use of toggles and similar fittings which take up a natural alignment, so that angles are not so critical here.
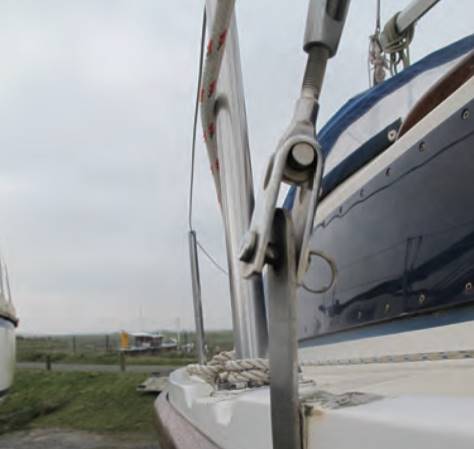
However, be sure to check all fittings closely. You might see this misalignment where a shackle is attached to the chain plates and the span of the shackle opening is much wider than the width of the chain plate to which it is attached, thus allowing the shackle to cant over. A shackle that is canted in this way could be a weak point in the rigging, so all shackles should be moused with wire to prevent the shackle pin unscrewing when the rigging vibrates.
There can be a whole collection of fittings at the masthead ranging from halyard blocks to rigging attachments, electronic antenna(e) and navigation lights. These are often out of sight, out of mind so that whenever the mast is taken down, these fittings should be inspected. Binoculars should help you to check that shackles are not coming undone and wires are not unravelling but the detail can only be seen by getting up there or getting the mast down.
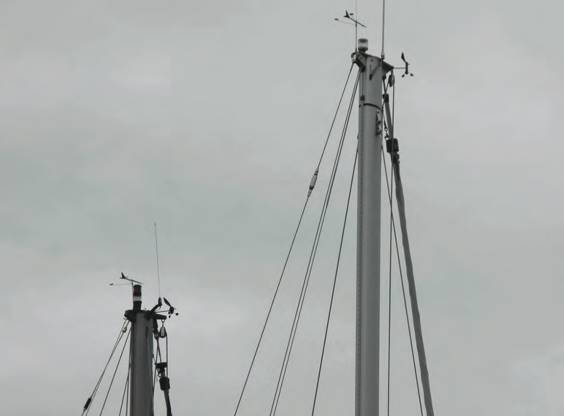
On a survey you should be looking for any elongation of the holes in lugs where halyard shackles are attached, or in the eyes that may also act as an attachment. Halyard attachments are often slack when the halyard is not in use, which can lead to wear in the holes or in the nip of the fitting.
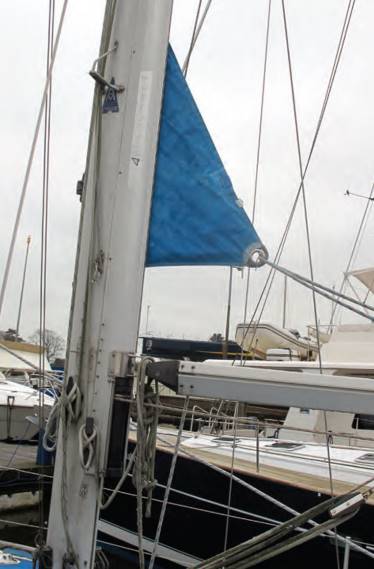
The boom and its fittings need to come in for a similar check, particularly the gooseneck where the boom attaches to the mast. The double joint here should be checked for wear because it comes under considerable strain.
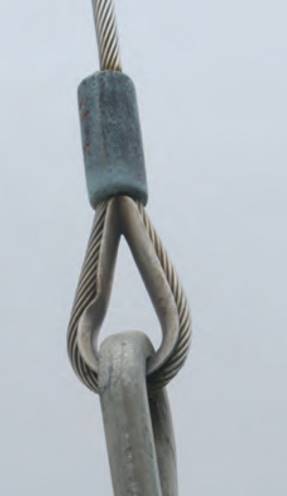
Carefully go over the vang attachments. If the vang is hydraulic check it for any leaks, indicated by a film of oil on the surface.
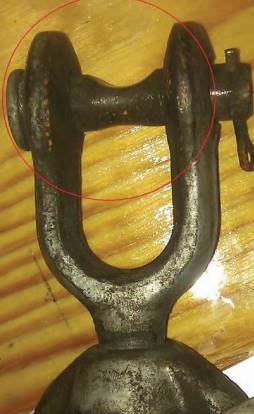
There will be more bits to check on both boats where the sail is reefed into the boom and where there is in-mast reefing.
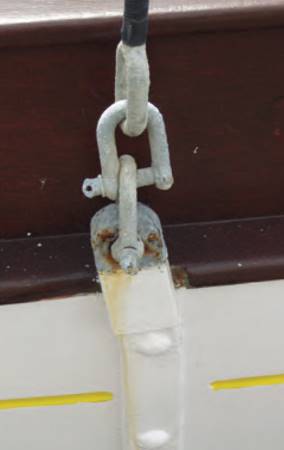
Getting access to the moving parts on these installations can be a challenge and this may be a dismantling job that should be scheduled perhaps every time the mast is taken out.
On a purchase survey inspect everything you can see for the tell-tale signs of wear, such as shiny surfaces and a grey or brown powder.
Contact Points (« NIPS »)
AS WE SAW earlier in this chapter, the « nip » is the point at which the two surfaces of an attachment meet. You can’t see this contact point until the attachment is slackened off, which enables you to open up the contact points. While everything may look fine from the outside, if a bit of sand or grit gets into the nip and the two surfaces begin to rub together, wear will occur.
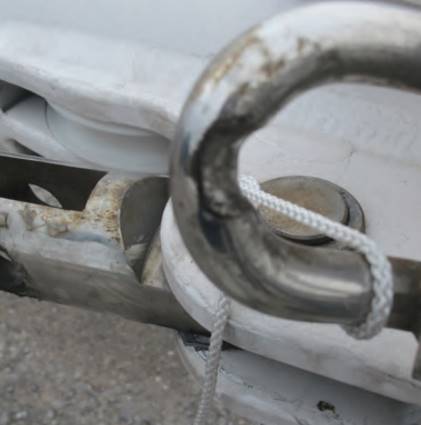
Where the meeting point consists of two rounded surfaces, the wear will be directly in the nip, while with a tongue and pin fitting (such as might be found on chain plates) the wear will be focused on a pinpoint area. There will always be movement at these points in the rigging, so it’s difficult to judge how much of this type of wear is permissible. I’d suggest measuring the diameter of the worn part against the unworn part with a pair of callipers: certainly you should be looking to replace anything more than a quarter of the original dimension, but I would recommend even less because it will only get worse with time.
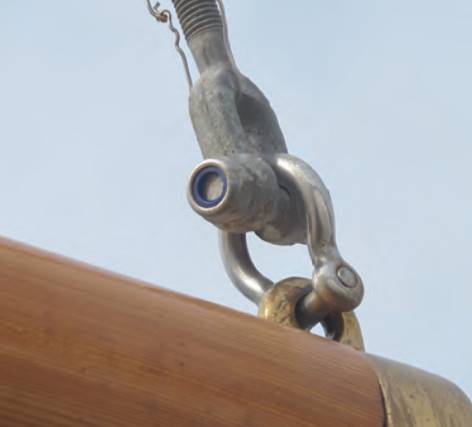
Every contact point between two parts of the rigging should receive this level of inspection, although you can only really go into this much detail with the mast out of the boat. If you are the boat owner, I’d suggest a bi-annual check along these lines. It might seem extreme, but if one element in the balanced rigging system fails it can start a chain reaction of failure, leading to possible collapse of the mast itself.
Rigging Wires
It can be hard to find faults in the rigging wires, so a quick glance is never enough. The first place to look is at the point where the wires terminate in the swages, the securing point for the end of the wire, which in turn are connected to the adjusting rigging screws or connections. The usual arrangement sees a cone fitted inside the swage with its point at the centre of the wire strands. When the swage is tightened up this cone then presses the wire strand against the inner sides of the swage, which locks them into place.
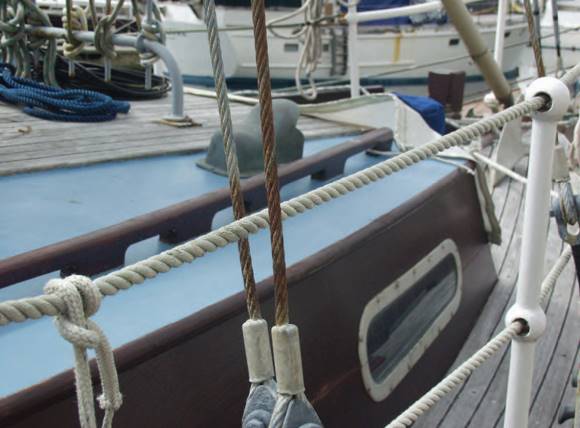
There are a number of patented connections but they all tend to work on a similar principle: the point is that you want to examine the point at which the wire enters the swage, since there can be pressure on the wire strands here. Another type of swaged fitting has a stainless steel ferule fitted over the wire and compressed under high pressure around the wire. The ferule was under considerable strain when it was fitted and in later life this can make it prone to stress cracking. You may well see signs of corrosion, but you may wish to get out your magnifying glass to get a much closer look at the surface of the fitting.
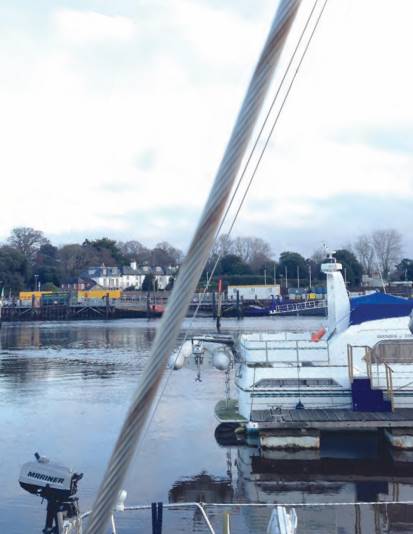
If there is a bottom connection linking the wire to the rigging screw, the hole where the wire enters is probably not fully sealed, meaning water can lie in the crevices and begin to corrode the metal. Vibration in the wire can aggravate the situation, the outside wires usually being the first to show signs of fatigue. Again, it might be necessary to use a magnifying glass – even if there is only one broken strand, it is a case for replacement of the wire.
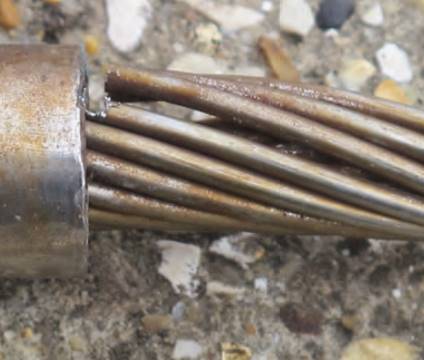
Less common are broken strands in the wire along its exposed length, probably caused by historical damage at some time. To check for this deterioration, put on a pair of stout leather gloves and run your hand along the wire to detect any « snagging » on broken wire ends. Again, replacement is the only solution.
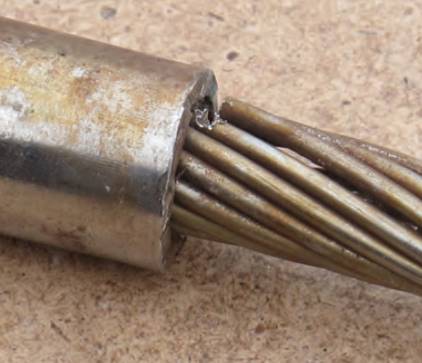
Both of these checks can be done with the rigging in place so you could use a bosun’s chair to get the required access. If you’re taking the easy route and using binoculars for a visual inspection, you may be able to see broken strands at the top fixings if the wire has opened up a little, but you’ll need to move around to get a view of the wire’s full circumference. Certainly in this way you should be able to detect any defects before the wire actually parts, but on a survey a closer inspection is the best solution.
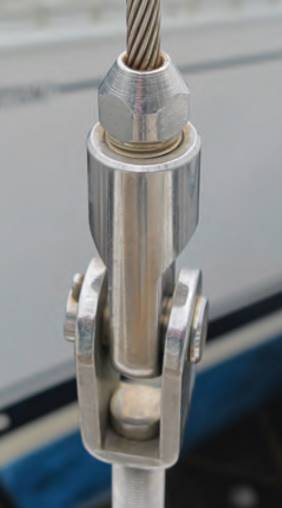
The backstays can be more vulnerable to stranding in this way because they are slackened off when on the lee side, meaning they may be swinging around in the wind. Because of this excessive movement, you must check both the wire at the connections and its securing fitting, such as shackles, for wear in the nip.
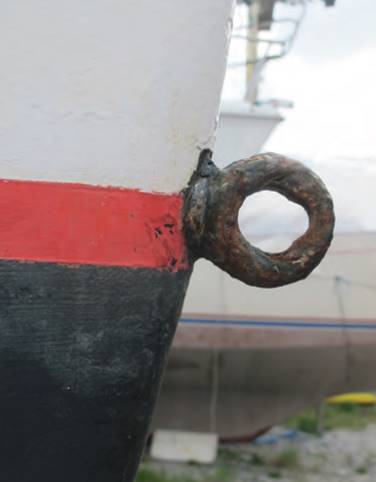
The forestay is another vulnerable point: not only does it help to hold the mast up but it also supports the jib. This support may be in the form of snap hooks that attach the jib to the stay and slide up and down it, but most modern yachts now use a roller reefing system, where the jib rolls up around the forestay fittings. This can add to the stress at the end fittings, particularly the lower one where the operating furling rope connects.
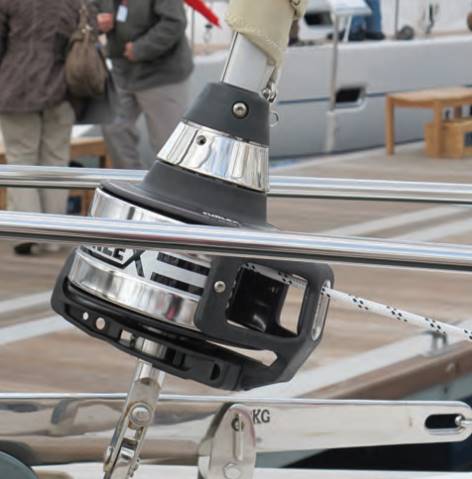
The sail also hides the bit that forms the « tube » around which the sail will roll; this « tube » should be free to revolve easily as it is turned because if it jams, it can get twisted and may even break, which in turn may tear the sail. The crew can cause this damage to the « tube » if they’re struggling to furl the jammed jib; they take the operating rope to a winch and put excess pressure on the system instead of trying to find the fault. Therefore during a survey the jib, and particularly its swivels and of course the forestay and its hidden connections, should be taken off the furling gear and inspected in detail.
Rigging Screws
The rigging screws that allow the Tips on Rigging a Boat and Using Knots in Sailing rigging wires to be adjusted and tensioned can take a lot of abuse, particularly those at the sides which, on top of their intended use of connecting rigging, may also be used for tying off the tender and even mooring ropes. The first thing to look for is any screws that are close to using up their full adjustment – if they are, look for the cause. It may be that the wire to which it is attached was made up too long in the first place or that the wire has stretched, but these are unlikely causes.
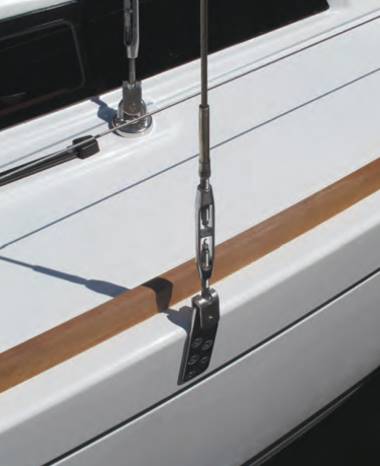
Perhaps the mast isn’t installed in the proper upright position or there is damage in the rigging wire. If both screws on the same side present with this problem, it could be that the mast or possibly even the chain plates are moving. Whatever the issue, do take the time to find the cause because a rigging screw with no more adjustment isn’t much use.
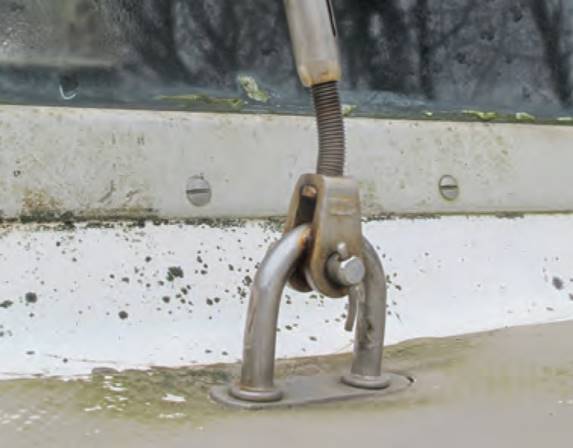
Check that the locking devices for the rigging screws are in place. These are usually lock nuts located at the outer ends of the turning part and they are tightened up against this turning part to stop it moving of its own accord. Since rigging screws can cause chafe on the foresails if they pass outside this point they are often covered in tape or other anti-chafe material, such as a plastic sleeve, so this should be removed to inspect what is happening below.
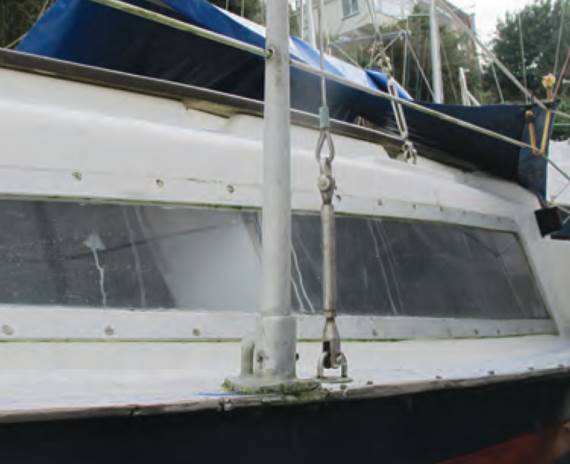
Because of the hard life they lead and their vulnerable position, the threaded section in screws can also become bent, which prevents further adjustment, so check that the threaded sections run true when turned and the rigging screw works throughout its length. This is also the time to look for any wear in the nips of the securing shackles and clevis pins (when the rigging is slackened off, of course).
Mast and Chain Plates
The chain plates and/or the deck fittings to which the rigging screws are attached should also come in for scrutiny. These rigging attachment points are a vital part of the structure: they not only serve to transmit the rigging loads to the hull, but also help to keep the mast where it should be.
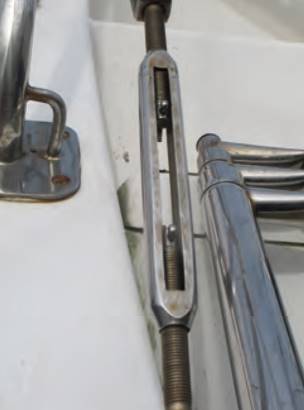
It is fairly easy to get a look at the external chain plates so check for any signs of movement where they are bolted to the hull, and/or staining of the topsides or paintwork which could indicate that there is corrosion beneath, perhaps in the fastening bolts. These bolts should also be checked inside the hull to ensure that they are tight and there is no sign of movement. There should always be a backing plate here to help spread the rigging loadings into the hull structure.
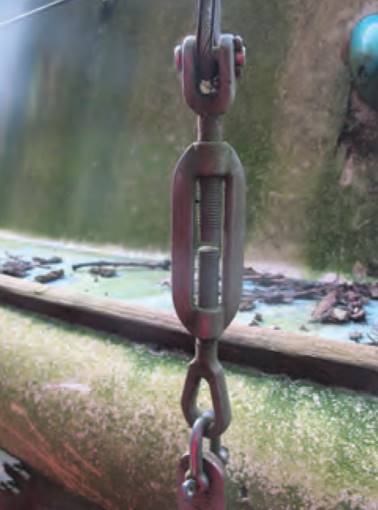
You should get the same backing plates when the chain plates are replaced by deck plates bolted through the deck.
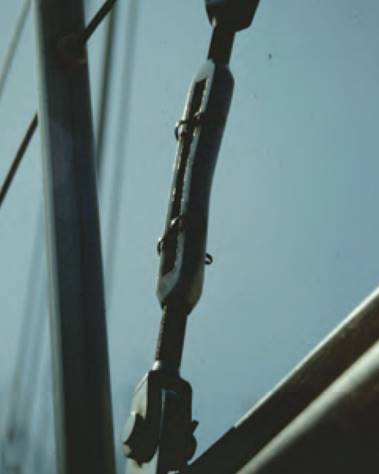
Here the loading should be spread between at least the adjacent frames in order to help transmit the loading to the hull structure.
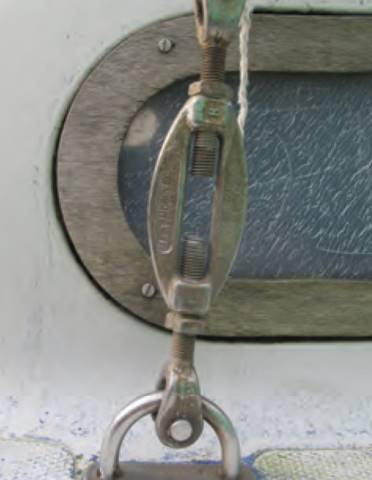
Carefully check the deck moulding around the fitting for any signs of softness or staining, which may indicate that water is getting into the moulding around the edge of the fitting or the fixing bolts.
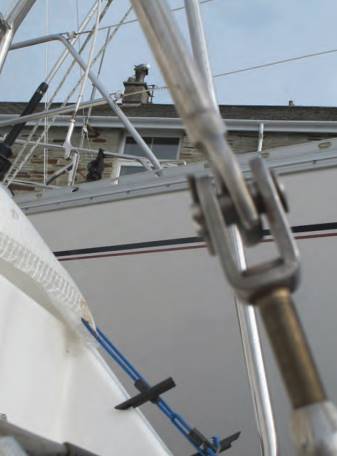
At the bow the securing for the forestay is often incorporated into the stem head fitting, while at the stern the backstay(s) may have chain plates bolted to the transom or eye bolts on the deck.
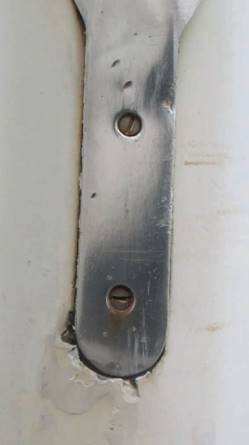
These are only as good as the laminate they are bolted to, so check for backing pads or plates, tight nuts and for any signs of softness or staining in the laminate: it is not unknown for a rigging attachment to pull out and take part of the deck with it.
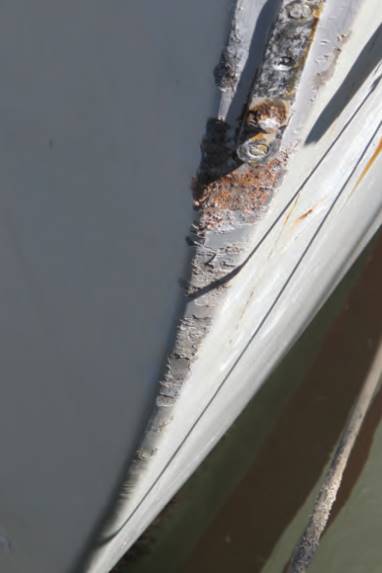
Finally, check that the pull of the rigging wire is in line at the tongues fitted to the mast and the chain plates at the bottom of the rigging.
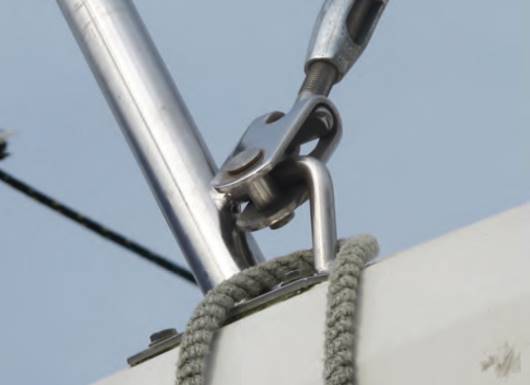
It’s not unusual to find that there is a misalignment so that there is a sharp change in angle between the rigging and its attachment point, which can place added stress at the point of connection, creating a wear point (you’ll need the mast in situ to see this).
Running Riggings are the ropes but they may incorporate some wires, such as for parts of the halyards.
With so many ropes going up inside the mast it can be difficult to get access to all of them, but if you pull the halyards up and down you’ll expose most of the length (although you may need a trip up the mast to see some parts). This is a pretty straightforward check: you’re looking for any signs of chafe and wear.
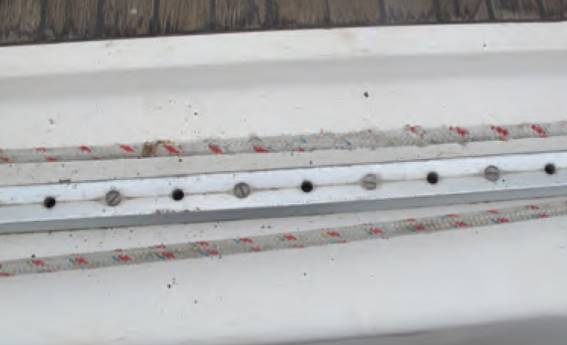
Many modern ropes have an outer weave that provides the wear and UV resistance, while the main strength of the rope is in the strands below. If the outer weave gets worn and the inner strands are exposed, it’s time for renewal because not only will the wear accelerate but with the outer weave torn the rope could end up jamming in a pulley or clamp.
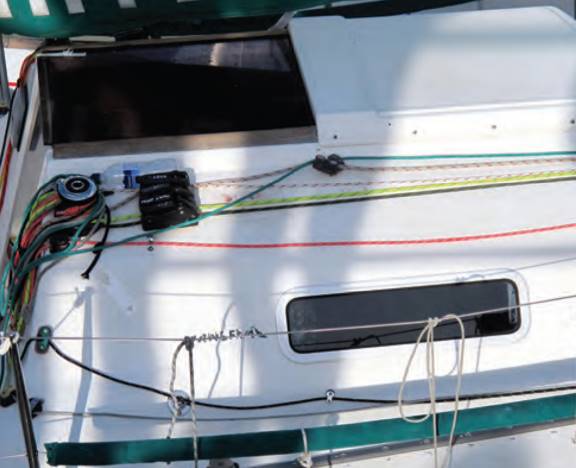
Read also: Deck and Super Structure
On modern sailboats many of the ropes can take quite a strain when under sail in a blow and this is the last moment that you want one to fail.
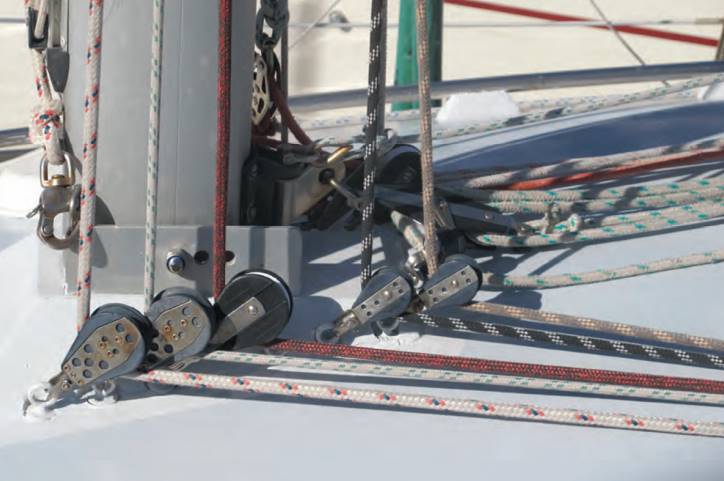
While checking the ropes is easy, examining the blocks and leads that they run through can be more of a challenge. The modern system of blocks and ropes is a fascinating cat’s cradle that should have been designed for easy sail handling and adjustment. It includes blocks at the top of the mast, which handle the halyards, and at the base of the mast, which lead the halyards out. More blocks are found at the mast base leading the various ropes to the clamps and winches, while finally there are the sheet lead blocks.
You can check most blocks by hand, but for a good check you need the weight off the rope running through the block you’re examining, which may be difficult to achieve when looking at the masthead blocks.
Modern blocks are usually made from a combination of stainless steel and tough composites, so they should be corrosion-proof, but they can be subject to wear. If you see wear in a rope it could be a clue that there is wear in the block, since the sheave may not be running true. Try to move the sheave in relation to the frame of the block – there should only be the very minimum of movement between the two, just enough to ensure free running. Any more and it may be time to replace the block. Also look for any signs of the rope rubbing on the sides of the block, which might suggest that there is wear in the sheave bearing or perhaps damage to the pulley itself. While examining the blocks check the securing shackles for wear in the nip and pins (these shackles should be moused).
Rope Clamps
The rope clamps are usually a simple cam operated system and here just a visual check is all that is required to ensure the clamp is operating properly and free of damage. Check the mounting points and fixings, because these clamps can take a heavy strain.
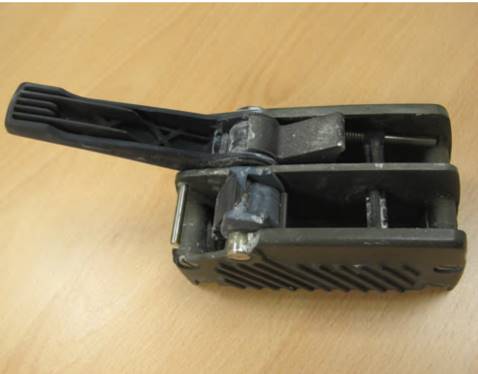
Most winches should be stripped down for maintenance and lubrication perhaps once a season, but during a survey you quickly check for wear in the bearings by simply moving the barrel of the winch to and fro. There will always be a small amount of play for the winch to run freely but anything more than a couple of millimetres indicates a more detailed check is required.
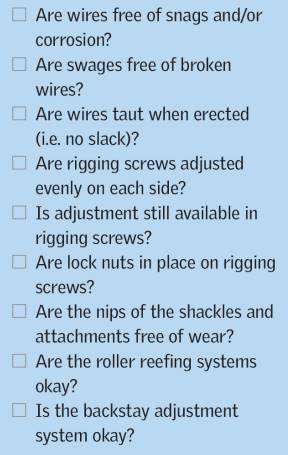
Finally, examine the mounting fixings as, like the clamps, these can come under heavy strain.
THE FIRST PLACE to look for signs of wear in the sails would be in the corners and in the pockets for the sail battens, the areas that wear first on a well-used sail. As a general rule a newer sail should feel firm while older sails should have a softer feel, but this is no sure guide. The state of the stitching is another clue to a sail’s condition; modern sails are made from a « harder » fabric than earlier sails, and the stitching tends to sit « proud » on the fabric surface, leaving it more vulnerable to rapid wear. Check all around the edges of the sail and its attached fittings, such as the mast sliders and the sheet eyes. Be alert to signs of repair, such as inconsistent stitching or patches. If you have any doubts about the durability of a repair, it may be time to call in an expert sailmaker, but keep in mind that he/she may have a vested interest in condemning a sail.
Jibs fitted onto furling systems can deteriorate through UV damage, which is why when the sail is rolled up, the exposed part is often constructed from a coloured material that protects it from harmful rays. This strip can act as a sacrificial part of the sail to be renewed when it deteriorates UV damage in a more serious form is indicated by a « powdery » substance on the surface of the sail; by this point, the sail is going rapidly downhill. Any sail fitted to a roller reefing system needs to be checked closely, since these systems can lead to localised chafing if the sail doesn’t roll on and off smoothly.
IF YOU’RE CHECKING a motorboat with a derrick or boom for boat launching or, on a more serious note, a fishing boat where there are blocks and wires for hauling pots or trawls, these require the same thorough checks.
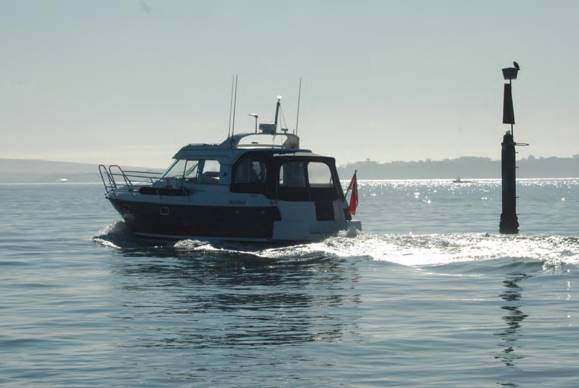
Any failure in a lifting or hauling system can have dire consequences if a heavy load should drop, so take nothing for granted:
- carefully examine the wires;
- and shackles.
It is so easy to assume that everything is OK until something in the system fails; the stresses on modern rigs can be surprisingly high, so take nothing for granted.

- Everett Collier, The Boatowner’s Guide to Corrosion . International Marine, 2001, hardcover, 314 pages.
- Fernec Mate, Shipshape: The Art of Sailboat Maintenance . Albatross Publishing, 1986, hardcover, 416 pages.
- John Payne, Understanding Boat Corrosion, Lightning Protection, and Interference . Sheridan House, 2005, 90 pages.
- Edwin Sherman, The 12-Volt Bible for Boats . International Marine, 2002, paperback, 208 pages.
- Nigel Warren, Metal Corrosion in Boats . Sheridan House, Inc., 2006, 229 pages.
- Charlie Wing, Boatowner’s Illustrated Electrical Handbook , Second Edition. International Marine, 2006, paperback, 280 pages.
- Don Casey, Canvaswork and Sail Repair . International Marine, 1996, hardcover, 140 pages.
- Jim Grant, The Complete Canvasworker’s Guide , Second Edition. International Marine, 1992, paperback, 186 pages.
- Karen Lipe, The Big Book of Boat Canvas . International Marine, 1988, paperback, 242 pages.
- Emiliano Marino, The Sailmaker’s Apprentice , International Marine, 1994, paperback.
- Philip W. Conkling, Green Islands, Green Sea: A Guide to Foraging on the Islands of Maine . Down East Books, 1980.
- Euell Gibbons, The Beachcombers Handbook . David McKay, 1967, 230 pages.
- Janet Groene, Cooking on the Go . Sail Books, 1980, 234 pages.
- Peter Howorth, Foraging Along the California Coast . Consortium, 1977.
- Ken Neumeyer, Sailing the Farm . Ten Speed Press, 1981, paperback, 256 pages.
- Lin Pardey, The Care and Feeding of the Offshore Crew . Paradise Cay Publications, 1999, 414 pages.
- Linda Frederick Yaffe, Backpack Gourmet . Stackpole Books, 147 pages.
- Peter Hunn, The Old Outboard . International Marine, 2002, paperback, 320 pages.
- Jean-Luc Pallas, Outboard Motors Maintenance and Repair Manual . Sheridan House, 2006, 125 pages.
- Edwin Sherman, Outboard Engines . International Marine, 2008, hardcover, 176 pages.
- W. D. Booth, Upgrading and Refurbishing the Older Fiberglass Sailboat . Cornell Maritime Press, 1988, 287 pages.
- Paul and Myra Butler, Fine Boat Finishes . International Marine, 1987, paperback, 160 pages.
- Paul and Myra Butler, Upgrading the Small Sailboat for Cruising . International Marine, 1988, paperback, 224 pages.
- Nigel Calder, Boatowner’s Mechanical and Electrical Manual . International Marine, 2005, hardcover, 818 pages.
- Don Casey, Sailboat Hull and Deck Repair . International Marine, 1996, hardcover, 128 pages.
- Don Casey, Sailboat Refinishing . International Marine, 1996, paperback, 144 pages.
- Don Casey, This Old Boat , Second Edition. International Marine, 2009, hardcover, 576 pages.
- Fernec Mate, The Finely Fitted Yacht . W. W. Norton & Company Limited, 2005, 606 pages.
- Dan Spurr, Spurr’s Guide to Upgrading Your Cruising Sailboat , Third Edition. International Marine, 2006, hardcover, 400 pages.
- Fred Bingham, Boat Joinery and Cabinetmaking Simplified . International Marine, 1993, paperback, 265 pages.
- Michael Naujok, Boat Interior Construction . Sheridan House, 2002, paperback, 176 pages.
- Larry Brown, Sailing America: A Trailer Sailor’s Guide to North America . Seven Seas Press, 1990, paperback.
- Larry Brown, Sailing on a Micro-Budget . Seven Seas Press, 1985, 163 pages, paperback.
- Robert Burgess, The Handbook of Trailer Sailing . International Marine, 1992, paperback, 227 pages.
- Don Casey and Lew Hackler, Sensible Cruising: The Thoreau Approach. International Marine, 1986, paperback, 364 pages.
- Ronald Florence, The Optimum Sailboat: Racing the Cruiser and Cruising the Racer . Harper and Row, 1986, hardcover, 374 pages.
- Annie Hill, Voyaging on a Small Income . Tiller Publishing, 1993, paperback, 208 pages.
- J. C. Jenkins, The Humanure Handbook: A Guide to Composting Human Manure . Chelsea Green Publishing Co., 2006, 302 pages.
- Elbert Maloney (editor), Chapman’s Piloting, Seamanship, and Small-Boat Handling , (65th edition). Sterling Publishing Company, Inc., 2007, hardcover, 928 pages.
- Tom Neale, All in the Same Boat . International Marine, 1997, hardcover, 376 pages.
- Lin and Larry Pardey, The Capable Cruiser . Pardey Books, 1995, hardcover, 400 pages.
- Lin and Larry Pardey, The Cost-Conscious Cruiser . Pardey Books, 1999, hardcover, 352 pages.
- John Rousmaniere, The Annapolis Book of Seamanship (revised edition). Simon and Schuster, 1989, hardcover, 402 pages.
- Daniel Spurr, Your First Sailboat: How to Find and Sail the Right Boat for You . International Marine, 2004, paperback, 288 pages.
- Donald M. Street, The Ocean Sailing Yacht . W. W. Norton, 1973, hardcover, 703 pages.
- USCG Auxiliary, Boating Skills and Seamanship . International Marine, 2007, paperback, 404 pages.
- Thomas Ask, Handbook of Marine Surveying . Sheridan House, Inc., 2007, 246 pages.
- Don Casey, Inspecting the Aging Sailboat . International Marine, 1996, paperback, 144 pages.
- Andrew Douglas, Practical Sailor’s Practical Boat Buying , 2 volumes. Belvoir Books, 1998, paperback.
Did you find mistake? Highlight and press CTRL+Enter

- Forum Listing
- Marketplace
- Advanced Search
- All Topics Sailing
- General Sailing Discussions
- SailNet is a forum community dedicated to Sailing enthusiasts. Come join the discussion about sailing, modifications, classifieds, troubleshooting, repairs, reviews, maintenance, and more!
Solo Mast Stepping System
- Add to quote
I've been talking with a local machinist about putting together a solo stepping system. I'm doing a full refit on my small boat, and still assembling the project list, prices, timing, etc; which is why I'm asking for input now. Here's a link to a video of someone that has what appears to be a very slick self contained setup for the raising assembly, both on and off the water: The big difference between my boat and hers, is that mine is more heavily rigged: 28' LOA, a 33' ~140 lb mast, 5/16" standing rigging. I've a cache of bookmarks on various systems and setups I've found, but would like to get your thoughts. Note: I do try and search for previous threads on the subjects I post, but the advanced search function on Sailnet tends to give me non-relevant returns. So apologies if this subject was approached - just post a link to the other threads. Thanks
Have you seen this one? Dave posted lots of details of it over on the Catalina 25 owner's association. I made my own version of the A-frame and it worked great.
The system shown only addresses the most simple of the issues and should not be used in any sort of wind or with a larger mast. It looks fine, but might be a lot of gizmo for the problem. I used nothing more than a gin pole and a block that took a line back to the cockpit winch for that part. Avoids the need for a winch on the gin pole. Let's call this problem #1. Problem #2 is that the mast has no lateral stability once it starts to come down. On a large mast the hinge at the base of the mast cannot possibly hold it against the forces of the wind or, worse yet, rolling of the boat if done while floating. The standard solution for #2 is to create a hinge point for side stays that is at the same altitude as the mast hinge point. That keeps tension on the side stays while the mast is being lowered. There are two common ways to do that. One is to cut the side stay and add a ring or other junction at the hinge point. Another is to create a turning block with a large radius, so the side stay can wrap around the turning block without kinking the stainless wire. In either case, the turning point needs to be tensioned forward as the mast tips back. Problem #3 is where the mast ends up after it's down. Unless you have a really stubby mast or a catboat rig, the mast will normally end up resting on the back rail at a point forward of the center of gravity. That means that when the hinge at the base of the mast is disconnected, the step of the mast will want to go up, with the tip of the mast going down to the water or the pavement. The solution to this is to build a rest point further astern than the end of the boat. The mast will come down on that, resting at a point that is behind the center of gravity. On my mast support I put a rubber roller, like those used on boat trailers, on the frame at the point where the mast would come down on it. Once the mast was on it, I would disconnect the hinge at the base of the mast and walk it forward. The top part (now astern) was sitting on that rubber roller and made it easy to walk the mast forward to it's winter resting cradle rigged on the bow. It took me a weekend to fabricate my single handed raise/lower system and few sessions to perfect it, but it really helped. I could to the complete job in less than a couple hours totally single handed and worked irrespective of whether it was windy or the boat was floating in a chop. Going up and going down was all totally controlled. Before I built that system I followed the standard procedure of calling a few guys over to the marina and having several people who didn't really understand the dynamics pulling on lines and pulling off wires. They all had other things to do on the weekend and were in a hurry. I created my system after having a few near incidents, and watching others at the marina drop their masts on the pavement due to confusion and missed communications.
I would like to hear some good solutions as well. Currently using our spinnaker pole and mainsheet block and tackle to raise and lower our mast (as illustrated here: Mast Raising ), but the set up is a pain and it is still a bit scary and can have problems. Going to be lowering the mast for the winter using this set up and two other people, which shouldn't be too bad, but I would like to get to the point where I can do it by myself easily. Looking forward to replies! Edited to add: At the very least I intend to fabricate a better ginpole and retire the bracket and spinnaker pole part of the procedure.
I can step a J24 mast keel stepped (70 pounds) with simple stuff and one hand tired behind my back The Cal 29 mast is about the same length and it is deck stepped BUT it is so freaking heavy and so much in the way for winter repairs I have the boat yard do it and store the mast there and take the boat home It is just the simplest way me to handle that boat
tommays said: I can step a J24 mast keel stepped (70 pounds) with simple stuff and one hand tired behind my back The Cal 29 mast is about the same length and it is deck stepped BUT it is so freaking heavy and so much in the way for winter repairs I have the boat yard do it and store the mast there and take the boat home It is just the simplest way me to handle that boat Click to expand...
Ed and Ellen Zacko have the answer. I purchased their DVD, "Raise Your Mast ...Yourself" and am in the process of adapting it to our Islander 28. An informative DVD about how to raise a deck stepped tabernacle mast Down
We also have a Nor'Sea 27 and use the boom to raise & lower our mast. We towed it back to Az. in the US from Guaymas, Mexico and Ed & Ellen helped us. There DVD is a GREAT place to start. You don't need all kinds of extra stuff to do it! Nor'Sea owners have been doing this for quite some time. You can see us lower our mast in Mexico in our Youtube video at; at about 3 min 40 seconds into the video. NOTE, the video is in 3D, but you can just turn that off using the settings. You can see raising a mast on another Nor'Sea 27 on our Youtube at; At the Havasu Pocket Cruisers Convention on Lake Havasu. Raising starts about 7 min in. This video is NOT 3D Greg
My hunter 260 has a 35' mast that I can raise and lower myself. The mast has struts on either side which run to the deck to keep it from twisting or swinging. It uses a gin pole which attaches into a hole on the mast. The jib halyard attaches to one side, the mainsheet attaches to the other and is run down to an attachment point in the anchor locker. You use the mainsheet to raise or lower the mast. Some people have modified things to use an electric winch. Some diagrams: The mast struts descrip_47d.jpg The system with gin pole general_17c.jpg
Looking at your engineering drawings; this is a Hunter designed system? Was the entire system sold by Hunter? Do the struts need to dynamically lengthen as they travel the raising arc? How heavy is your mast? Perhaps my 140 lbs isn't heavy for a 33' mast, but it was beefier than I expected when first lifting. Do you have any photos available of your install? Thanks.
The Corsair 750 has the easiest rig stepping system I have used. Basically it is a hinge that slides into place that the mast is pinned into. Then you attach a gin pole to the mast, and crank the whole mess up with the trailer winch. It also uses two side stays to hold the mast center lined as it goes up. All in all it takes about 20 minutes up or down. Similar to but somewhat refined.
I wish I could find the owner's manual that came with my Rhodes 22. It says, "After attaching the lowers and the back stay, using both hands heave the mast up with all your force." I did it successfully when I was in my late 20's. I used a high pully hanging from a tree branch as time went on. Ha! Down
Thanks for all the great info! We are planning on cruising a portion of the Rideau Canal and lake system in Ontario next summer on my Starwind 22, which currently uses the boom as a gin pole to raise and lower the mast. I'm really interested in a stable system that could be used on the water, because we would like to go thru a couple locks just for the experience of it with the kids. I like the idea of keeping the shrouds tensioned to keep the mast stable, and I'm definitely not concerned with modifying/adding hardware to this boat.
F.Y.I. To search sailnet forums for a specific phrase, google it like this: "mast stepping" /site:http://www.sailnet.com/forums/ Without the double-quotes, the search finds *any* of the words (even parts of words, e.g. 'step' from 'stepping') in your phrase; with them, the search looks for the *exact phrase*. You can fine tune the results once you see how broad-meshed your original phrase is. Basically, the more words in your search-phrase, the fewer results you get. I've always admired the old Norfolk Wherry* mast rig. Counterweight at base of mast, beefy tabernacle setup, one man on a manual winch. They aim at the channel under the bridge, drop the mast as they get to the bridge, raise the mast as soon as they clear it, all without losing any time or tide, or inconveniencing vehicular traffic, or paying bridge tolls. Clever folk, those English. *See this thread , good discussion of mast stepping,post #17 for the wherry.
hey Smier, if you need help, I'm a stone's throw from the rideau locks
SHNOOL said: A frame stays put, mainsheet tackle to raise the mast... it's so easy, that you stand, by the mast, pull with 1 hand, and steer with the other..... by the way works better if you put the mainsheet side AT the mast. Stupid simple, and fast. 4:1 works fine for my 31ft mast that weighs in a 70lbs. Click to expand...
I am 100% with those who prefer an A-frame system. Look at two videos below for ideas...the devil is always in the details - ideally you want your baby stays in the centre of rotation of the mast base. This way, the spar will always have lateral support. I have similar system on my boat and I love it. TES 28 Magnam Bingo 930
Rhys05, yes used the spin pole ring on the S2 to raise the mast.. the key is to get the ring as high up as possible.... My buddy has a T-track on his mast, so we put it at like 6 feet high (highest point).... it worked fine. You could also attach above the spreaders with a bridle, however you must make the bridle large enough so that once the mast is up, you can untie the bridle from the ground. This doesn't help much for lowering though... an alternative might be to install a fixed ring at a reachable height when the mast is up... but I guess you could swag a line around and above the spreaders with a little effort too. By the way, TakeFive's system was what my fellow club-mate used (almost identical) for his Oday 26 mast, the gin pole and some temporary baby stays. The Oday 26 mast is about 100lbs. He used a light trailer winch for the crank, and frankly I was impressed by it's ease of use, and functionality... He prefers it's use because of the requirement for connecting his roller furler drum (which requires a fairly forward leaning mast to get connected apparently).
SHNOOL: My mast is the class mast, so the spinnaker ring is in a fixed position, I'll have to look and see how high is is above the step, but it appears to be in about the same (relative) position as on your boat. Am I correct in assuming that the S2 mast is ~30 lbs heavier than yours? About the same as that Oday, at ~100 lbs? We'll see what I end up with, I was originally going to go with something like TakeFive's system, but then I was intrigued by the A-frame designs. We shall see. Right now I have been using the spinnaker topping lift halyard as the lift point, it seems to work okay, but it is a bit high so the tension in the line has to be pretty high before the lifting component is enough to move the mast, I'd like to try to minimize the line tensions as much as possible. ...off to do some trig and engineering!
Rhys05 said: ...Right now I have been using the spinnaker topping lift halyard as the lift point, it seems to work okay, but it is a bit high so the tension in the line has to be pretty high before the lifting component is enough to move the mast, I'd like to try to minimize the line tensions as much as possible. ...off to do some trig and engineering! Click to expand...
Rhys05, yes the fixed ring is high enough I believe it's about 6 feet from the deck or about 4 from the base of the mast... Yes the S2 mast is about 30lbs heavier than the Capri 25... yet about the same height (which is really where all the "problem" is)... It may be 100lbs, but it takes roughly 300-400lbs of force to get it started in lifting, an extra set of hands to get it started in the upward direction is helpful, but ideally the A-frame has to handle the weight, so you're better off not letting slack occur in the raising process, or it could BOUNCE and induce excess stress 2-3 times the load... the amount of initial "grunt" goes down substantially depending on how high up the aft end of the mast starts. Therefore the "initial" setting for the mast should be well above horizontal... Ideally it'd be the maximum comfortable height for one person standing on the cockpit seats to lift the mast and set it down into the support... therefore mine is about 6-7 feet off the cockpit seat... Lifting just the 1 end too, is not a lot of effort... as you put the pin into the bottom of the mast first THEN lift the mast up to the highest setting on the aft mast support (which ideally is at or behind the center of grav, which if you note in my picture, the support angles OUT off the stern to well behind the boat, I've tied it off to the stern cleats, and locked it into my stern pulpit, it never moves). I should note that I've raised and lowered the mast 2 times myself now... if you look at the pictures closely, you'll see some are from spring some are from fall, both from this year. This is a good investment... but building your own (like TakeFive)... works too! Catalina Direct: Mastup Mast Stepper CP-14.2, C-15, C-16.5, CP-18, C-22, CP-22, C-25, C-250
SHNOOL said: This is a good investment... but building your own (like TakeFive)... works too! Catalina Direct: Mastup Mast Stepper CP-14.2, C-15, C-16.5, CP-18, C-22, CP-22, C-25, C-250 Click to expand...
Hobie 33's all came with a bridle system that has dual sidestays and uses the spin pole as a gin pole..the H33 website has a PDF of the manual with the whole system described. I can raise n lower without assistance..
My last boat was a Hunter 26 and used the same gin pole setup as the 260. I raised and lowered the mast routinely by myself. One of the good things about the system is the only "extra" parts you need are the gin pole and side stays, which are easy to keep on the boat.
I made a simple JinPole for my 23... can do it easy peasy. 40 bucks in hardward plus the cost of the winch. http://www.sailnet.com/forums/general-discussion-sailing-related/104478-jin-pole.html
The mast on a Catalina 22 is about 75 lbs.
- ?
- 176K members
Top Contributors this Month
- New Sailboats
- Sailboats 21-30ft
- Sailboats 31-35ft
- Sailboats 36-40ft
- Sailboats Over 40ft
- Sailboats Under 21feet
- used_sailboats
- Apps and Computer Programs
- Communications
- Fishfinders
- Handheld Electronics
- Plotters MFDS Rradar
- Wind, Speed & Depth Instruments
- Anchoring Mooring
- Running Rigging
- Sails Canvas
- Standing Rigging
- Diesel Engines
- Off Grid Energy
- Cleaning Waxing
- DIY Projects
- Repair, Tools & Materials
- Spare Parts
- Tools & Gadgets
- Cabin Comfort
- Ventilation
- Footwear Apparel
- Foul Weather Gear
- Mailport & PS Advisor
- Inside Practical Sailor Blog
- Activate My Web Access
- Reset Password
- Customer Service

- Free Newsletter

Mason 33 Used Boat Review
Beneteau 311, Catalina 310 and Hunter 326 Used Boat Comparison
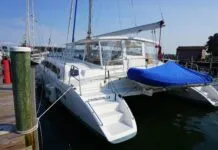
Maine Cat 41 Used Boat Review

Cheoy Lee Clipper 36 & 42 Used Boat Review

Tips From A First “Sail” on the ICW

Tillerpilot Tips and Safety Cautions

Best Crimpers and Strippers for Fixing Marine Electrical Connectors
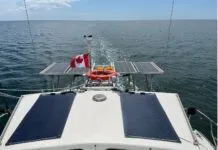
Thinking Through a Solar Power Installation

Stopping Mainsheet Twist
Working with High-Tech Ropes
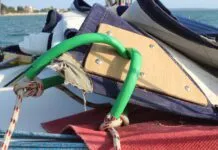
Getting a Clue for the Blown-Out Clew
Monel Seizing Wire is Worth the Extra Cost
Fuel Lift Pump: Easy DIY Diesel Fuel System Diagnostic and Repair
Ensuring Safe Shorepower
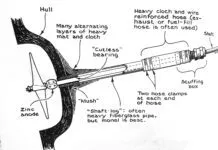
Sinking? Check Your Stuffing Box

The Rain Catcher’s Guide
Boat Maintenance for the Technically Illiterate: Part 1

Whats the Best Way to Restore Clear Plastic Windows?
Mastering Precision Drilling: How to Use Drill Guides
Giving Bugs the Big Goodbye

Galley Gadgets for the Cruising Sailor

Those Extras you Don’t Need But Love to Have
UV Clothing: Is It Worth the Hype?

Preparing Yourself for Solo Sailing

How to Select Crew for a Passage or Delivery

Preparing A Boat to Sail Solo

On Watch: This 60-Year-Old Hinckley Pilot 35 is Also a Working…
On Watch: America’s Cup

On Watch: All Eyes on Europe Sail Racing

Dear Readers
Chafe Protection for Dock Lines
- Sails, Rigging & Deck Gear
Un-Stepping the Mast for America’s Great Loop
The great loop adventure is open to sailboats but you need to plan for un-stepping and stepping your mast to clear bridges along the way. learn about the marinas and costs involved to get ready for this north american cruising trip..
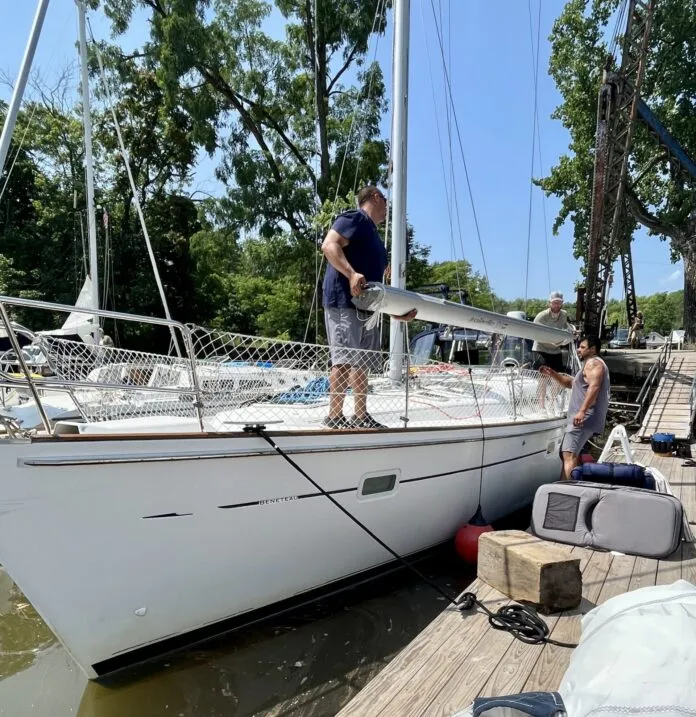
As a family on a sailboat traveling on the Great Loop, our crew of four aboard Fika was a bit out of the ordinary. While not a common sight, many sailboats do take on the Great Loop adventure. The first question we’re asked when folks learn about our vessel is, “Don’t you have to take the mast down?”
America’s Great Loop is a waterway adventure that will lead you on a circumnavigation of the eastern portion of the United States. When the first “Looper,” Kenneth Ransom, and his crew of teens made the trip in a sailing yawl in 1898, he didn’t have a modern convenience that stood in his way: fixed-height bridges.
Two areas along the Great Loop are restricted by your vessel’s air draft: New York along the Erie Canal (a modern marvel in its early days that allowed for more accessible settlements in the Midwest) and just south of Chicago in the Illinois River.
As you approach the Erie Canal, three routes have varying height restrictions. A 21-ft. air draft lets you take the Erie Canal and the Oswego Canal to Lake Ontario. A 17-ft. clearance enables you to take the “triangle loop” into Lake Champlain and the St. Lawrence Seaway to Lake Ontario. A 15-ft. height gives you the option of the entire Erie Canal to Lake Erie. No matter the route, the mast must come down when traveling by sailboat.
As our family sailed and motored up the Hudson River in early July 2023, we aimed for Hop O’Nose Marina in the Great Northern Catskills. The marina wasn’t a polished resort; it had a few amenities, but its primary feature was the marina crew’s skill. However, the old rusty crane for our mast lowering raised our eyebrows slightly.
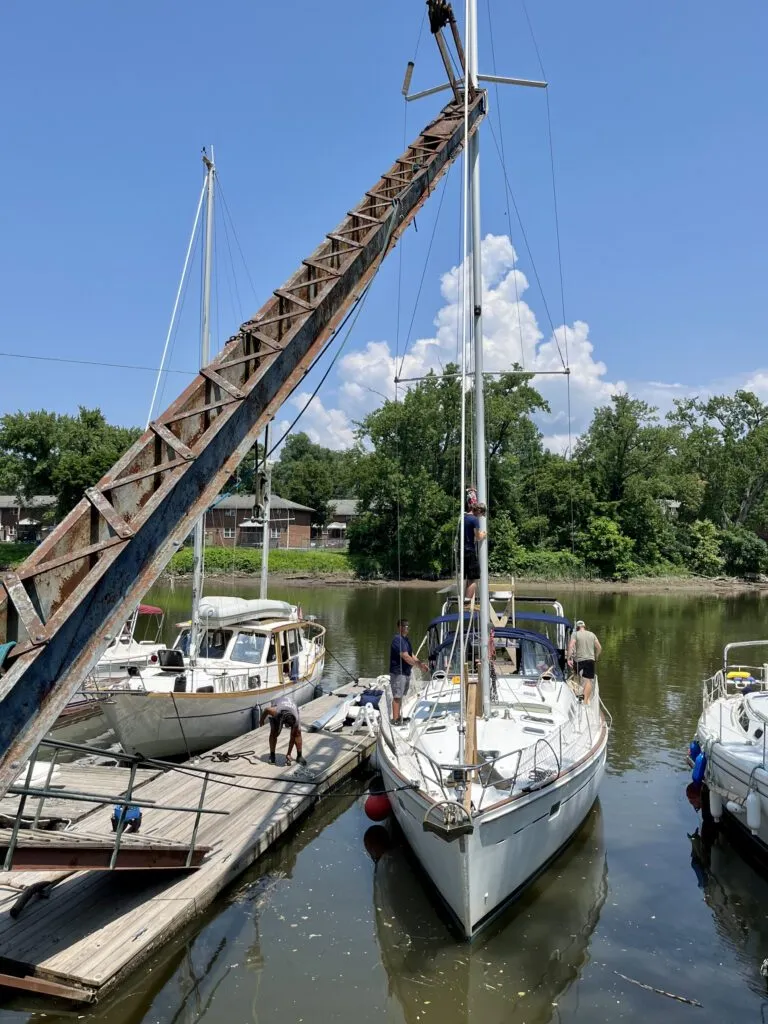
“This crane was used in the original construction of the Erie Canal!” we were told. Did they mean all the way back in the early 1800s? From the looks of the crane, this fact was very plausible.
The marina crew was skilled in the task; it was evident that this was a common stop for sailboats coming from and going to the canal for mast raising and lowering. We planned to travel with our mast on our deck for this stretch of the Loop. The Hop O’Nose team quickly constructed mast supports for us from 2×4’s and provided us with straps to secure the mast. One support was near our bow, the other in our cockpit directly in front of the helm. The process of demasting, the cradle supplies, and the labor to help build the cradle and set the mast in place brought us to about $800.
The primary negatives of carrying our mast on deck were that our visibility was more limited, our deck and cockpit were crowded, and we lost some maneuverability for managing our lines while locking through the canal. We were also top-heavy in a way that the boat wasn’t intended for, making it precarious if we were waked hard by faster vessels. Additionally, we were now a longer vessel for any dockage that might be charged by the foot (our mast length exceeded our hull length).
Despite these inconveniences, we enjoyed transiting the Erie Canal with no significant issues. We opted to travel the entire length of the Erie Canal, as it served not only an interesting history curriculum as we learned about its origin and impact in the many canal-side towns we visited, but the western half of the canal, often missed by many Loopers, was peaceful and beautiful. Our lowest fixed bridge to pass under was 15-ft. 6-in. shortly after Oneida Lake, but we easily cleared it with our mastless air draft of 13-ft.
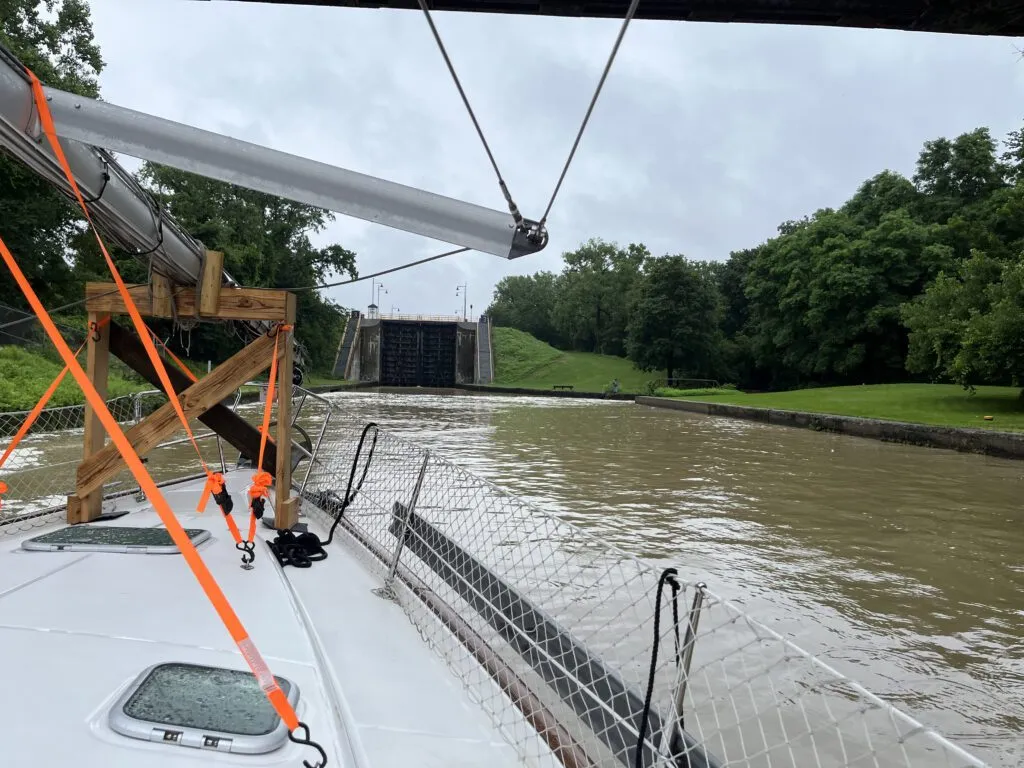
After cruising the canal for 19 days, we reached its terminus in Tonawanda, NY, just north of Buffalo, where we’d enter Lake Erie. We found our way to Wardell Boat Yard, where we refueled and had their assistance raising the mast for about $600.
After we looked like a sailboat again, we wanted to ensure our rigging was in good shape, as we planned to sail quite a bit in the Great Lakes. We replaced our outhaul and tuned the rig for about $1,000 at RCR Yachts Buffalo Marina.
After sailing across Lake Erie, up Lake Huron, under the Mackinac Bridge, and into our home cruising grounds in Lake Michigan, we approached Chicago to continue our journey south through the river system. Just south of Chicago is a fixed bridge, and all vessels must pass under it to access the lower rivers; there is no other way. This bridge has a clearance of 19-ft. 6-in. along the Illinois River.
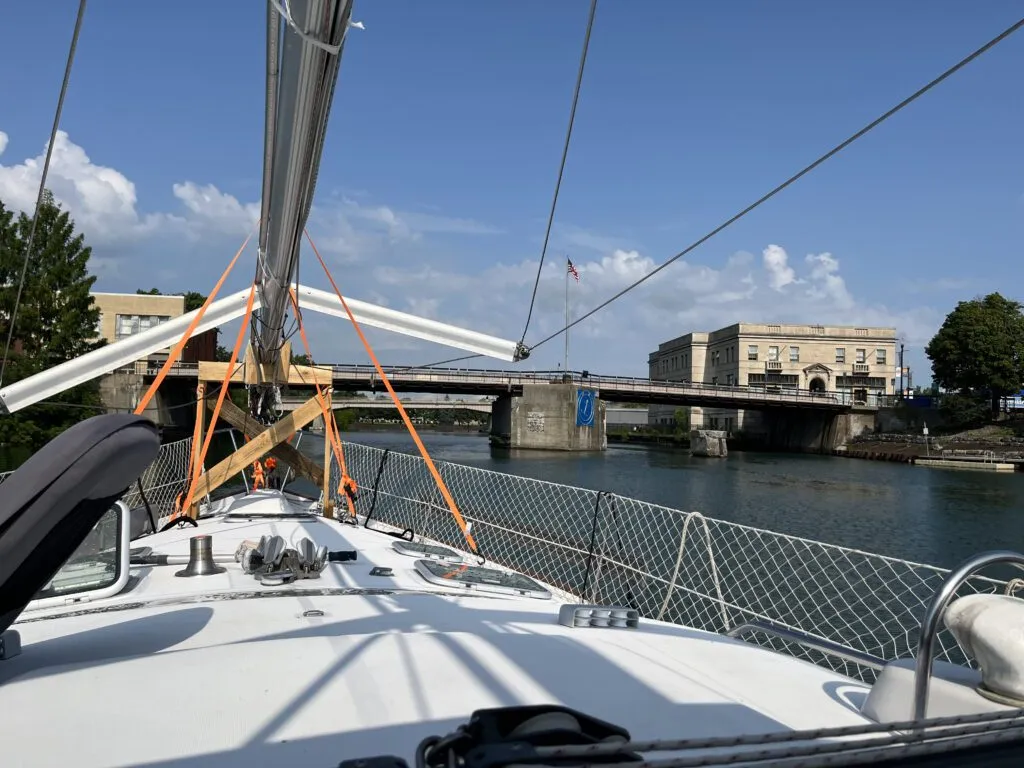
In mid-October, we took Fika to Crowley’s Yacht Yard Lakeside on the Calumet River to take down our mast. The crew’s cost to safely remove and pack our mast for shipment to Mobile, AL, was about $1,225. The river system would take us longer to transit than the Erie Canal, so we opted to have our deck clear for this portion of the route rather than working around our massive mast on the deck.
From there, Crowley’s helped us work with Cross Country Boat Transport to ship our mast to Turner Marine in Mobile, AL. The cost of transport was about $1,400. Our vessel’s equipment would be loaded onto a truck bed with other masts, shipped to Mobile, and await our arrival there.
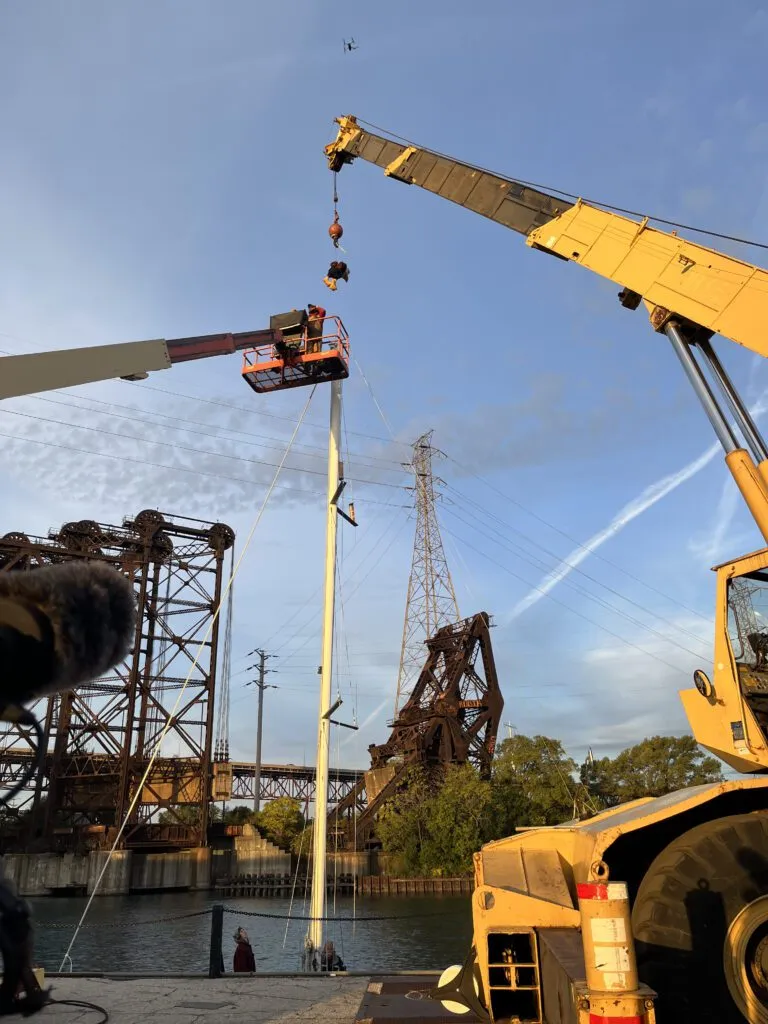
The lack of mast weight onboard changed our vessel’s dynamics (our boat weighed less and sat higher in the water) as we traveled as a funny-looking motorboat along the rivers. Still, the freedom on our decks and unobstructed visibility were worth it. Not only could we see directly in front of us without cradles in the way, but we also had an open deck without any rigging, making it more straightforward to tend our lines in the massive locks along the river.
In mid-December, 56 days after removing our mast, we could put it back up at Turner Marine, located at the mouth of Dog River and Mobile Bay. One drawback of shipping the stick is that you can no longer control or protect the mast while it travels south without you. We found minor damage on our mast once we raised it. However, it’s not worth pointing fingers, as it could have happened during any stage, from removing the mast, shipping, and putting it back up. For $638, Turner Marine accepted our mast from the shipping company, held it for us, and stepped it back onto Fika once we arrived.
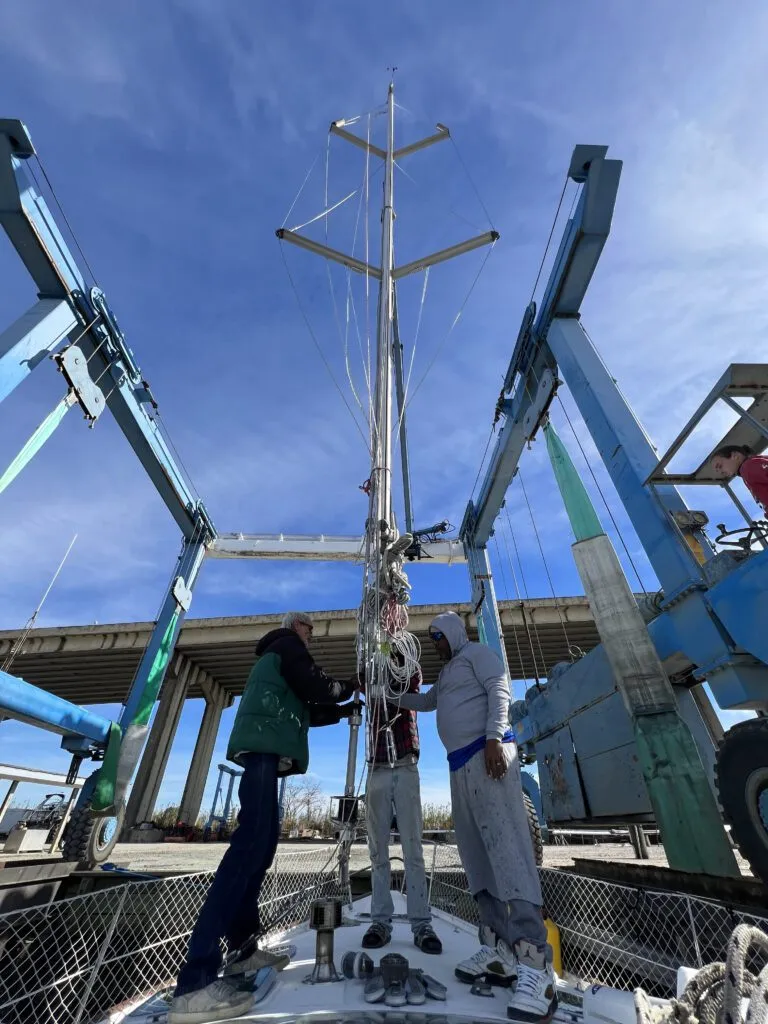
To ensure our safety and efficiency, we had Stanley’s Services Sailboat Rigging Specialists come out while we were at Turner Marine. These folks are professional, thoughtful, and wonderful to work with, and their prices were very reasonable. The rig inspection, rig tuning, and rigger aloft cost us $350. They also performed additional services, replacements, and fixes. At the same time, they worked with us based on their recommendations and our needs, taking time to confirm we understood their notes and guidance for future maintenance.
As a sailboat, we are often given a hard time (usually in jest) for the added cost of removing and shipping the mast multiple times during our Great Loop journey. The prices I outlined above add up to just over $6,000. However, compared to fuel costs of reasonably fuel-efficient and cost-conscious trawlers of about $10,000 on fuel alone (though more often they are spending $20,000 or more), our own low fuel consumption and given our love of sailing whenever we can (even in the Intracoastal Waterway!), we wouldn’t hesitate to encourage sailors to take on America’s Great Loop in their sailboat if that’s the way they love to cruise.
RELATED ARTICLES MORE FROM AUTHOR
For the benefit of those who would like to save a few dollars on mast stepping/lowering, the Castleton Boat Club on the Hudson River at Castleton on Hudson, about 16 miles south of Waterford, is much less expensive. Current rates for the do it yourself service using the mast crane are $100 for the first mast and $50 for a second. There is dockage available as well as moorings. The usual routine here is that you assist the guy in front of you, and the guy behind you helps you – then everyone retires to the clubhouse for an inexpensive beer. The last time I went through, the club commodore assisted me in stepping my mast – and bought me a beer when we were done. On the other end, I would strongly recommend RCR over Wardells for your mast, or if you’re continuing on into Ontario, use Sugarloaf Marina in Port Colborne at a cost of $6.40 (Canadian) per mast foot. Just be sure to pick a calm day for the crossing as you don’t want your mast to topple over into the drink.
LEAVE A REPLY Cancel reply
Log in to leave a comment
Latest Videos

The Perfect Family Sailboat! Hunter 27-2 – Boat Review

Pettit EZ-Poxy – How to Paint a Boat

The Boat From True Spirit – Sparkman & Stephens

Top 5 Boat Hacks – Boat Maintenance Tips and Tricks
Latest sailboat review.

- Privacy Policy
- Do Not Sell My Personal Information
- Online Account Activation
- Privacy Manager
| (001) 401-739-1140 -- (001) 401-739-1149 | |
| |
| or Mast Feet, are used on Deck or Keel to secure the base of the Mast. Mast Steps are usually bolted through the Deck, or into the Keel. Some Deck Steps incorporate a means of attaching and other Control lines. Some Keel Steps incorporate a means of attaching various or Deck Tie-down attaching to the Deck or Deck Collar, to prevent Deck rise due to Rig Tension. , , , and the unrelated, but oft-confused, , for climbing. Rig-Rite stocks a wide selection of originally supplied by a variety of Manufacturers, as noted below, and is able to supply any type of , as required. are listed by specific Mast Section, See . , for Sections are shown listed here, please forward details on your See: . We will also need measurements, and full details of the part, boat model and year. If an original Step is not available, we are able to supply any type of , as noted below. are available separately, See: . to attach to standard Bails are available, See: . |
| Mast Steps for Sections on-site are shown below. | ||
| | ||
| Cast Aluminum Mast Step for use with Annapolis Spars 7446 Mast Section. Oval Mast Section is 7 3/8" x 4 9/16", Mast Step is 7 3/8" long x 4 5/8" wide with NO holes for attachment. Unit is marked
| ||
| Cast Aluminum Mast Step for use with Annapolis Spars 8553 Mast Section. Oval Mast Section is 8 1/2" x 5 1/4", Mast Step is 8 1/2" long x 5 1/4" wide with NO holes for attachment. Unit is marked
| ||
| | ||
| Cast Aluminum Mast Step for use with Columbia Yachts 6" x 4" Oval Mast Section. Anodized, Oval Deck-mounted Mast Step is 6 1/4" long x 4 1/4" wide and attaches to deck with (4) 1/4" screws on 2 1/2" x 1 1/2" centers. Unit features drainage slots, 2" x 1" center slot, and is marked
| ||
| Cast Aluminum Mast Step for use with Columbia Yachts 7 1/4" x 4 1/2" Oval Mast Section. Anodized, Oval Deck-mounted Mast Step is 7 7/16" long x 4 9/16" wide and attaches to deck with (4) 1/4" screws on 3" x 2" centers. Unit features drainage slots and 1" center hole.
| ||
| Cast Aluminum Mast Step for use with Columbia Yachts 7 1/4" x 4 1/2" Oval Mast Section. Anodized, Rectangular Keel-mounted Mast Step is 8 1/2" long x 6 7/8" wide and attaches to Keel with (2) 1/2" bolts, and (2) 5/16" screws in 2 1/4" long slots. Unit features drainage slots, 2 1/4" x 1 1/2" center slot, and is marked and others.
| ||
| Cast Aluminum Mast Step for use with Columbia Yachts 8 1/2" x 5 3/4" Oval Mast Section. Anodized, Rectangular Mast Step is 11" long x 6 7/8" wide and attaches to Keel with (4) 1/4" bolts in 1" long slots. Unit is marked
| ||
| Aluminum Mast Step for use with Columbia Yachts Mast Section. Rectangular Keel-mounted Mast Step is 9 3/8" long x 6" wide and attaches to Keel with (4) 1/2" bolts in 1 3/4" long slots. Welded Mast Step has Black epoxy coating. and others.
| ||
| | ||
| Cast Aluminum Mast Step for Famet 4530 (4 1/2" x 3") Flat Oval Mast Section. Mast Step measures 4 1/2" long x 3" wide x 1 1/4" high, with NO holes for attachment. Cast in 356 Aluminum with anodized finish. and others.
| ||
| Hinged tabernacle assembly for Famet 4530 section allows for easy mast-stepping. Consists of Mast Step casting bolted to . When replacing the original 2-piece Tabernacle used on Balboa, Ensenada 20, and others, a 1/2" Spacer, , (below) is required to maintain original Mast height.
| ||
| Spacer Plate or Riser for Hinged Mast Plate Assembly is 1/2" thick, and fits Bottom Hinge plate to increase Mast height by 1/2" or multiples of 1/2". Useful where mast needs to be cut, or as an easy way to solve rigging stretch problems. High-density Plastic Spacer Plate is 6 1/2" long x 3 3/4" wide x 1/2" thick, and is drilled to match the Bottom Plate ( ).
| ||
| Cast Aluminum Mast Step for Famet 5032, L-106 (5" x 3 1/4") Flat Oval Mast Section. Mast Step is 5" long x 3 1/2" wide x 1 1/4" high, with NO holes for attachment. Cast in 356 Aluminum with anodized finish.
| ||
| Hinged tabernacle assembly for Famet 5032 section allows for easy mast-stepping. Consists of Mast Step casting bolted to
| ||
| Cast Aluminum Mast Step for Famet 6535 (6 1/2" x 3 1/2") Flat Oval Mast Section. Mast Step measures 6 5/8" long x 3 5/8" wide x 1 1/4" high, with NO holes for attachment. Cast in 356 Aluminum with anodized finish.
| ||
| | ||
| Mast Step for Forespar 6210 Mast Section (10" x 6 1/4") fastens to deck, keel or keelson with (4) 3/8" bolts in internal adjustment slots to allow for precise positioning. Mast Step is 10 1/2" long x 6 7/8" wide, slots allow for 1" fore and aft adjustment. Slot centers are 2 1/4" athwartships, and 4" fore & aft, unit has 1 1/4" Center hole. Part is marked and Cast in 356 Aluminum with anodized finish.
| ||
| | ||
| Mast Step Assembly for Hall Spars 095 Mast Section (3.75 x 2.75) fastens to various SS plates w/ (4) 3/8" bolts. New-style Assembly includes sheaves with removable Axles and Cover Plates, and SS Vang Bail. Mast Step Base is 6 1/2" long x 4" wide, Casting is marked Cast in 356 Aluminum with anodized finish.
| ||
| New-style Mast Step Casting Only has tapped holes for Sheave Cover Plates (w/ new removable Axles), and hole for SS Vang Bail. Mast Step Casting Only for Hall Spars 095 Mast Section (3.75 x 2.75) fastens to various SS plates w/ (4) 3/8" bolts. Cast in 356 Aluminum with anodized finish.
| ||
| Mast Step for Hall Spars 128 Mast Section (5" x 3.2") fastens to keel or keelson w/ (4) 3/8" bolts in external adjustment slots to allow for precise positioning without unsteping the mast. Mast Step measures 9" long x 3 1/2" wide, slots allow for 1" fore & aft adjustment. Slot centers are 1 5/8" athwartships, & 7" fore & aft. Part is marked Cast in 356 Aluminum with anodized finish. & others.
| ||
| Mast Step for Hall Spars 152 Mast Section (6" x 4") fastens to keel or keelson with (4) 3/8" bolts in external adjustment slots to allow for precise positioning without unstepping the mast. Mast Step measures 9 3/8" long x 4 3/8" wide, slots allow for 1 1/2" fore and aft adjustment. Slot centers are 3 3/8" athwartships, and 7" fore & aft, unit has 1 1/2" Center hole. Cast in 356 Aluminum with anodized finish. and others.
| ||
| Special Base Plate for Mumm 30 attaches to keel and receives Plug attached to Carbon Mast. Extruded Aluminum Channel Plate attaches to keelson with (4) 5/16" bolts in external adjustment slots to allow for precise positioning without unstepping the mast. Hardcoat anodized unit is 9 3/4" long x 3" wide, slots allow for 1" fore and aft adjustment. Slot centers are 1 3/4" athwartships, and 7 3/4" fore & aft, unit includes (2) 3/8" SS bolts to secure Mast.
| ||
| Mast Step for Hall Spars 166 Mast Section (6.50" x 4") fastens to keel or keelson with (4) 3/8" bolts in external adjustment slots to allow for precise positioning without unstepping the mast. Mast Step measures 7 1/2" long x 6" wide, slots allow for 2" fore and aft adjustment. Slot centers are 5" athwartships, and 4 1/2" fore & aft. Part is marked Cast in 356 Aluminum with anodized finish. and others.
| ||
| Mast Step for Schaefer Spars 180 Mast Section (7 1/8" x 4 1/2") fastens to deck with (4) 1/4" bolts in adjustment slots to allow for precise positioning. Mast Step is (maximum) 7 7/8" long x 5 1/4" wide, slots allow for 1" fore and aft adjustment. Slot centers are 2" athwartships, and 3" fore & aft, unit has 1 1/2" Center hole. Cast in 356 Aluminum with anodized finish. and others.
| ||
| Mast Step for Schaefer Spars 180 Mast Section (7 1/8" x 4 1/2") fastens to keel or keelson with (4) 3/8" bolts in external adjustment slots to allow for precise positioning without unstepping the mast. Mast Step measures 9 1/2" long x 5 5/8" wide, slots allow for 1" fore and aft adjustment. Slot centers are 4 5/16" athwartships, and 7 1/4" fore & aft, unit has 1 1/2" Center hole. Cast in 356 Aluminum with anodized finish.
| ||
| Mast Step for Schaefer Spars 200 Mast Section (7.685" x 4.86") fastens to deck with (4) 3/8" bolts in adjustment slots to allow for precise positioning. Mast Step is (maximum) 8 1/2" long x 5 9/16" wide, slots allow for 1" fore and aft adjustment. Slot centers are 1 3/4" (fwd.) and 2" (aft) athwartships, and 3" fore & aft, unit has 1 1/2" Center hole. Part is marked and Cast in 356 Aluminum with anodized finish. and others.
| ||
| Mast Step for Schaefer Spars 200 Mast Section (7.685" x 4.86") fastens to keel or keelson with (4) 3/8" bolts in external adjustment slots to allow for precise positioning without unstepping the mast. Mast Step measures 10" long x 7 1/4" wide, slots allow for 1" fore and aft adjustment. Slot centers are 6" athwartships, and 7 3/4" fore & aft, unit has 1 1/2" Center hole. Part is marked and Cast in 356 Aluminum with anodized finish. and others.
| ||
| Mast Step for Schaefer Spars 205 Mast Section (8.06" x 4.88") fastens to deck or keel with (4) 3/8" bolts in external adjustment slots to allow for precise positioning without unstepping the mast. Mast Step is (maximum) 10 1/2" long x 6" wide, slots allow for 2" fore and aft adjustment. Slot centers are 4 7/8" athwartships, and 7 1/2" fore & aft. With 1 1/2" x 3" Center slot. Cast in 356 Aluminum with anodized finish. and others.
| ||
| Mast Step for Schaefer Spars 220 Mast Section (8.55" x 5.40") fastens to deck or keel with (4) 3/8" bolts in adjustment slots to allow for precise positioning. Mast Step is (maximum) 9 3/8" long x 5 15/16" wide, slots allow for 1" fore and aft adjustment. Slot centers are 2 1/2" athwartships, and 4 1/8" fore & aft. With 1 1/2" Center hole. Cast in 356 Aluminum with anodized finish. MMM SLC
| ||
| Mast Step for Schaefer Spars 230 Mast Section (9.233" x 5.82") fastens to deck or keel with (4) 1/2" bolts in adjustment slots to allow for precise positioning. Mast Step is (maximum) 10" long x 6 5/8" wide, slots allow for 1" fore and aft adjustment. Slot centers are 2 1/4" athwartships, and 4 1/4" fore & aft. With 1 1/2" Center hole. Cast in 356 Aluminum with anodized finish.
| ||
| Mast Step for Schaefer Spars 240 Mast Section (9.91" x 6.20") fastens to deck or keel with (4) 1/2" bolts in adjustment slots to allow for precise positioning. Mast Step is (maximum) 10 5/8" long x 7 1/16" wide, slots allow for 1" fore and aft adjustment. Slot centers are 2 3/4" athwartships, and 4 3/4" fore & aft. With 1 1/2" Center hole. Cast in 356 Aluminum with anodized finish.
| ||
| Mast Step for Schaefer Spars 240 Mast Section (9.91" x 6.20") fastens to keel or keelson with (4) 1/2" bolts in external adjustment slots to allow for precise positioning without unstepping the mast. Mast Step is (maximum) 13" long x 9" wide, slots allow for 1 1/2" fore and aft adjustment. Slot centers are 7 1/2" athwartships, and 10" fore & aft. With 1 1/2" Center hole. Cast in 356 Aluminum with anodized finish. and others.
| ||
| Mast Step for Hall Spars 9641 and 9642 Mast Sections fastens to keel or keelson with (4) 1/2" bolts in external adjustment slots to allow for precise positioning without unstepping the mast. Mast Step is 12 1/2" long x 7" wide, slots allow for 2" fore and aft adjustment. Slot centers are 5 1/2" athwartships, and 9" fore & aft. Part is marked Cast in 356 Aluminum with anodized finish.
| ||
| | ||
| Mast Step for Hood Stoway 9555 Section (9 1/2" x 5 1/2"). Cast Aluminum Mast Step is (maximum) 10 1/2" long x 6 1/2" wide x 1 3/4" high with 1 1/4" ID Electrical stand pipe and Black anodized finish. Marked 6271-004.
| ||
| Mast Step for Hood Stoway 1267 Section (12.3" x 6.75"). Cast Aluminum Mast Step is (maximum) 14 1/2" long x 11 7/8" wide x 2 1/2" high with 1 1/2" ID Electrical stand pipe hole (3 1/2" high) and anodized finish. Unit mounts with 1/2" bolts in (4) 9/16" x 3" slots on 10 1/4" athwartships centers x 8 1/2" fore & aft centers. Marked HYS 6161 04.
| ||
| | ||
| Mast Step for MetalMast 6035 Teardrop Mast Section (6" x 3 1/2") has (2) Tenons (1 1/8" square x 1 1/8" deep) to fit in special deck receiver. Cast Aluminum Mast Step is (maximum) 6" long x 3 1/2" wide with clear anodized finish. and others.
| ||
| for MetalMast 6641 Oval Section: MM 6641M-S1: | ||
| Mast Step for MetalMast 6641 Oval Mast Section (6.62" x 4.12") is undrilled to adapt to any mounting hole configuration. Cast Aluminum Mast Step is (maximum) 6 1/4" long x 4 1/8" wide with Light Gray Awlgrip finish. and others.
| ||
| for MetalMast 6641 Oval Section: MM 6641M-S2: | ||
| Mast Step for MetalMast 6641 Oval Mast Section (6.62" x 4.12") fastens to keel or deck with (2) 3/8" bolts on 3 1/2" centers. Welded Aluminum Mast Step is (maximum) 8 1/4" long x 5 5/8" wide with clear anodized finish. Replaces earlier Cast version.
| ||
| Mast Step for MetalMast 6641 Oval Mast Section (6.62" x 4.12") fastens to deck with (2) 5/16" bolts on 3 7/8" centers. Cast Aluminum Mast Step is (maximum) 7" long x 4 1/2" wide with clear anodized finish. Unit is marked and others. Fits MM 6641 Mast Section, and other variations of this section.
| ||
| Mast Step for MetalMast 7041 Teardrop Mast Section (7" x 4.11") fastens to keel or keelson with (2) 3/8" bolts on 8 1/4" centers. Mast Step is (maximum) 10" long x 4 3/8" wide. Cast in 356 Aluminum, fully machined with a clear anodized finish. and others.
| ||
| Mast Step for MetalMast 7244 Oval Mast Section (7.31" x 4 1/2") fastens to keel or keelson with (2) 3/8" bolts on 8 3/4" centers. Mast Step is (maximum) 10 1/2" long x 4 3/4" wide. Cast in 356 Aluminum, fully machined with a clear anodized finish. Unit is marked Can be modified for use as Deck Step, as on and others.
| ||
| Mast Step for MetalMast 7244 Oval Mast Section (7.31" x 4 1/2") with Custom 4" Riser fastens to keel or keelson with (2) 3/8" bolts on 8 3/4" centers. Custom Riser is welded from 6061-T6 Aluminum Plate with a clear anodized finish and is designed to fit footprint of Mast Step. Shown at 4" high, but Riser can be made in any height to allow for trimming of corroded Mast bottom.
| ||
| Mast Step for MetalMast 7845 (-1 & -2) Teardrop Mast Sections (7.8" x 4.51") fastens to keel or deck with (2) 3/8" bolts on 3 1/4" centers. Welded Aluminum Mast Step is (maximum) 8 3/8" long x 5 5/8" wide with clear anodized finish. Replaces earlier Cast version.
| ||
| Domed Mast Step Plug for MetalMast 7845-1 Mast Section (7.8" x 4.51") fastens to mast with (4) 1/4" screws. Anodized, cast Aluminum Mast Plug is (maximum) 8" long x 4 5/8" wide, with 1" center hole. As used on a variety of Bristol and Pearson Yachts.
| ||
| Domed Mast Step Plug for MetalMast 7845-2 Mast Section (7.8" x 4.51") fastens to mast with (4) 1/4" screws. Anodized, cast Aluminum Mast Plug is (maximum) 8" long x 4 5/8" wide, with 1" center hole. As used on a variety of Bristol and Pearson Yachts.
| ||
| Oval Deck Step receiver for Domed Mast Step Plug is (maximum) 9 5/8" long x 6" wide x 2" high, with 1" center hole. Anodized casting has no fastener holes but was originally attached with (6 or 8) 1/4" FH screws in various patterns. As used on a variety of Bristol Yachts and and others.
| ||
| Mast Step for MetalMast 8348 Teardrop Mast Section (8.3" x 4.81") fastens to keel or deck and is undrilled to adapt to any mounting hole configuration. Cast Aluminum Mast Step is (maximum) 9 3/16" long x 5 13/16" wide with unfinished surface.
| ||
| Aluminum Keel-mount Mast Step for Mast replaces Steel original, as used on (some) 's. Anodized aluminum Mast Step is 15" long x 6 1/2" wide, with (4) 7/8" x 2 1/2" slots on 3 5/8" centers and 7/16" bridged hole for deck tie down rod. As original Steel Steps varied widely, mounting may require new holes. Similar to as pictured here. and others.
| ||
| Mast Step for MetalMast 8655 Oval Mast Section (8.6" x 5.5") fastens to keel or deck with (4) 1/4" screws on 7 1/2" x 4 3/4" centers. Cast Aluminum Mast Step is (maximum) 9 1/2" long x 6 3/4" wide with clear anodized finish.
| ||
| | ||
| Cast Aluminum Mast Step for use with Sound Spar 7747 Mast Section. Oval Mast Section is 7 3/4" x 4 3/4", Mast Step is 7 3/4" long x 4 3/4" wide and attaches to deck or keel with (2) 3/8" bolts in 1 1/2" long slots on 4" centers. and others.
| ||
| Aluminum Keel-mount Mast Step for Sound Spar Mast (7 3/4" x 4 3/4") replaces Steel original, as used on (some) 's. Anodized aluminum Mast Step is 15" long x 6 1/2" wide, with (4) 1/2" x 2 3/8" slots on 4 1/2" centers and 7/16" bridged hole for deck tie down rod. As original Steel Steps varied widely, mounting may require new holes. Similar to as pictured here. and others.
| ||
| Cast Aluminum Mast Step for use with Sound Spar 8755 Mast Section. Oval Mast Section is 8 3/4" x 5 1/2", Mast Step is 11 1/4" long x 7 1/8" wide and attaches to keel with (4) 1/4" bolts in 3 1/4" long slots on 6", and 3 1/4" centers. Unit features drainage slots, 4" x 1 1/2" center slot, and is marked ****
| ||
| Aluminum Keel-mount Mast Step for Sound Spar Mast (8 3/4" x 5 1/2") replaces Steel original, as used on (some) 's. Anodized aluminum Mast Step is 15" long x 6 1/2" wide, with (4) 1/2" x 2 3/8" slots on 4 1/2" centers and 7/16" bridged hole for deck tie down rod. As original Steel Steps varied widely, mounting may require new holes. and others.
| ||
| | ||
| Cast Aluminum Mast Step for use with Sparcraft (California) Mast Section. S-108 Flat-sided Oval Mast Section is (maximum) 4 1/2" long x 3" wide. and others.
| ||
| Cast Aluminum Mast Step for use with Sparcraft (California) Mast Section. S-107 Teardrop-shaped Mast Section is (maximum) 5 5/8" long x 4" wide. and others.
| ||
| Custom Mast Steps are available in any number of varieties and materials. Common arrangements are detailed below, or specify any other configuration. We now commonly make Custom Aluminum Keel-mounted Mast Steps, with an integral Riser (of varying heights). For older Rigs with corrosion problems, this allows the removal of the bottom several inches of Mast Section without affecting Rig height.
| ||
| Simple Custom Aluminum Deck-mount Mast Step. For Quotation, Specify Mast Section, fastener size and spacing, and other requirements.
| ||
| Custom Aluminum Keel-mount Mast Step. For Quotation, Specify Mast Section, and other requirements. Design is similar to , as pictured here and and others.
| ||
| Custom Aluminum Keel-mount Mast Step with Riser. For Quotation, Specify Mast Section, and other requirements. Commonly used on replacements for original Pearson Steel Mast Steps, where corrosion forces removal of several inches of Mast Section. Design is similar to custom Mast Step as pictured here.
| ||
| Mast Step Base Plate Adapters are used to adapt a standard Mast Step for use in an externally adjustable Keel-stepped application. Standard items are detailed below, any others are available on a Custom basis, please supply details.
| |
| Mast Step Base Plate Adapter converts standard mast step for use with external adjustment screws, on keel-stepped rigs. Fastens with (2) 5/16" FH screws in standard holes of E, 2740, 3049, 3350, 3550, 3656, and other Kenyon mast steps. Allows for precise positioning without unstepping the mast. Anodized aluminum plate is and measures Fastens to keelson with (4) 3/8" bolts in Slots that allow for 1 1/2" adjustment. Slot centers are 3 5/8" athwartships, and 5 3/4" fore & aft. and others.
|
|
| Mast Step Base Plate Adapter converts standard mast step for use with external adjustment screws, on keel-stepped rigs. Fastens with (4) 3/8" FH screws in internal adjustment slots of 4066 mast step, Allows for precise positioning without un-stepping the mast. Anodized aluminum plate is and measures Fastens to keelson with (4) 3/8" bolts in Slots that allow for 1 1/8" adjustment. Slot centers are 4 1/4" athwartships, and 7" fore & aft. and others.
| |
| Mast Step Base Plate Adapter converts standard mast step for use with external adjustment screws, on keel-stepped rigs. Fastens with (4) 3/8" FH screws in internal adjustment slots of 4270, and 4477 mast steps. Allows for precise positioning without un-stepping the mast. Anodized aluminum plate is and measures Fastens to keelson with (4) 3/8" bolts in Slots that allow for 1 1/4" adjustment. Slot centers are 4 3/4" athwartships, and 8 1/8" fore & aft. and and others, and on and others.
|
|
| Mast Step Base Plate Adapter converts standard mast step for use with external adjustment screws, on keel-stepped rigs. Fastens with (4) 3/8" FH screws in internal adjustment slots of 4873 mast step, Allows for precise positioning without un-stepping the mast. Anodized aluminum plate is and measures Fastens to keelson with (4) 3/8" bolts in Slots that allow for 2" adjustment. Slot centers are 5 1/2" athwartships, and 7 1/2" fore & aft. and others, and on and others. | |
~ Back to Spars Main Page ~
Mast Steps Sailboat: A Guide to Choosing and Installing the Perfect Mast Steps
by Emma Sullivan | Aug 10, 2023 | Sailboat Gear and Equipment

Short answer: Mast steps on a sailboat
Mast steps are devices installed on sailboats to aid in climbing the mast. They consist of small platforms or rungs attached to the mast, allowing sailors to ascend safely for maintenance or rigging purposes. These sturdy steps provide stability and ease of access while working aloft.
1) Introduction to Mast Steps: A Must-Have for Every Sailboat
Introduction to Mast Steps: A Must-Have for Every Sailboat
Sailing is an exhilarating experience that allows individuals to harness the power of the wind and immerse themselves in the wonders of the open water . Whether you’re a seasoned sailor or a novice, it’s essential to have the right equipment on board to ensure safety and convenience. One such tool that every sailboat owner should consider investing in is mast steps.
Mast steps, as the name suggests, are secure footholds attached to the mast of a sailboat . They provide sailors with a safe means of climbing up and down the mast, allowing them to perform various tasks such as adjusting sails, inspecting rigging, installing or repairing equipment, and even taking stunning aerial photographs.
But why are mast steps considered a must-have for every sailboat? Let’s dive into their benefits.
1. Accessibility: When navigating through rough waters or adverse weather conditions, it may become necessary for sailors to ascend the mast quickly. Mast steps provide an easily accessible route up the mast without relying on haphazard makeshift solutions or dangerously improvising climbs. Having well-installed mast steps ensures swift and secure access when you need it most.
2. Safety: Safety should always be a top priority while sailing . By having mast steps installed on your boat, you eliminate potential risks associated with climbing masts without proper footholds. With each step firmly anchored to the mast and designed for optimal grip, sailors can confidently ascend even in challenging sea conditions while minimizing accidents or falls.
3. Versatility: Apart from aiding navigation during demanding situations at sea, mast steps offer versatile functionality during regular maintenance activities as well. Whether it’s routine inspections or replacing rigging elements like spreaders or lights, being able to climb up your mast safely makes these tasks significantly more manageable.
4. Efficient Rigging Adjustments: Properly trimmed sails play a crucial role in maximizing speed and improving overall sailing performance. With mast steps, sailors gain the ability to make on-the-go adjustments without having to rely solely on electronic or hydraulic systems. Climb up the mast, analyze sail shape, tension lines, and make necessary tweaks to ensure your sails harness the wind to its fullest potential.
5. Aesthetic Value: Mast steps not only provide practicality but also add a touch of elegance and sophistication to your sailboat. The sight of well-designed and expertly installed mast steps can awe fellow sailors and generate admiration for your attention to detail.
In conclusion, mast steps should be viewed as an investment rather than just another accessory for sailboats. Their numerous advantages in terms of accessibility, safety, versatility, efficiency, and aesthetic value make them a must-have tool for every sailor looking to enhance their sailing experience. So why compromise on convenience and risk safety when you can ascend your mast confidently with secure footholds? Upgrade your sailboat today with mast steps and embrace the full potential of joyful sailing!
2) How to Install Mast Steps on Your Sailboat: A Step-by-Step Guide
Installing mast steps on your sailboat is not only a practical addition but also an essential safety measure. These handy devices allow you to climb up and down the mast with ease, making tasks like changing sails or inspecting rigging much simpler. So, if you’re ready to take on this DIY project and enhance your sailing experience, here’s a step-by-step guide on how to install mast steps.
Step 1: Assess Your Boat and Choose the Right Steps Before diving into the installation process, it’s crucial to assess your boat and determine which type of mast steps will work best for you. There are various options available, including folding steps, ladder-style steps, or even custom-made ones. Consider factors such as the size of your mast, the material of the steps, and your personal preferences. This initial research will ensure you make an informed decision that suits both your boat and your needs.
Step 2: Gather Your Tools To successfully complete this project, gather all the necessary tools beforehand. Typically, you’ll need a drill with different-sized bits (depending on the screw dimensions), a measuring tape or ruler for accurate placement, a wrench or socket set for tightening bolts or screws, some sealant to prevent water ingress around screw holes if required in your specific setup.
Step 3: Determine Step Placement The next step is determining where exactly you want to place your mast steps along the length of your mast. It’s crucial to consider factors such as proper weight distribution and ease of access when deciding on their placement. Keep in mind that each step should be evenly spaced for optimum usability during ascent or descent.
Using a measuring tape or ruler as guidance can help ensure equal spacing between each step while maintaining symmetry visually appealing aesthetic.
Step 4: Prep Your Mast After marking out where each step will go along the mast length using tape or pencil marks in line with measured placements determined in Step 3 – it’s time to prepare the mast. Use a wire brush or a fine-grit sandpaper to clean the surface where each step will be mounted. This ensures excellent adhesion for proper installation.
Step 5: Drill Pilot Holes To ensure secure mounting of your mast steps, it is imperative to drill pilot holes before inserting screws or bolts. Having pilot holes helps prevent splitting the wood and makes screwing in much smoother – especially if your mast is made of wood. Match the size of your pilot hole with that of your chosen screws or bolts – a slightly smaller diameter would suffice.
Step 6: Install the Mast Steps Now comes the exciting part – installing the mast steps! Follow the instructions provided by the manufacturer, specifically focusing on how to attach them securely to your specific mast type. Typically, you’ll insert screws or bolts into each pilot hole and then tighten them carefully using a wrench or socket set. Be cautious not to overtighten as this can damage both the steps themselves and compromise the integrity of your mast .
Step 7: Test and Refine Once all steps have been installed, take some time to test their functionality. Inspect each step closely for any signs of looseness or instability while applying controlled weight pressure during testing period which simulates climbing conditions; resolve any issues promptly by tightening necessary bolts or screws further if required. It’s better to catch any potential problems now rather than dealing with them while out at sea!
And there you have it – a straightforward, step-by-step guide on how to install mast steps on your sailboat! By following these detailed instructions and taking care throughout each stage, you’ll be able to navigate up and down your mast effortlessly, opening up new horizons in terms of maintenance and adjustment options while enhancing both safety aspects and overall convenience during your sailing adventures .
3) Frequently Asked Questions about Mast Steps on Sailboats
Frequently Asked Questions about Mast Steps on Sailboats
Are you curious about mast steps on sailboats? Whether you’re a seasoned sailor or just starting out, understanding mast steps is essential for your safety and convenience while sailing. In this blog post, we’ll tackle some of the most frequently asked questions about mast steps and provide detailed professional, witty, and clever explanations that will leave you with a deeper knowledge and a smile on your face.
1) What are mast steps?
Mast steps are sturdy platforms or rungs attached to the mast of a sailboat . They serve as vertical ladders that allow sailors to climb up and reach different areas of the rigging while aloft. In simple terms, they act as stepping stones to ensure safe access to the top of the boat ‘s mast.
2) Why do sailboats have mast steps?
Sailboats have mast steps for several reasons. Firstly, they make it easier for crew members to perform maintenance tasks, inspections, and repairs on the rigging at heights. Secondly, they provide an efficient way to access the upper parts of the sails for adjustment or reefing when necessary. Lastly (and let’s not forget!), they add an element of adventurousness – who doesn’t enjoy feeling like a fearless pirate climbing their way up towards new horizons?
3) Do all sailboats have mast steps?
No, not all sailboats have pre-installed mast steps. While some yachts come equipped with them from the factory, others rely on alternative methods like bosun’s chairs or ascenders for ascending their masts safely. However, many experienced sailors prefer having fixed/mounted mast steps due to their sturdiness and less reliance on additional equipment.
4) Can I add/remove my own mast steps?
Absolutely! Adding or removing your own mast steps is possible but should be approached with caution if you aren’t an experienced sailor or lack proper knowledge in rigging. It’s crucial to consult with a professional or expert before making any modifications to your sailboat’s mast . The last thing you want is for your mast steps to become a liability rather than an asset.
5) What materials are mast steps made of?
Mast steps can be constructed from various materials such as stainless steel, aluminum, or even high-strength plastics. Each material has its pros and cons, including resistance to rust and corrosion, weight considerations, durability, and overall aesthetic appeal. Whichever material you choose, always prioritize safety and reliability over everything else.
6) Are there different types of mast steps?
Yes! Mast steps come in a variety of designs and styles. Some boats have individual rungs that need to be bolted onto the mast individually, while others feature pre-fabricated platforms that can be easily attached and secured in one go. Additionally, some mast steps are specialized for specific boat models or sizes, so it’s essential to know what works best for your vessel before making any purchases or installations.
Now that we’ve answered some of the burning questions about mast steps on sailboats in a detailed yet witty manner (hopefully tickling your funny bone along the way), you’re armed with newfound knowledge about this crucial aspect of sailing. Remember, whether you’re climbing up towards uncharted territories or fine-tuning your rigging like a pro, having safe and reliable mast steps will set you on the right course towards nautical success!
4) Benefits of Having Mast Steps on Your Sailboat
Title: Enhance Your Sailing Experience with Mast Steps: A Clever and Versatile Addition to Your Sailboat
Introduction: Sailboat owners are always on the lookout for ways to improve their sailing experience; from upgrading equipment to fine-tuning techniques, every small adjustment makes a difference. One remarkable addition that can elevate both the functionality and enjoyment of your sailboat is the installation of mast steps. These nifty structures provide an array of benefits, allowing sailors to easily access various parts of the mast while ensuring safety and convenience. In this article, we delve into the world of mast steps and explore their invaluable advantages.
1) Enhanced Safety for Ascending the Mast: Ascending a towering mast can be a daunting task for any sailor. However, with well-placed mast steps, this once laborious activity becomes significantly safer and more manageable. The presence of sturdy steps not only ensures stability but also provides climbers with secure footholds at regular intervals. By eliminating unpredictable and hazardous gripping points found on traditional masts, mast steps considerably reduce the risk of accidents caused by slippery or unstable surfaces.
2) Simplified Maintenance and Repair Work: Owning a sailboat entails regular maintenance and occasional repairs, particularly regarding rigging or electronic installations mounted high up on the mast. The incorporation of mast steps renders these tasks far more convenient than ever before. Accessing hard-to-reach areas becomes effortless as sailors can now comfortably distribute their weight across each step when carrying out inspections or performing necessary replacements. This increased accessibility saves valuable time and energy while minimizing discomfort during challenging repair work.
3) Efficient Sail Changes: Sailing enthusiasts know all too well that wind conditions can change rapidly on the open waters . Being able to adjust your sails accordingly is crucial for optimal performance and speed control. With strategically positioned mast steps, quickly climbing up towards the headboard to alter your sail trim is no longer an arduous chore but rather an agile maneuver. The more efficiently crew members can engage with sail changes, the greater their sailing proficiency becomes, leading to a smoother and more responsive overall sailing experience.
4) Observing and Photographing Scenic Vistas: Sailors are often privileged to witness breathtaking scenes while on the water: picturesque sunsets, wildlife encounters, or simply breathtaking landscapes. Mast steps provide an excellent vantage point for embracing these visual delights by enabling sailors to climb up the mast safely and snap remarkable photographs or simply soak in the stunning surroundings. By providing a higher and unobstructed viewpoint, mast steps turn your sailboat into a floating observatory and enable you to capture memorable moments that would otherwise be missed.
Conclusion: Investing in mast steps for your sailboat is undoubtedly an astute decision that unlocks both practicality and enjoyment. From improved safety during ascents to simplified maintenance work, efficient sail changes, and offering stunning vistas from atop the mast, there is no shortage of benefits to reap. So why limit yourself when it comes to exploring the full potential of your sailboat ? Embrace this clever addition today and elevate your sailing adventures like never before – all while keeping your witty mind at ease!
5) Choosing the Right Type of Mast Steps for Your Sailboat
When it comes to sailing, having the right equipment can make all the difference in your experience on the water. One crucial aspect that often goes overlooked is choosing the right type of mast steps for your sailboat. Mast steps may seem like a small detail, but they play a significant role in ensuring the safety and convenience of accessing different areas of your boat’s mast .
So, what exactly are mast steps? In simple terms, they are metal or wooden installations attached to the mast of a sailboat that provide a series of steps or rungs, allowing sailors to climb up and down easily. These steps allow sailors to access various parts of their boat ‘s rigging for maintenance and repairs while at sea.
The first factor you need to consider when selecting mast steps is the material used in their construction. You’ll typically find mast steps made from either stainless steel or aluminum. Both materials offer their own unique advantages. Stainless steel is incredibly durable and resistant to corrosion, making it suitable for long-term use. On the other hand, aluminum is lighter and more cost-effective while still providing adequate strength.
Next, you’ll want to consider whether you prefer folding or fixed mast steps. Folding steps are hinged at one end, allowing them to be folded up against the mast when not in use. This feature not only improves aerodynamics but also prevents accidental injury by reducing snagging hazards while moving around on deck. Fixed mast steps, on the other hand, remain stationary and securely attached at all times.
Another key consideration is step design and spacing. The design should be ergonomic and comfortable for climbing without causing strain or discomfort over extended periods. A common step design includes squared off edges with non-slip grooves or grip pads for enhanced safety during wet conditions – after all, nobody wants slippery steps! Additionally, focus on finding an appropriate space between each step that allows for easy foot placement while accommodating different shoe sizes.
Aside from functionality considerations, it’s worth noting that mast steps can also enhance the aesthetics of your sailboat. Many sailors consider their boats to be a reflection of their personality, and having well-designed mast steps can contribute to an overall sleek and polished appearance. Some manufacturers offer customizable options, giving you the opportunity to showcase your unique style on your vessel.
When choosing mast steps for your sailboat, it is essential to prioritize safety and convenience without disregarding aesthetics. Ensure the material is durable and corrosion-resistant, select a folding or fixed design that suits your needs, and opt for a step layout that provides comfort during climbing. By carefully evaluating these factors, you’ll find yourself with the perfect set of mast steps that meet your sailing requirements while adding a touch of elegance to your boat.
In conclusion, selecting the right type of mast steps for your sailboat is crucial for maintaining safety, efficiency, and a visually appealing aesthetic. Consider materials such as stainless steel or aluminum based on durability and cost-effectiveness. Evaluate whether folding or fixed steps would better suit your sailing needs. Focus on ergonomic design and appropriate spacing to ensure comfortable foot placement during climbs. Remember that personalized customization options are available if you desire additional style elements on your boat. So next time you’re gearing up for an adventure on the open water, take a moment to appreciate the often-underestimated value of properly selected mast steps!
6) Tips and Tricks for Maintaining and Using Mast Steps Safely
In the exhilarating world of sailing, safely navigating through various tasks and maneuvers is of utmost importance. One crucial aspect that often gets overlooked but plays a critical role in maintaining a sailboat is mast steps. These handy little devices are not only essential for scaling the heights of your boat ‘s mast effortlessly, but they also serve as platforms to perform maintenance tasks efficiently. Whether you are a seasoned sailor or a novice just getting acquainted with sailing, we have gathered some expert tips and tricks to help you maintain and use mast steps safely.
1) Regular Inspection:
Like any other component on your boat, mast steps require regular inspections to ensure their functionality and structural integrity. Before each voyage, take the time to closely examine the condition of all your mast steps. Look out for signs of corrosion, loose or damaged fasteners, cracks, or any other visible damages that might compromise their safety. By detecting potential issues early on, you can prevent accidents from occurring while ascending or descending from your mast.
2) Corrosion Prevention:
As sailors well know, exposure to saltwater can accelerate corrosion on metal surfaces. To keep your mast steps in top-notch condition, it is vital to implement preventive measures against corrosion. Applying an anti-corrosive coating like zinc chromate paint serves as an effective barrier against saltwater-induced damage. Additionally, regularly rinsing off salt residue from your mast steps with fresh water after each sailing trip helps prolong their lifespan.
3) Lubrication and Tightening:
Over time, due to constant exposure to harsh environmental elements such as wind and waves, screws or bolts securing the mast steps may loosen up. To ensure safe usage and stability while climbing up the mast, it is imperative to periodically inspect and tighten these fasteners using appropriate tools. Additionally, consider applying a small amount of silicone lubricant to pivot points or hinges within your mast step system for smooth operation.
4) Consider Non-Slip Enhancements:
As you ascend or descend from the mast, the journey can become hazardous if your footing is compromised. Adding non-slip enhancements to your mast steps significantly decreases the chances of slips and falls, thus ensuring your safety. Non-slip adhesive tapes or rubberized coatings are popular options that improve traction on mast steps.
5) Proper Climbing Technique:
Maintaining proper climbing technique is essential for avoiding accidents when using mast steps. Always ensure both of your hands are free while climbing, as holding tools or equipment increases the likelihood of losing grip and falling. It is also crucial to wear a snug-fitting harness to maintain stability and enhance safety throughout the process.
6) Do Not Overload:
While mast steps are designed to support sailors during maintenance tasks, it is crucial not to overload them with excessive weight or pressure. Mast steps have their limits, and exceeding these limits can result in damage and compromised safety. Be mindful of the maximum load specifications provided by the manufacturer and distribute your weight evenly across multiple steps when necessary.
By following these tips and tricks diligently, you can guarantee a safe and hassle-free experience when maintaining or ascending your boat’s mast using mast steps. Remember, prioritizing safety ensures that you can enjoy sailing adventures with peace of mind while taking full advantage of this invaluable accessory. Happy sailing!
Recent Posts

- Sailboat Gear and Equipment
- Sailboat Lifestyle
- Sailboat Maintenance
- Sailboat Racing
- Sailboat Tips and Tricks
- Sailboat Types
- Sailing Adventures
- Sailing Destinations
- Sailing Safety
- Sailing Techniques
Attainable Adventure Cruising
The Offshore Voyaging Reference Site

- Surviving Storms While Coastal Cruising—21 Preparation Tips

In Part 1 I shared the strategies Phyllis and I used in over 30 years of voyaging to keep our boat safe from storms when coastal cruising, and in Part 2 we looked at how we selected anchorages or harbours when something nasty was on the way.
Now let’s dig into getting ready for the storm.
The good news is that over the years I have written articles and chapters to support most of the tips that follow.
I am assuming that you have read our Anchoring Online Book, so I will not be duplicating anything about anchor gear selection or anchoring techniques here.
Login to continue reading (scroll down)
Please Share a Link:
More Articles From Online Book: Heavy Weather Tactics:
- Introduction—We Need A System
- Goals For A Heavy Weather System
- Rogue Waves Are Not Bad Luck
- Just Get a Series Drogue Designed By Don Jordan…Dammit!
- Jordan Series Drogue Attachments And Launch System
- Alternatives to Chainplates For Drogue Attachment…Or Not
- Jordan Series Drogue Retrieval System
- Jordan Series Drogue Retrieval—An Alternative From Hal Roth
- Series Drogue Durability Problems
- Battle Testing a Jordan-Designed Series Drogue—Round 1
- Battle Testing a Jordan-Designed Series Drogue—Round 2
- Real Life Storm Survival Story
- Series Drogues: Learning From Tony Gooch
- Series Drogues: Learning From Randall Reeves
- Retrieval of Dyneema (Spectra) Series Drogues Solved
- When Heaving-To Is Dangerous
- Stopping Wave Strikes While Heaved-To
- Determining When Heaving-To Is Dangerous
- Transitioning From Heaved-to To a Series Drogue
- Storm Strategy—Fore-Reaching
- Surviving A Lee Shore
- Storm Survival Secret Weapon: Your Engine
- Storm Survival FAQ
- Companionway Integrity In A Storm
- Q&A: Safety of Large Pilothouse Windows
- Surviving Storms While Coastal Cruising—12 Strategy Tips
- Surviving Storms While Coastal Cruising—9 Tips for Anchorage and Harbour Selection
- Gale And Storm At Anchor Or On A Mooring Check List
- Summary And Conclusions For Heavy Weather Offshore Section
Hi John, Thanks for bringing it into a complete list. Even though many here will nod in agreement on most of the points mentioned, we may not always remember all of them, or not prioritise them suitably when distracted by the approaching scare. I strongly believe in check lists for various topics. This is one such. This article is a good inspiration to improve ours. The list must be made specifically for each boat.
One point I had not put on ours is the one on diving masks. That’s in spite of having experienced how impossible it is to look against the wind when it really pipes up. From that experience, when I didn’t have it, i wonder if the mask might need to be low windage, to stay on. Or perhaps that’s into the level of storm when we shouldn’t be around.
The experience was a “bomb” in Oslo about 1984, during a race. Totally sheltered area with low hills on all sides. According to the National Met office, the strongest gusts on the water were at least 150 knots, possibly much more. We had nothing up, on a 33 foot cruiser/racer with 60% of total weight in the lead fin keel. The mast top was still slapping on the water surface.
I was hanging on in the cockpit trying to stick my head up, but fearing that hear and skin might blow off. Probably not real, but a mask (not in my mind at the time) would have to be low windage to stay on. Maybe full face? Luckily the peak of it lasted only a few minutes, but it created chaos and destruction. I had forgotten the relevance of this. I’ll be looking for a suitable mask.
I’m sure you’re right that 150 knots a mask would not stay on, but given that would be the wind speeds in a Category five hurricane I’m not sure it matters that much. That said, I guess another option would be competitive swimmer goggles, which, I think, would stay on at higher wind speeds, although I don’t think even goggles would stay on in that much wind.
Hi John, An excellent primer. I was reminded of one surprise I encountered when I saw the picture of MC on the wall. Some walls in the fishing villages are quite a bit deeper than your picture and if you sail into Sept and Oct in Newfoundland, you will find yourself in gale conditions with some regularity. Our surprise was that we found that our shrouds (not too far from the lower spreader even) came dangerously close to hitting the sides of the wharf when things heated up and the wind got us rocking and a bit of water movement contributed and it was low water. It was a pretty helpless feel to watch. We carry oversize fenders and extra of them and a fender-board, but they are of the sausage variety and even strategically deployed we were too close to the wall. We liked the idea of round fenders, but never really found the need and on our 40-foot boat the round ones of sufficient size were just too hard to store. But, in this particular application, they were far more effective when it came to providing distance from the wharf (we borrowed some really big ones from generous local fishermen). My best, Dick Stevenson
Thanks John, a really good summary.
A comment on the use of electronic navigation aids if I may, from the perspective of an ex-professional navigator.
We would check our radar reflectors and their rigging – but perhaps consider windage too. And turn on an active radar transmitter (but we don’t have this). Ours is a single large passive reflector 40% up the mast, and this is fixed so not easy to remove. But we also have two smaller cylindrical reflectors we can hoist to the lower spreaders on our flag halyards, but probably wouldn’t in a storm because of chafe and the added windage – any thoughts?
If conditions are such that we are keeping anchor watch, we will have the radar on and running, not just on standby. Even our modern radar takes thirty seconds to start up from standby, and then it takes me a further minute or two to build good situational awareness, especially in heavy rain when smaller targets like anchored vessels may be obscured during most sweeps, and then appear momentarily on others. Having the radar on goes double at night and in heavy rain and having time to optimise the “gain” adjustments for rain and sea clutter is key to maximising effectiveness.
Turning AIS transmit ON will help others be aware of our proximity, especially boats without radar, but with an AIS enabled chart plotter. AIS receive to ON, which for us can be overlayed on the radar screen, as long as it doesn’t get too busy.
Old-fashioned plotting of the multiple moored vessels in the anchorage with a chinagraph pencil on the screen, helps us quickly identify boats on the move and any on a collision path. This will also facilitate identification of CPA and TCPA. Our radar will compute and display this for us, as will AIS, but I still like the analogue display.
Mark also with chinagraph our chosen navigation points, this will tell us immediately if WE are moving. And try not to rely on buoys as these move.
Take and record visual compass bearings of each potential hazard, especially anchored vessels to windward and check these against the radar bearings (and range) to positively identify each target. Repeat at dusk / dawn when our situational awareness needs to be reset.
Remember vessels to leeward, especially large vessels, which will often be anchored further out in deeper water. Larger vessels, especially steel vessels, will act like cliffs.
Repeat the above for our chosen navigation points, bearings and distances off. And p lan and plot our course out of the anchorage if need be, as per thinking in the Part A article. Especially note first course and distance.
Keep an active Channel 16 watch. In NZ we can check in with Coastguard and ensure they have our latest TR. Remember to charge and test our portable VHFs.

IMAGES
COMMENTS
Build the mast either track up or track down depending on whether the crane will be set up forward of where the mast sits or aft of where the mast sits (bow-in or stern-to) Hang all standing rigging. Ensure all turnbuckles and stays are new or have been inspected and serviced. Install spreaders and make/ seize spreader ends onto the wire.
Stepping the mast on a sailboat is a fundamental process that marks the beginning of every sailing adventure. It involves raising and securing the mast into its proper position, allowing for the attachment of sails and rigging, ultimately enabling the boat to harness the power of wind and embark on exciting voyages.
This distinction refers to the location of the mast step, or where the base of the mast is located. With Keel Stepped, the mast stands on the keel at the bottom of the hull, while Deck Stepped means that the mast stands on the top of the deck. Deck Stepped. The most obvious difference between the two from a livability standpoint is the presence ...
Walk the mast aft and drop the mast foot into the mast step on top of the deck, keeping the mast in center line of boat, insert the pivot bolt and locking nut. One crew member should pull on a line tied securely to the forestay while another pushes up on the mast and walks from the cockpit forward.
Short answer stepping a mast: Stepping a mast refers to the process of installing or raising a sailboat's mast. It involves carefully aligning and securing the mast on the boat's deck, while ensuring proper tension and stability. Various techniques and equipment can be used for this task, depending on the boat's design and size.
1. Check by sighting up the backside of the mast to see how straight your spar is side to side. You can take a masthead halyard from side to side to ensure that the masthead is on center. Do this by placing a wrap of tape 3′ up from the upper chainplate pin hole on each upper shroud. Cleat the halyard and pull it to the tape mark on one side ...
Short answer sailboat mast step: The sailboat mast step is a structural component located at the base of the mast, designed to support and secure the mast to the deck. It provides stability and distributes the loads generated by the sail rigging. The Importance of a Sailboat Mast Step: Guide to Understanding the BasicsTitle: Navigating.
3. As the rig rises, you can start walking the foot of the mast forwards, towards the mast step. With a two-spreader rig, it's best to put the strop below the top spreaders if possible. This will lift the top of the mast first, so the heel will then need to be 'walked' along the deck of your boat towards the mast step as the rig is lifted.
This process involves removing or installing the mast on your boat. Here's a step-by-step guide for safe mast handling. Step-by-Step Guide for Safe Mast Handling. Gather the necessary tools and equipment. Disconnect all electrical and rigging connections. Use a crane or mast-stepping system to safely lower or raise the mast.
Stepping the mast is a pain, but re-rigging is a bigger pain. Meriachee. Aug 1, 2011 3,972 ... The boat is a Sport Catalina 22 with a mast raising option patterned after the Hunter system but with side stays on the mast to attach to the deck so it will not fall sideways.
Pulling the mast sideways. On our J/35, the mast is stepped belowdecks and must be supported and sealed at the partners. The best way to do this with any mast is by using a pourable rubber called Spartite. With that system, you install the mast, get it positioned perfectly, create a dam with foam and clay at the bottom of the gap between the ...
Mast stepping is the process of raising the mast of a boat. It may be a ceremonial occasion on a new boat, a necessary step (as in stepping the mast of a small sailing dinghy or gig), or simply routine (as following seasonal maintenance on a sailboat). The ceremony involves placing or welding one or more coins into the mast step [clarification ...
Andrew Price explains how to use a gin pole and assemble tackle to raise and lower a sailboat mast. This is a 30' mast on an O'Day 26, and the gin pole was m...
I am surprised there is no videos on youtube of someone doing a mast stepping on a Catalina 30. If you have any please share them. List for a mast service that I am aware of at this point. 1. new standing rig. 2. new antenna wires and maybe antenna. 3. inspect and replace mast head pulleys as needed. 4. seal around mast base.
The mast step, whether it is inside or outside the boat, is a critical part of the installation as it takes the considerable downward stress of the mast and transmits it to the hull structure. There will often be a pad of some sort in the mast step, which acts as a shock absorber.
Whatever you choose, with two or more per step, youll need quite a few to attach alternating steps the recommended 16″ to18″ apart. Measure and divide to get the steps evenly spaced. Youll want two opposing steps for standing at the top; consider carefully how far these two should be from the top of the mast.
Stepping Up: Installing a Sailboat Mast Stepping a mast may provoke anxiety among beginners, but fear not! With careful planning and some assistance, it can be an invigorating part of preparing your sailboat for action. From proper alignment to securely attaching shrouds and stays, following step-by-step procedures helps avoid mishaps during ...
The Corsair 750 has the easiest rig stepping system I have used. Basically it is a hinge that slides into place that the mast is pinned into. Then you attach a gin pole to the mast, and crank the whole mess up with the trailer winch. It also uses two side stays to hold the mast center lined as it goes up.
As a sailboat, we are often given a hard time (usually in jest) for the added cost of removing and shipping the mast multiple times during our Great Loop journey. The prices I outlined above add up to just over $6,000. However, compared to fuel costs of reasonably fuel-efficient and cost-conscious trawlers of about $10,000 on fuel alone (though ...
Mast Up Sailboat Mast Raising System is an easy mast stepping device and supports your mast while trailering or storing. Now just 2 people can raise any mast. Ideal for short handed mast raising. Fits virtually any boat with an outboard rudder (see the Mast Up Cockpit version for through-hull rudder boats). Mast Up telescopes to 9-1/2 feet.
Spacer Plate or Riser for K-1374 Hinged Mast Plate Assembly is 1/2" thick, and fits under Bottom Hinge plate to increase Mast height by 1/2" or multiples of 1/2". Useful where mast needs to be cut, or as an easy way to solve rigging stretch problems. High-density Plastic Spacer Plate is 6 1/2" long x 3 3/4" wide x 1/2" thick, and is drilled to match the K-1374 Bottom Plate (K-9517).
When un-stepping the mast there are several things that need to happen in preparation for the actual mast removal. The following tips and procedures are in line with the methods we use for boats up to 55′. Small boats or big boats alike, first things must come first. All of the sails and sail covers...
Short answer: Mast steps on a sailboat Mast steps are devices installed on sailboats to aid in climbing the mast. They consist of small platforms or rungs attached to the mast, allowing sailors to ascend safely for maintenance or rigging purposes. These sturdy steps provide stability and ease of access while working aloft. 1) Introduction
Strengthen your mast with top-quality sailboat mast parts from Fisheries Supply! Find mast steps, mast hardware, mast tangs, & more for safe & secure sailing. Need Help? Customer Service. ... Folding Step. Available in 2 options. $38.14 - $43.70. In Stock. Sea-Dog Line Folding Sawtooth Edged Step . SKU: 68787 | Item ID: SDL 328025-1. $26.34. In ...
According to Perini's website Bayesian has a 75m (246ft) mast which it claims is the tallest aluminium mast in the world. ... "Vessels aren't designed to be out sailing in that weather - 65 to ...
Any sailor who neglects this step when a storm is forecast to be Force 9 (41 to 47 knots) or better, has zero seamanship skills…and is an idiot who is a menace to his fellow cruisers too. Strip cockpit enclosures. Get rid of all that crap on deck. If we can't get that paddleboard below, it should not have been on the boat in the first place.