- Advertising
- Find the Magazine
- Good Jibes Podcast
- Boat In Dining
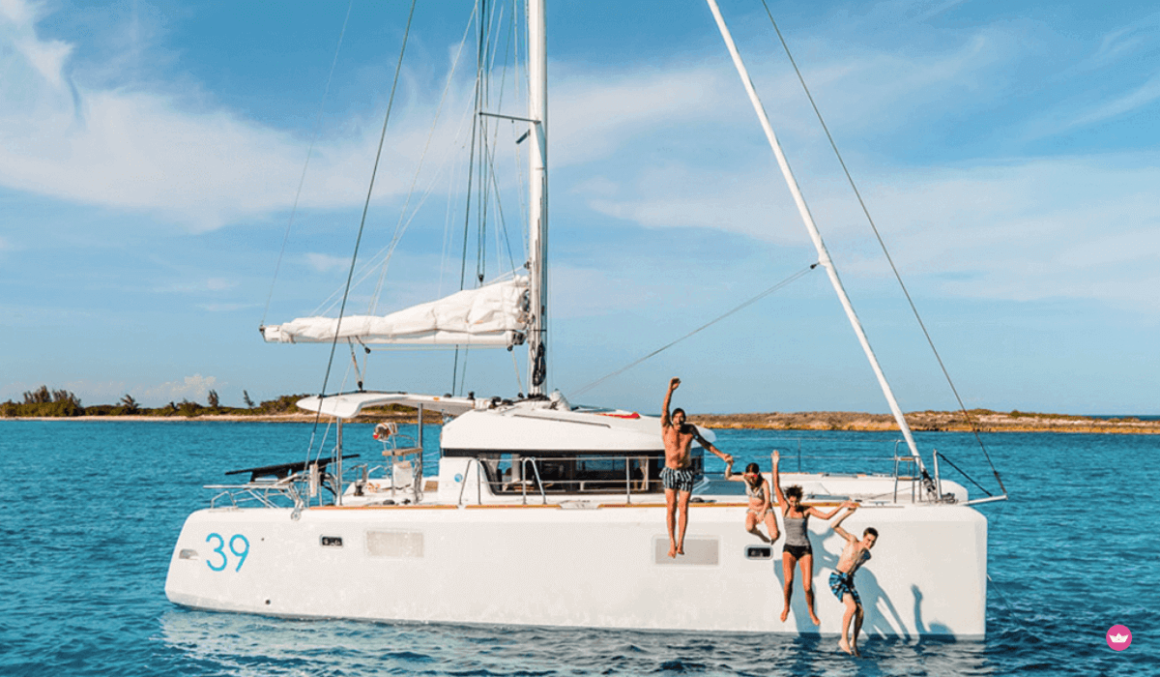
- Sailboat Charters
- Business News
- Working Waterfront
- Youth Sailing
- General Sailing
- Repair & Maintenance

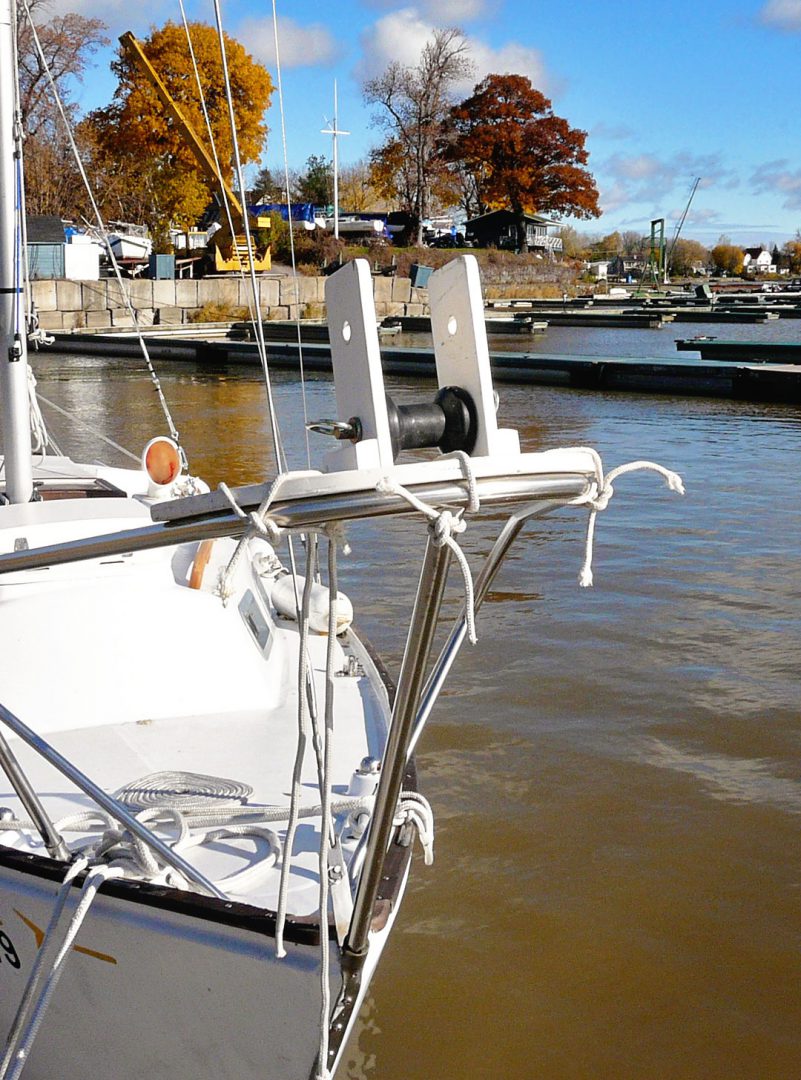
Raising the Mast of a Small Sailboat with The Resourceful Sailor — The Solo Version
It’s been a while since we’ve heard from The Resourceful Sailor. Since he lowered the mast on his boat Sampaguita last June, he’s been busy taking care of several boat projects. Now he’s back on deck and has sent us this detailed report on raising the mast.
What goes down must go up? After a rig refit, the mast of Sampaguita , a Pacific Seacraft Flicka 20, was ready to be raised. Still in her Port Townsend slip, the process was, generally, the opposite of lowering, presented in ‘Lectronic Latitude on June 16, 2021 — Lowering the Mast on a Small Sailboat with The Resourceful Sailor .
It required the same bridle setup. The boom, again, would act as a gin pole to gain the proper angle for leverage. The mainsheet block and tackle would do the heavy lifting. Rather than write the same thing again, I will focus on the differences between the two procedures and provide some previously left-out insights. In doing this, I will presume that you have read or will review the installment mentioned above.

For raising, only the cap shrouds and the headstay needed to be attached to their respective chainplates. Out of respect for Murphy’s Law, the other wires were secured tightly to the mast to mitigate their inclination to get snagged. Snagged wires like to kink, and whether new or old, it is unsatisfying, not to mention detrimental to their longevity and strength. The turnbuckles were wrapped in rags and secured to the mast, preventing them from scratching and banging into anything (everything.)

The bridle setup was more challenging to organize with the rig down than up. Since I had new wires, I needed to re-seize the stainless steel rings to the cap shrouds. It required holding up the wire to determine the proper pivot points with the mast. Then the opposing force lines to the lower stay chainplates were added, conceptualizing the rigid triangle necessary to maintain the pivot points. With the rig up, it is easier to build and see this. But down, it is a floppy mess. Then, a line was attached to each ring, ready to lead to a bail on the boom. A block and tackle served nicely for this on one side for ease of adjustment. These guylines will provide the opposing forces to keep the boom centered.

After that, I moved the mast to the tabernacle and pinned its base in the ready position. A final review of the halyard and wire leads and spreader orientations was done. A reminder: Always be on the lookout for snagging wires and lines whenever you move the mast.

The boom, as a gin pole, could then be added. When lowering, it was already in position and there was only the matter of attaching the bridle lines. However, with the mast down, the boom would be attached starting in a vertical position, which involved some boat yoga. I shackled the mainsheet and topping lift to its outer end. Lots of slack was fed into those lines, allowing for lifting it straight up. While holding it so, I pinned the mast end to the gooseneck. I picked up the previously-led guylines (the line and the block and tackle) and attached them to the boom bail. I tightened and adjusted the mainsheet, the topping lift, and the guylines until the boom was centered and vertical. The opposing forces held the gin pole in place.
With the correct bridle setup, the mast base in the tabernacle, and the gin pole in place, it was simply a matter of hoisting the mast. On a Flicka 20, the round bar traveler and the four-part mainsheet block and tackle are very accommodating to providing the mechanical advantage necessary for raising and lowering the mast. To a soloist, this advantage was indispensable. It took two hands and a bit of leaning to get it moving, but it became easier as it went higher. An eye was kept on the centerline alignment of the mast and boom, making sure the bridle prep was accurate, and watching that the wires did not snag.

The accompanying video shows the raising from a first-person view and solo. In contrast to lowering the mast, gravity is less of a friend, so the ascent is slower, with a bit more heave-ho. There is no shame in re-lowering the mast to adjust the bridle lines or sort out the wires. It is better to correct them early than to think something will be all right when it is not. Raising and lowering the mast is not rocket science, but 99% of the gig is proper preparation. If something goes wrong, it could be catastrophic, so double- and triple-check. It can be intimidating at first, but it is simple physics and simple tools at work. Remember, keep it safe and prudent, and have a blast.

This is so stressful to watch! I would have never had the courage to do it myself. As always, you have my respect and admiration. Well done!

Rusty, thanks for the kind words, and thanks for reading.

Joshua, Thank you for taking the time for so nicely relaying your experiences on single-hand stepping the mast on your Flicka. I am currently refining this design process for my own boat, and am thus interested in the finer details. My initial questions are two: First, concerning the method and material for seizing the bridle to the cap shrouds: As you state, a properly rigged bridle is key to making the process work. How did you analyze the adequacy of your seizing method and the loads that would be experienced?
Temporary seizing is a good place to start for me, but since I do this spring and fall every year, I have considered incorporating a more permanent nicropress and cable pigtail for the ring attachment (the loads there are not very high). A triangular plate in the top shroud with attachment points for the bridle connection points would be nicer, but more expensive to implement. Either way, it is probably prudent to use a temporary seizing first, to demonstrate dimensional functionality prior to a permanent solution. Second, I am sure you release the cap shrouds to allow the bridle arrangement some up/down movement as a result of the mast butt movement in the tabernacle during stepping. Somehow I must have missed that. Once upon a time I tried raising the mast with very slack uppers (guessing at what was needed instead of graphical analysis or calculations) instead of the bridle approach (all else was like your scenario). Because the slack was inadequate and no bridle, I managed to bend my boom out of alignment. :o(. A good machine shop worked that out. As long as the mast remains vertical through the lift, there isn’t much load on that ring connection, but its job is keeping the mast in a vertical/perpendicular orientation through the lift. But if some kind of unforeseen incident would create shock loading on the seized ring, (say even 2 pounds of lateral movement (force at the truck) that would correlate to about 56 foot-pounds of moment (engineering statics) applied at the ring due to the long lever arm of the mast. If it were 5 pounds force perpendicular at the top of the mast, it would correlate to up to 140 foot pounds. In my view, a shock load of 5 pounds or maybe more, isn’t an unlikely scenario, considering Murphy. I can’t think of a way to analyze the strength of the seizing, and prayer does not work for me. So, how did you analyze the adequacy of your seizing method and what did you use? Wire? In my case, I have been stepping my mast at least annually, on my Lancer 25 for more than 35 years. I usually do it on the hard, or in the water if launching was via travel lift or something else that dictated the mast needed to be down when launched. But in at least one case, years ago, while sailing near Cowichan Bay at Vancouver Island, the jib wire jumped the sheave (a result of rough water and a slack line while dousing the jib) at the truck, and jammed along-side of the sheave when I tried to pull the sail down. I wasn’t sure of the problem at the time, but the sail definitely was not coming down, so I wrapped the jib halyard around the forestay to try to contain the partially-filled sail and considered my options. Luckily, upon checking my depth sounder, and found some shallow 30’ water (unheard of up there) and dropped the hook (probably on a rock bottom) and it held well enough for the task at hand. My mate always helped tail the line connected to the backstay at the winch and through a clam cleat to hold things if I needed a rest. I just loosened and released the rigging as necessary, muscle-dropped the mast and used the dinghy to go forward and sort things out. It was a very high reach, but I was successful. After I got the mast back up it started to rain….. I later drilled a hole in the truck to insert a stainless wire restraint, so the halyard cable could not be thrown off the sheave again. I have toyed with analyzing more mechanical methods for raising the mast now that I am older, less strong, and my first mate has passed on. That is what piqued my interest on your article. The Flicka is ready-made (Bingham designed it in; I am sure) for this raising procedure. The Flicka doesn’t have many complications, since there are double lowers in perfect position for the bridle attachment, and the cap shrouds are neatly centered to the mast. The Lancer is not so nice. It has a single set of lowers, and the chain plate has about 1” between the 2 connections for uppers and lowers. These are also set about 3” aft of mast centerline. The original Lancer design was a tabernacle (not exactly the proper technical term, but we will go with it) with the slot in the tabernacle tabs, and a through bolt for securing the mast. I would say this is the usual case for production trailer sailor boats. I have never been wild about the uneven up-and-down friction-prone mast butt action and the associated movement reflected in the rigging connections during stepping. I do have a strong toe rail to connect the bridle, but the chain-plate bridle connection will not work geometrically. I have purchased a hinged tabernacle plate from Ballinger Spars, which will smooth out the rotational process down there. However, the negative thing it does, is place the pivot point about 3” in front of the mast centerline. The hinge movement is forward of the mast (eccentric) and translates to about 3” up-and-down movement (tensioning or slacking) of the cap shroud/ bridle assembly while stepping the Lancer mast. With the eccentric hinged plate pivot, (while rotating up), the mast butt raises momentarily for about 1/4” (slackening the rigging) and then drops down 3” (requiring an equal amount of rigging slack or things will go into tension, which is no good). The shrouds or bridle assembly must allow a lengthening of 3” during rotation of the mast butt into final position (as determined by graphical analysis). On lowering, the movement is opposite, so the shrouds will slacken throughout rotation without causing any tension problems, and there is plenty of play being created to keep any stresses from developing. I suppose the key in my case is to set the bridle configuration when the mast I up, thus ‘dimensionally building in’ the 3” movement required into the bridle/shroud system. Thoughts? The following is an analysis of the forces on the Lancer rigging dimensions and mast weight: The mast (Kenyon 3550) is 28’ long and weighs in at 62 pounds. I arbitrarily rounded to 70 pounds for these calculations. The moment to initiate lifting the mast is 980 foot pounds. (28’x half the mast length x70 pounds – assume equal weight distribution per foot.). That is to say, if the mast is on the ground and you lift one end, it will take 35 pounds force through a distance of 28 feet (=980 foot pounds of moment acting on the mast to lift one end off of the ground). But in raising the mast, the force is pulling more aft than up (requiring vector analysis which I will get to). I am currently considering a 10’ jibboom mounted at the hinge point and not higher on the mast where the boom lives, which changes the numbers- (no bending forces on the mast – which are not really great enough to mean much to the 3550). Also in the Flicka case, boom length (as with lancer) is probably about 8’. A 10’ jibboom lowers the forces more than an 8’, but using the existing spar is practical. It is probably prudent for me to reconsider and re-calculate using the boom in its usual position. A few years ago, I designed and had a fitting made to connect a jibboom to the mast foot, so I was considering using it. So, running the numbers based on the Lacer backstay distance to the mast and initial lay of the mast, it would take (rounded) 103 pounds of tension in the backstay from the mast truck to the jibboom, and 125 pounds of tension from the jibboom to the backstay connection point. Compression loading in the 10’ boom is 114 pounds. Yes, one can use Eulers equation to analyze buckling forces, but I didn’t do it. Following good engineering practice with a factor of safety of at least 2, these numbers would be double the values shown for design checking of adequacy of rigging and spars. Confirming your experience, as the mast goes up, the center of gravity moves aft, requiring less and less force to raise the mast (and the geometry is changing) to increase efficiency of the forces as the mast goes up. 30degrees=858 ft lbs, 45 degrees=700 ft lbs, 70 degrees=350 ft lbs. 70 degrees into the lift, it would equate to 10 pounds of perpendicular force applied at the top (the center of mast mass has shifted to only 5’ in front of the final mast position). With a 4:1 ratio applied on the backstay, the pull on the line is about 31 pounds force for the Lancer System. The Flicka system is somewhat more (I don’t have the dimensions to analyze it), but from your description it was probably 40 pounds or less to start the raise, and then the tension required reduces as the mast goes up. Since the pull for the lancer scenario calculates in at around 31 pounds, I am planning to run the bitter end of the 4:1 through a block at the stern, to the bow, through a blocks on the bow, and use the anchor windlass to pull the mast up (the windlass maximum has 400 pounds of tension available). So even with friction losses, there should be no issue. I have a windlass switch in the cockpit, and a second hand-held remote at the forward hatch. It is a very convenient setup for going forward and guiding the mast or sorting out issues. Also, after my spouse passed, I put a winch at about 5’ high on the mast, and I ran the raising line there, instead of needing someone tailing at the cockpit. It is easier (almost necessary) to have a helper with me at the mast. I have lowered the mast alone with this manual system by taking wraps on the winch and playing out slack while catching the mast. However, without a jibboom, the forces are tougher to man-handle alone at the end of the lowering process. Comments are appreciated, as there is always something else to be considered or learned. Thanks
Jim, Thanks for reading and taking the time to engage. You have certainly been thinking about this! You get far deeper into the physics than I ever have and I suspect, many readers and sailors. Regarding seizing the rings on, I don’t overthink it. I have some net twine and I wrap and figure-eight it until I am sure it is strong enough. They are not permanent installations but are easy for me to put on as needed. Thoughtful marlinspike would make a nice permanent install. I have seen a different Flicka install that had the cap shroud turnbuckle placed at the pivot point. This removed the need for a seized-on ring and also gave a nice pivot point that does not bend the wire. Kinking the wire is my big concern, but the forces and the pivot point have not been high enough to do this, so without doing the physics calculation, the stress is low. Regarding the extra slack in the cap shrouds to accommodate that extra lift that occurs as the mast tips forward, no, I did not mention it, but it is a thing. I learned of that when I did not have them slack enough on a lowering. I recognized what was happening, so rather than forcing it, I backed off, adjusted, and restarted. Article scope naturally means some things are left out. That is good intel on bending your boom though. I have found on a sailboat, that if something feels like it is not running free, something is wrong. I don’t force it.
Thanks for the reply, Joshua.
I am leaning toward installing a permanent 4-hole triangular plate in the cap shroud at the bridle connection. This would create clear movement for hinge point attachments, and address stresses that can occur there. The rest is just a matter of rigging things up.
Best wishes in the new year.
Leave a Comment Cancel Reply
Notify me via e-mail if anyone answers my comment.
Racing Continues Today Dramatic Collision at SailGP Sydney A collision between Great Britain and Japan took both teams out the race — and out of the remainder of the Sydney SailGP regatta.
TEMPORARILY BOATLESS What Should Chuck Hawley’s Next Boat Be? Chuck Hawley has sold his most recent boat and is hot on the trail for a new one.
Sponsored Post Skippers Wanted: US Coast Guard-Licensed Captains for Charters and Private Lessons For power & sail. Hourly rate from $50 up. Weekend and weekday work available.
Let Your Lights Shine Lighted Boats Continue to Dazzle the Bay The Lighted Boat Parades continue! Tonight, the St. Francis YC’s Decorated Boat Parade in San Francisco will travel between Crissy Field and the Marina Green.
Sponsored Post Stuff Your Stockings with Latitudes The perfect stocking fillers. And they're free!
Tropical Boating
Stories about Boats and Boating
- The Perfect Solo Mast-Raising System for Small Sailboats
April 19, 2010 By Tom 18 Comments

I have seen lots of different techniques and contraptions used to raise and lower the masts on small sailboats. All suffer from the same problems for solo sailors, and I recently came across a system that solves all of them neatly and for a fairly low price.
While not tremendously heavy, small sailboat masts are long and awkward to handle, tending to sway to one side while being lowered or raised. It is possible with most boats to stand at the stern and pick up the mast and just start walking forward and pushing it up. The problem comes when you have to step up onto the cabin top while holding a heavy mast high above your head. It's usually a long step, and most people can't do it.
Instead of lifting the mast by hand, many opt for a gin pole or A-frame and use the boom vang to get the mechanical advantage needed to pull the mast up.
Some trailers are fitted with a tall pole, allowing the trailer winch strap to be led to a halyard and used to crank the mast up and down. The A-frame support tends to hold the mast over the center of the boat, but gin poles on the boat or on the trailer will allow it to sway back and forth unless stabilizing baby stays are used.
Using the trailer winch to crank the mast up and down means that singlehanded sailors can't see what is going on up on the boat, and it obviously precludes raising and lowering the mast while on the water.
These difficulties are further compounded by the fact that small sailboats are covered with winches, cleats, boarding ladders, small outboard engines, etc., all of which tend to snag the shrouds or backstay as the mast goes up. If something snags, a sailor who is rigging the boat alone must find a way to hold the mast in a partially raised position while clearing the snag.
It is important that the solo sailor be able to keep a sharp eye on all the rigging and stop immediately if any resistance is felt. A snag can mean moving from your position on top of the boat or at the trailer winch all the way to the stern of the boat, where the backstay has managed to catch the rudder or boarding ladder. It is often impossible to leave the mast precariously hanging in the air, so it must be lowered to fix the problem.
The terminal fittings on the ends of the shrouds are strong when in position and tensioned, but they can lodge themselves sideways as the mast is coming up and bend when placed under load. The fittings that hold the upper ends of the shrouds in the mast must rotate as much as 90 degrees as the mast goes up, and if they lock up instead of turning freely, it is easy to bend the swage fitting when they come under tension as the mast is nearly stepped. Down at the deck, the fittings must also rotate as the shrouds go from lying aft on the deck to standing up straight. Singlehand sailors must watch the ends of the rigging carefully to ensure that all of them are operating as intended while the mast is going up. If a fitting binds up, once again it becomes necessary to either leave the mast hanging or put it back down to correct the problem and try again.
Boats with roller furling jibs present an additional problem, as the jib furler drum tends to bounce down the deck and the sail itself acts like a giant snake having a seizure. The furler drum and forestay end fittings can scratch the deck of the boat and can get snagged on bow cleats, opening hatches, and other hardware around the foredeck as the mast is being lowered. When raising the mast, the roller furling jib generally does not want to slide forward on the boat by itself, and must be pulled along and kept near the center of the boat to avoid kinking the forestay wire or binding up the fitting that holds the forestay to the mast.
Last but not least, the mast needs an appropriate place to land when it comes down , and a good place to start on its way up. Sailors must use a mast crutch of some kind, and for trailering a sailboat it helps if the crutch has two positions: a low position for holding the mast during transport, and a higher position to give a little head start when raising the mast. Having a roller on the top of the crutch is also handy for solo sailors because it makes it easier to move the mast back and forth from trailering position to the mast step.
The Mast Raising Solution for Single-Handed Sailors
I recently saw a solution that addresses all these problems and makes single handed mast raising on the water or on the trailer a fairly simple procedure . This system was in use on a Precision 23 sailboat, but can be used on any small sailboat. The boat has a mast raising pole for a MacGregor 26M with an ingenious addition to help manage the furling drum, a set of baby stays to hold the mast on centerline, and a small dinghy motor davit mounted on the stern and outfitted with a U shaped mast crutch. The owner of the boat put a lot of thought into this system because he wanted to sail his boat from his dock behind a low bridge from the harbor. Even though it uses a MacGregor mast-raising pole, this system can be installed on nearly any small sailboat.
Click on any photos for a larger view:
| Above: A side view of the sailboat with the mast raising system ready for use. This system can be installed and used on nearly any small sailboat to make solo mast-raising easier. | A closer look at the MacGregor mast raising pole and how it is attached to the mast. The MacGregor pole is a tiny trailer winch mounted on an aluminum tube with a block and eye strap on opposite sides of one end and a fitting on the other end to secure it to the mast base. The winch has a clutch instead of gears and a pawl lever, and can be cranked in either direction without flipping a lever. It can also be let go at any time without freewheeling, an important safety feature in this application. A bail is installed in the mast about 5' off the deck. There is a line tied to the middle of the mast-raising pole that has to do with furler management, as the next pictures illustrate. |
| How the mast raising system is attached at the bow of the boat. A line from the eye strap on the tip of the MacGregor pole leads to a large snap shackle that snaps around the bow rail. The line from the middle of the mast raising pole, with a little slack left in it, is also tied to that large snap shackle after being led through a snatch block which is clipped to the furler drum. | As the mast is lowered, the furler drum rides up that piece of line and ends up suspended above the forward hatch when the mast is down. On the way back up, the furler rides back down the line, remaining over the center of the boat and safely clear of the deck. In addition to keeping the furler from scratching the deck or getting hung up on something, this little bit of rigging also tends to force the furled jib to hang above the center of the mast. |
| This picture shows how the MacGregor mast raising device is attached to the tabernacle mast base of the Precision 23. The plates used are actually a small boat hinged mast step available from Dwyer, and they happen to fit perfectly on the Precision 23 mast step, also from Dwyer Masts. One hole through the mast step on the 23 was all that was required to attach the unit. | This picture shows the upper end of the MacGregor mast raising pole and the attachment to the mast of the P-23. The line from the winch on the MacGregor pole is led through the block at the tip of the pole and attaches to a ring. Also attached to the same ring are the two stabilizing stays which prevent the mast from swaying. The ring is shackled to a bail through the mast, so the one shackle connects the two baby stays and the mast raising line to the mast bail all at once. |
| The mast raising "baby stays" on a sailboat must be positioned in line with the pin holding the base of the mast in the tabernacle. As the mast rotates up or down around that pin, the raising stays remain taut, preventing any side to side motion by the mast. The problem on a Precision 23 is that there is no point on the boat which is in line with that pin. This problem was solved with a pair of stainless steel chains attached to stanchion bases in front of and aft of the mast on each side of the boat. When stretched tight, there is one link of chain on each side which is aligned with the mast tabernacle pin, and the stabilizing stays are shackled to those two links of chain. A Com-Pac 23 owner suggested locating that point in space by putting a long dowel the same size as the mast tabernacle pin through the tabernacle and using it to locate the correct link of baby stay chain. This setup was made so that the mast raising system could be quickly disconnected but not completely detached. The mast raising pole could just be left to rest on the deck with all the lines and hardware secured to it while going for a short sail. In that position, the chains would clatter around on deck, so the owner installed canvas sleeves over the chains to protect the gelcoat on the deck and reduce the noise. | This picture shows a small dinghy engine hoisting davit installed in the stern of the Precision 23, serving double duty as a mast crutch. To serve as a mast crutch, it has a metal V covered by a piece of hose on a custom support which is lashed to the tip of the davit by a few hose clamps. It is also in a good position to use for lifting the outboard engine off the transom bracket, and could be used for its intended purpose as a dinghy engine davit as well. This arrangement serves well for lowering the mast to go under a bridge, but for single hand trailering a much better solution would be to mount a roller on a mast crutch. The dinghy engine davit is an innovative solution, but an easier method would be a simple pole which can be set into a spare set of rudder pintles and gudgeons mounted alongside the ones in use on the rudder. The small offset from the centerline of the boat can be corrected by mounting the roller off center on the pole. |
| A mast support crutch with roller on a different Precision 23. The support can be extended for easier mast raising and lowering, then retracted for a lower profile when trailering the boat. On this prototype we discovered that it is important to install blocks on the pintel/gudgeon arrangement to prevent the whole pole from rotating. The roller works well when walking the mast forward and back from the step to its trailering position, but it only works well when it is aligned with the mast. Pintles and gudgeons are designed to make rudders easy to turn, and they make the pole much too easy to misalign. | This one was intended for use when the boat is on the trailer, so it just uses the same attachments as the rudder, but modifying the system for use on the water would just mean installing a duplicate set and offsetting the roller to remain on centerline. With an offset roller, it would become even more important to have some way to lock the pole and prevent it from rotating. Another lesson from this prototype was to avoid making tall guides/retainers on either side of the roller. We made them tall to prevent the mast from escaping, but it does not want to jump off the roller, and the tall guides hang up on the upper shrouds as the mast is moved fore and aft. The shrouds would ride right over shorter guides. |
This system can be adapted to fit any small sailboat, and it makes stepping the mast by yourself a much easier task. If a snag occurs during mast raising, it is possible to leave the mast partially raised to go and clear the snag. The winch used on the MacGregor pole is self-braking and almost silent, and the operator can see everything while cranking it. The extra length of line to force the jib and furler to ride up and down the centerline of the boat is a stroke of genius. The addition of a properly designed roller mast crutch makes moving the mast back to the step by yourself easy for one person.
Update: May, 2012 - Since I wrote this article, many people have contacted me asking whether I sell this mast raising system or know where to buy it. The answer to both questions is no, at least not as a package. You will have to buy the various parts and put them together yourself.
You will need the following items to assemble the mast raising system:
- A sturdy pole about 6 feet long
- A small self-braking trailer winch and hardware to attach to sturdy pole
- A way to attach the pole to the mast base
- Some sailing blocks and snaps
- Some low stretch rope
- Some chain for the centering stays , if your boat requires these
- A stainless steel bail to attach to the mast
- Probably a few things I forgot, but that will become apparent along the way
The first three items on the list are to make your own mast raising pole of the type sold with MacGregor 26M model boats. I would simply buy one from a MacGregor dealer instead of making one, but you can probably make it a bit cheaper. I would not mention to a MacGregor dealer that you intend to use it on a sailboat other than a MacGregor, as they might have liability concerns.
December 27, 2008 at 12:27 pm
Thanks for a great article. I’ve been reading other articles about mast raising systems, but they never had enough pictures to help me visualize exactly how things worked. The extra line for the furler is also great as it solves a problem I’ve seen several people discuss.
June 18, 2015 at 9:33 am
I have built one for my 1980 Macgregor 22. I would be willing to build one for the cost of materials plus $ 100 labor. It would be custom made for your boat. All you need to do is provide pictures of the mast base and tabernacle. You may contact me at: [email protected] Leave a contact email or phone number.
January 29, 2009 at 12:25 pm
This is the design I will follow for my boat. Thanks for the great documentation
April 23, 2010 at 11:49 am
I’ve got a Luger Tradewinds 26. I recently looked at the MacGregor system at a local dealer. It sells for about $150.00. I was going to buy one but then decided to make my own. I bought a piece of 2″ electrical conduit, a 600 # winch and a small pulley for about half the price of the manufactured unit. My only issue is that I don’t have a hinged mast step so I’ll be fabricating a bracket that suits my setup. I’d have to do that with the manufactured system, too. When all is said and done, I’ll probably be about $50 to $75 cheaper.
March 1, 2011 at 11:19 am
Great article, Ray! For those of you wishing to purchase the mast-raising pole, contact MacGregor Sailboats.
May 16, 2011 at 11:11 am
In the past 25 years, I’ve fabricated both gin poles and “A” frames to raise and lower the masts on boats from 21-28 feet. The 21 footer had a steel mast that was very heavy. My “A” from was made from 1″ square aluminum “pipe” with 1/8″ thickness. A bolt with eyes on each end passes through both legs with a bronze spacer between them. This functions as a hinge between the legs. One eye attaches to the forestay or topping lift and the bottom eye attaches to the tackle. The bitter end runs back to the cockpit/mast area where the skipper can control both the mast and the tackle. The bottom of each leg must hinge close to a line passing through the mast bolt and far enough apart to impart stability. Often, the cabin top is the only alternative. I placed eyebolts through the bottom of the legs with closely matching eye bolts on the cabin top. I used two eyes on the cabintop about 3/4″ apart. A simple pin with a keeper or a bolt passes through the 2 eyes of the cabin and the one eye of the “A” frame.
June 2, 2011 at 11:09 am
This is an interesting sytem. I’ve built and used one at the URL below. They obviously differ in a few ways but rely on similar principles. They also suffer from the same weak links, the attachment point for the pole to the mast or step in your case. And the auxiliary stay set-up.
To be honest, I don’t like the idea of putting through holes in my mast for the bail or using my pintles for the crutch. The crutch is the easiest to work around. For that, I’ll take a piece of galvanized pole from the depot; try to find a cap for the bottom; drill two through holes in that to attach a pair of eyebolts which I can use to secure the pole laterally to the rails. If I can’t make a height-adjustable crutch so be it. I’ll fix it right above the cabin roof.
For the attachment point. Since I’m using a system that attaches differently to begin with, I’ll leave that, but I have issues there.
For the auxilliary stays. I’m really worried here. In a single handed operation this may be the weakest link. Perhaps this how the phrase “things starting going sideways” was coined.
I like the chains. I’ll use them. I have chains for my stands, but it’s not easy to find guide wires like the one used here for the connection point. They look like old stays cut down. The process I used ties a tight line around the mast connected vertically to one of the halyards (instead of the bail on a through bolt), and attaches the baby stays there. I think I’ll try to find some low stretch line to make the connection from the loop on the mast to the chains. I think it’s really important that this be tight so clearly my idea of using the halyard suffers a bit (too much give).
Here’s that URL for the gin pole: I put this together in 2 hours of twilight with a circular saw and my drill. I take no credit for the invention.
http://www.google.com/imgres?imgurl=http://slowflight.net/upgrades/images/GinPole.jpg&imgrefurl=http://slowflight.net/upgrades/tips-GinPole.html&h=460&w=300&sz=32&tbnid=iyzi45IS37IlbM:&tbnh=128&tbnw=83&prev=/search%3Fq%3Dgin%2Bpole%26tbm%3Disch%26tbo%3Du&zoom=1&q=gin+pole&usg=__MAJzPBn9ofV8lK2r0D_01WD7ZQM=&sa=X&ei=p4bnTZCoCqnj0QGirvGCCw&ved=0CCgQ9QEwAw&biw=1131&bih=687
November 10, 2011 at 10:56 am
great idea ,used to lift a 20′ pole in the ground. To put a light. Thank you sir.
February 20, 2012 at 10:55 am
I agree, this is by far the best/safest/easiest “Mast Rising System” I have seen! I’ve been wanting to build this system for two years now. I finally was able to either collected/make all the necessary parts to put it together. Thanks for the head start! By the way, if anyone is interested, I can make them one and ship it to their house. I don’t have a price in mind right now, but interested parties can call me.
Thanks Pat 513 891 5112
October 11, 2012 at 2:07 pm
Hello, That system looks great! I am interested in putting something together for our Ericson 25′. There is no mast hinge currently so I need to piece together the stainless steel components. I’ve called Dwyer and they were unable to help determine the parts after looking at the photos on this article.If you could help I’d greatly appreciate it. Maybe Pat Maundrell could help? My cell # is (828)337-5899 and email is [email protected]
July 20, 2014 at 11:02 am
Catalina, Factory Yacht, nor MacGregor will sell to the product. I have searched for at least 2 wks. I discovered the solo-mast raising system for small boats on Tropical Boating.
Can you built one for me or any references.
cell 434-242-1859
Thanks, Randy Boone
March 29, 2015 at 7:54 pm
Do you still make tis mast raising system
June 21, 2015 at 12:28 pm
I have a Catalina 22′ Sailboat & need a Mast Raiser. Are you interested in making one? If so how much would it cost?
July 14, 2015 at 10:23 pm
I’m not interested in making one. I’d recommend going to a MacGregor dealer and buying one of theirs and then adapting it to your boat.
April 22, 2012 at 10:52 am
This link was sent to me today by the seller of the (Australian design) Castle 650 (21’4″) that I bought yesterday afternoon. He has always sailed with a family crew of 4 or more, whereas I almost exclusively sail solo, and mast raising was looming as the biggest problem for solo sailing the Castle that I hadn’t solved yet! With some minor adjustments to the baby stays I now have my answer.
I’m not sure what to make of the “where do I buy one” type replies – it’s a bunch of standard components which you buy and build the parts you need to suit the boat you’ve got. The important stuff is the idea, how it works, not the particular set of parts used on one boat somewhere in North America! I guess its because I’m an engineer and because boat production runs in Australia are so much smaller, so no one expects to be able to buy complete complex systems designed specifically for their boat.
May 3, 2012 at 10:51 am
Hello, excelent system, where can I get it, I really need it for a macregor 26 ’92
May 27, 2013 at 12:37 pm
I followed the instructions and now have a great mast raising system for my precision 23. I am interested in the small crane that you use to hold the mast for going under bridges. (I already have the pole for trailer transportation). Do you have a picture of its installation and what type it is and where you purchased it.
May 31, 2013 at 6:38 am
Angus, I have no other pictures of that small crane on the Precision 23 stern rail, but it is just a stainless steel dinghy davit that the boat owner bought at a marine store. He put a piece of rubber hose on it to prevent it from scratching the mast. I do not know the make/model of davit nor do I recall exactly how it was installed. I do remember that it was not custom built. It’s a commercially available davit that is used to pick up dinghies and hoist outboard engines on and off of them. Sorry I can not be more helpful! Good luck!
Leave a Reply Cancel reply
You must be logged in to post a comment.
- BOTE Aero Rover Inflatable SUP MicroSkiffs!
- ePropulsion Electric Outboard On A Picnic Cat
- Com-Pac Picnic Cat Fun!
- Selling the Stray Goat
- June 2021 Stray Goat Projects
- How to Dock an Outboard or Sterndrive Powerboat in 3 Easy Pictures
- Small Outboard Engine Tilt and Trim: Theory and Practice
- Tying Boats to Docks Using Springlines
- Deep V, Shallow V, or Variable Deadrise Hull Performance
- The Com-Pac Sun Cat: A Review
- Building a Live Bait Well For A Small Boat
- Choosing the Right Propeller For Your Boat
- Rebuilding Whaleboat Tenders Part 5: Boat Parts Shopping Day
- More Boston Whaler Modifications
- Boat Building (5)
- Boat Handling (10)
- Boat Repairs & Upgrades (50)
- Dinghies (4)
- Boating Fun (30)
- Boating Safety (7)
- Buying & Selling Boats (5)
- Classic Boating Tales (25)
- Fishing (16)
- Drone Stuff (3)
- Trail Camera Pictures (18)
- Tropical Fruiting (1)
- Kayaking (22)
- Powerboating (18)
- Races & Regattas (14)
- Sailboat Cruising (15)
- Sailboat Reviews (7)
- Antique Fishing Tackle
- Big Air Wakeboards
- Binocular Bargains
- Boat Parts Online
- Boat Seats for Sale
- Boat Wear Bargains
- Boating Memorabilia
- Discount Marine Electronics
- Ice Fishing Shop
- Maritime Antiques
- Nautical Motif Gifts & Decor
- Slingin' Steel Spearfishing Bargains
- Sun Cat National Championship Regatta
- Tropical Affiliate Marketing
- Tropical Web Works
- Tying Flies
- Boat Paddles
- Dock & Boat Cleats
- Fender Cleats & Holders
- Fender Covers
- Abu Garcia Spinning Reels
- Daiwa Spinning Reels
- KastKing Spinning Reels
- Okuma Spinning Reels
- Penn Spinning Reels
- Pflueger Spinning Reels
- Quantum Spinning Reels
- Shakespeare Spinning Reels
- Shimano Spinning Reels
- Zebco Spinning Reels
- Baitcasting Reels
- Spincast Reels
- Abu Garcia Rod & Reel Combos
- Baitcast Rod & Reel Combos
- Okuma Rod & Reel Combos
- Quantum Rod & Reel Combos
- Shakespeare Rod & Reel Combos
- Spinning Rod & Reel Combos
- Ugly Stik Rod & Reel Combos
- Tackle Bags
- Tackle Boxes
- Fishing Backpacks
- Inflatable Dinghies
- Inflatable Kayaks
- Inflatable SUPs
- Kayak Paddles
- KeelGuard Keel Protectors
- Chartplotters
- Fishfinders
- Fixed-Mount VHF Radios
- Handheld GPS Units
- Handheld VHF Radios
- Pelican Waterproof Marine Boxes
- Fishing PFDs
- Inflatable PFDs
- Kayaking PFDs
- Survival PFDs
- Survival Suits & Immersion Suits
- PFDs for Infants
- PFDs for Children
- PFDs for Adults
- PFDs for Dogs
- Throwable (Type IV) PFDs
- Right-Hand Propellers
- Left-Hand Propellers
- Aluminum Propellers
- Stainless Steel Propellers
- Three-Blade Propellers
- Four-Blade Propellers
- Forums New posts Unanswered threads Register Top Posts Email
- What's new New posts New Posts (legacy) Latest activity New media
- Media New media New comments
- Boat Info Downloads Weekly Quiz Topic FAQ 10000boatnames.com
- Classifieds Sell Your Boat Used Gear for Sale
- Parts General Marine Parts Hunter Beneteau Catalina MacGregor Oday
- Help Terms of Use Monday Mail Subscribe Monday Mail Unsubscribe
A great mast raising system
- Thread starter saddlesore
- Start date Sep 5, 2018
- Hunter Owner Forums
- Smaller Boats
Slick looking idea. What type of fitting do you have attaching the tubes to the mast slide? Any chance you have pics of that part? Thanks Sam
I don't have a picture now but will get one on Friday. I use a roller between the poles and eye bolts about 3" below with a short wire to a center eye. Watch the youtube video of the guy from the UK who invented it search "mast raising tool".

That is interesting. When the mast gets near vertical it looks like the roller sits pretty low on the mast, leaving a lot of weight above the roller. How has that worked out for you, to get it fully vertical?
That's a really cute idea. I haven't seen it done that way before. Thanks for sharing.
It really works great. I use 7' poles that takes it right to the boom attachment and fully vertical with enough pressure to attach the front stay. You use the mainsheet attached to the "tool" and to the boomvang eye. I was blown away by the youtube video and have found it accurately shows how simple it works.
saddlesore said: I don't have a picture now but will get one on Friday. I use a roller between the poles and eye bolts about 3" below with a short wire to a center eye. Watch the youtube video of the guy from the UK who invented it search "mast raising tool". Click to expand
Interesting approach! On the video the supports extended somewhat beyond the roller which would provide additional security against the mast rolling off the side in the case of heavy winds or other inadvertent lateral forces.
Thank you Sooooooooo much! just finished lowering my mast with your rig. so much better than the jin pole i had.
Love this idea, I'm going to make one this weekend!

This is a great idea and one which I copied when I saw it on You Tube.
So I thought I was going to try something really cool. I measured and it seems I need 9 ft from the companionway to the mast. I was at Home Depot and noticed a 10 ft aluminum ladder that was mangled a the last foot. That would have probably been more work to cut the rivets off and narrow the ladder but I thought it would make a lightweight but strong option. I needed it to be discounted to at least $50 to make it worth it but the manager wouldn't go for it. I did decide to use two large castors mounted upside down on a crossbar instead of a bow roller on an axle. I'm going to do the same thing on my mast support to aid in sliding the mast back and forth.
Crazy Dave Condon
The wire crimped should always have two crimps in case the single should ever fail
Project_Mayhem
Fred said: supports extended somewhat beyond the roller Click to expand
replaced masts when one failed. New mast with shipping for example H260 is around or greater than $2,000

- Dec 17, 2018
I may try this at some point, but the toughest part of my mast raising is getting the mast back far enough over the crutch to pin its base, because of the spreaders. These photos look a bit different than what I have, as I can see that when the mast is in the crutch, before the rig has been used to start lifting it, the spreaders are forward of the crutch. I have a Z-spar, and maybe the position of the spreaders is a bit different that this pictured mast. I did something similar to these pics, built a wooden attachment with a trailer roller at the top that I bolt on to the metal crutch. I leave the metal crutch in its lowest position (the one used to store and transport) and bolt on my extension. That extension is the right height so that when the mast is pinned and rests in it, the mast is angled high enough to clear the sliding hatch. Attached is the only photo I have at hand, but you can see the extension. I did not do anything to angle the extension toward the rear, and the slant of the transom positions the top of the extension (or extended metal crutch if used) a bit forward of the pintles. When I slide the mast back, rolling it along the roller, the spreaders stop it from rolling back far enough to attach the pin on the tabernacle. I have to lift the mast at the spreaders over the wood sides by the roller and move it back about 6 inches to get the mast base in the pinning position. That is a PITA as it is somewhat high to lift. I have thought about ways to mount the extension so it is angled back a bit, but have no good design that would be easy and structurally sound. I may have a weld shop cut the metal crutch and reweld at an angle with some sort of strengthener. Do others with a 23 find that the spreaders must be muscled aftward over the crutch to pin the mast? Any good solutions to this?
Attachments

My mast is exactly like yours. The solution to rolling the mast back on the crutch and clearing the spreaders is to cut your ears off of your crutch support. I did that and replaced my roller with one that had raised sides to it. That way the mast clears the roller and the roller holds the mast in center line as you roll it forward and aft in order to line up with the mast base. Because of the angle between the raising mast and the mast tool, the ears on the mast tool do not seem to interfere with the spreaders.
Isaksp00: I do not have a picture handy of my mast crutch/roller system but am going to the boat tomorrow and will take a pic so that you can see what I did to solve the mast moving/spreader dilema.
- This site uses cookies to help personalise content, tailor your experience and to keep you logged in if you register. By continuing to use this site, you are consenting to our use of cookies. Accept Learn more…
- Mastering the Mast: A Comprehensive Dive into the World of Sailboat Masts and Their Importance
A mast is not just a tall structure on a sailboat; it's the backbone of the vessel, holding sails that catch the wind, driving the boat forward. Beyond function, it's a symbol of adventure, romance, and humanity's age-old relationship with the sea.
The Rich Tapestry of Sailboat Mast History
From the simple rafts of ancient civilizations to the majestic ships of the Renaissance and the agile sailboats of today, masts have undergone significant evolution.
- The Humble Beginnings : Early masts were basic structures, made from whatever wood was available. These rudimentary poles were designed to support basic sails that propelled the boat forward.
- The Age of Exploration : As ships grew in size and began journeying across oceans, the demands on masts increased. They needed to be taller, stronger, and able to support multiple sails.
- Modern Innovations : Today's masts are feats of engineering, designed for efficiency, speed, and durability.
A Deep Dive into Types of Boat Masts
There's no 'one size fits all' in the world of masts. Each type is designed with a specific purpose in mind.
- Keel Stepped Mast : This is the traditional choice, where the mast runs through the deck and extends into the keel. While providing excellent stability, its integration with the boat's structure makes replacements and repairs a task.
- Deck Stepped Mast : Gaining popularity in modern sailboats, these masts sit atop the deck. They might be perceived as less stable, but advancements in boat design have largely addressed these concerns.
Materials and Their Impact
The choice of material can profoundly affect the mast's weight, durability, and overall performance.
- Aluminum : Lightweight and resistant to rust, aluminum masts have become the industry standard for most recreational sailboats.
- Carbon Fiber : These masts are the sports cars of the sailing world. Lightweight and incredibly strong, they're often seen on racing boats and high-performance vessels.
- Wood : Wooden masts carry the romance of traditional sailing. They're heavier and require more maintenance but offer unparalleled aesthetics and a classic feel.
Anatomy of a Sail Mast
Understanding the various components can greatly improve your sailing experience.
- Masthead : Sitting atop the mast, it's a hub for various instruments like wind indicators and lights.
- Spreaders : These are essential for maintaining the mast's stability and optimizing the angle of the sails.
- Mast Steps and Their Critical Role : Climbing a mast, whether for repairs, adjustments, or simply the thrill, is made possible by these "rungs." Their design and placement are paramount for safety.
Deck vs. Yacht Masts
A common misconception is that all masts are the same. However, the requirements of a small deck boat versus a luxury yacht differ drastically.
- Yacht Masts : Designed for grandeur, these masts are equipped to handle multiple heavy sails, sophisticated rigging systems, and the weight and balance demands of a large vessel.
- Sailboat Masts : Engineered for agility, they prioritize speed, wind optimization, and quick adjustments.
Maintenance, Repairs, and the Importance of Both
Seawater, winds, and regular wear and tear can take their toll on your mast.
- Routine Maintenance : Regular checks for signs of corrosion, wear, or structural issues can prolong your mast's life. Using protective coatings and ensuring moving parts are well-lubricated is crucial.
- Common Repairs : Over time, parts like spreaders, stays, or even the mast steps might need repair or replacement. Regular inspections can spot potential problems before they escalate.
Read our top notch articles on topics such as sailing, sailing tips and destinations in our Magazine .
Check out our latest sailing content:
Costing: The Investment Behind the Mast
While the thrill of sailing might be priceless, maintaining the mast comes with its costs.
- Regular Upkeep : This is an ongoing expense, but think of it as insurance against larger, more costly repairs down the line.
- Repairs : Depending on severity and frequency, repair costs can stack up. It's always advisable to address issues promptly to avoid more significant expenses later.
- Complete Replacement : Whether due to extensive damage or just seeking an upgrade, replacing the mast is a significant investment. Consider factors like material, type, and labor when budgeting.
Upgrading Your Mast: Why and How
There comes a time when every sailor contemplates upgrading their mast. It might be for performance, compatibility with new sail types, or the allure of modern materials and technology.
- Performance Boosts : New masts can offer better aerodynamics, weight distribution, and responsiveness.
- Material Upgrades : Shifting from an old wooden mast to a modern aluminum or carbon fiber one can drastically change your sailing experience.
- Compatibility : Modern sails, especially those designed for racing or specific weather conditions, might necessitate a mast upgrade.
The Impact of Weather on Masts
Weather conditions significantly influence the longevity and performance of your mast. From strong winds to salty sea sprays, each element poses unique challenges. Regularly washing the mast, especially after sailing in saltwater, can help prevent the onset of corrosion and wear.
Customization and Personal Touches
Every sailor has a unique touch, and this extends to the mast. Whether it's intricate carvings on wooden masts, personalized masthead designs, or innovative rigging solutions, customization allows sailors to make their vessel truly their own.
The Role of Sails in Mast Design
It's not just about the mast; the type and size of sails greatly influence mast design. From the full-bellied spinnakers to the slender jibs, each sail requires specific support, tension, and angle, dictating the rigging and structure of the mast.
Safety First: The Role of Masts in Overboard Incidents
A mast isn't just for sailing; it plays a crucial role in safety. In overboard situations, the mast, especially when fitted with steps, can be a lifeline, allowing sailors to climb back onto their boat. Its visibility also aids in search and rescue operations.
The Rise of Eco-Friendly Masts
As the world grows more eco-conscious, the sailing community isn't far behind. New materials, designed to be environmentally friendly, are making their way into mast production. They aim to provide the strength and durability of traditional materials while reducing the environmental footprint.
The Intricate World of Rigging
The mast serves as the anchor for a complex system of ropes, pulleys, and cables – the rigging. This network, when fine-tuned, allows sailors to adjust sails for optimal wind capture, maneuverability, and speed. Mastery over rigging can elevate a sailor's experience and prowess significantly.
Historical Significance: Masts in Naval Warfare
In historical naval battles, the mast played a pivotal role. Damaging or destroying an enemy's mast was a strategic move, crippling their mobility and rendering them vulnerable. The evolution of masts in naval ships offers a fascinating glimpse into maritime warfare tactics of yesteryears.
The Science Behind Mast Vibrations
Ever noticed your mast humming or vibrating in strong winds? This phenomenon, known as aeolian vibration, arises from the interaction between wind and the mast's
structure. While it can be a mesmerizing sound, unchecked vibrations over time can lead to wear and potential damage.
Future Trends: What Lies Ahead for Sailboat Masts
With technological advancements, the future of masts is bright. Concepts like retractable masts, integrated solar panels, and smart sensors for real-time health monitoring of the mast are on the horizon. These innovations promise to redefine sailing in the years to come.
Paying Homage: Celebrating the Mast
Across cultures and ages, masts have been celebrated, revered, and even worshipped. From the Polynesians who viewed them as spiritual totems, to modern sailors tattooing mast symbols as badges of honor, the mast, in its silent grandeur, continues to inspire awe and respect.
Conclusion: The Mast’s Place in Sailing
In the grand scheme of sailing, the mast holds a place of reverence. It's not just a structural necessity; it's a testament to human ingenuity, our quest for exploration, and the sheer love of the sea.
How often should I inspect my mast?
At least twice a year, preferably before and after sailing season.
Can I handle repairs myself?
Minor repairs, yes. But for major issues, it's best to consult a professional.
Is there an average lifespan for a mast?
With proper care, masts can last decades. Material and maintenance quality play a huge role.
How do I know if it's time to replace my mast?
Constant repairs, visible wear, and decreased performance are indicators.
What's the most durable mast material?
Carbon fiber is incredibly strong and durable, but aluminum also offers excellent longevity.
So what are you waiting for? Take a look at our range of charter boats and head to some of our favourite sailing destinations.
Mast Queries Answered
I am ready to help you with booking a boat for your dream vacation. contact me..

Denisa Kliner Nguyenová
- Destination Information
- Sailing routes
- Boat owners
- Tips & Inspiration
- Sustainable Sailing

- Featured Posts: The Latest News
- Nautical Knowledge
What a sailboat mast? All you need to know!
- 8 August 2023
- 4 minute read
Alice Martin
Share the post "What a sailboat mast? All you need to know!"
If you are an avid sailor, you will understand the importance knowing about the different parts of a sailboat. There are few things as fundamental as the sailboat mast. Rising tall from the deck, the mast is an important structure that harmonises the wind and water to propel the vessel forward. In this blog post, we will explore the different components of a sailboat mast and dive into the fascinating world of single mast rigs and multi-mast rigs, each offering a unique sailing experience.
At Click&Boat, we like to keep you up to date with all things sailing. Read on to find out more about the different parts and uses of the mighty sailboat mast!
What is a sailboat mast?
At its core, a sailboat mast is a vertical pole that extends upward from the deck of the boat. It plays an important role in supporting the sails and maintaining their shape to maximise the use of wind. The material used to make sailboat masts is typically aluminum, carbon fiber, or wood, with each material offering its own unique benefits.
What are the different parts of a sailboat mast?
A sailboat mast consists of several integral parts:
Base and Step: The mast is securely fixed to the boat’s deck using a base and step, which provide stability and distribute the forces exerted by the sails.
Masthead: Located at the very top of the mast, the masthead is an attachment point for various rigging elements, such as halyards and stays.
Spreaders: These are horizontal bars extending from the mast, which help to keep the shrouds (supporting cables) away from the mast, providing better support for the rig.
Boom: The boom is a horizontal spar that extends from the bottom of the mast, holding the foot of the mainsail and controlling its angle.
Now that we have an overview of the sailboat mast let’s delve into the two primary types of sailboat rigs: single-mast rigs and multi-mast rigs.
Single – mast rigs
There are 3 different types of single mast rigs: Sloop – Rigged Mast, Cutter Mast and Catboat Mast.

Sloop – Rigged Mast
The sloop rig is one of the most common and simple configurations for a single mast sailboat. It features a single mast with two sails – a mainsail and a foresail (jib or genoa). Attached to the boom is the mainsail. The foresail secures to the forestay at the bow and a headsail furler, allowing for easy reefing and unfurling.
Cutter Mast
The cutter rig is a variation of the sloop rig, with an additional smaller headsail, known as the staysail. This configuration provides more sail area options, offering increased versatility and better performance in varying wind conditions. The staysail is set between the forestay and an inner forestay, creating a more balanced sail plan.
Catboat Mast
The catboat rig is a unique single mast configuration that features a single, large mainsail with no headsail. This makes it easy to handle, especially for beginners. The lack of a headsail makes the catboat less efficient for upwind sailing but ideal for downwind and reaching courses.
Multi – Mast rig
There are 3 different types of Multi – Mast rigs: Yawl Masts, Ketch Masts, and Schooner Masts.

The yawl rig has two masts – a taller main mast and also a shorter mizzen mast, located forward of the rudder post. The mizzen mast helps improve balance and control, making it easier to handle in rough seas. The yawl rig allows for a diverse range of sail combinations, enhancing the sailboat’s adaptability.
Ketch Masts
The ketch rig features two masts, but with the mizzen mast positioned aft of the rudder post. This configuration offers better downwind performance and maneuverability while sacrificing some upwind efficiency. Ketch rigs are popular for long-distance cruising vessels due to their versatility.
Schooner Masts
The schooner rig has two masts, with the forward mast (foremast) being taller than the aft mast (mainmast). Schooners often feature multiple foresails and square topsails on their masts, providing an extensive sail area for excellent downwind performance.
For any sailor, understanding the sailboat mast and its various configurations is essential for navigating the waters with confidence. The sailboat mast stands as an excellent example of engineering. It symbolizes the very essence of sailing – the harmonious dance between the wind, water, and the spirit of adventure. next time you set sail, take a moment to appreciate the sailboat mast. the sturdy backbone that carries you on your nautical journey. Happy sailing!

- Inspiration
Sunset Sailing: The Complete Handbook
- 31 July 2023
- Clara Chambers

Boating activities for your next adventure
- 10 August 2023
You May Also Like

Discovering Madeira: boat trip ideas to explore the island
- 7 September 2024

Your City Break Holidays to Barcelona During the America’s Cup
- 21 August 2024

What you need to know for a boat safety certificate in the United States
- 7 July 2024

Budgeting for your daily boat hire
- 6 July 2024

For your next motorboat trip: A skippered or a bareboat charter?
- 3 July 2024

What to bring aboard a motorboat: your boating checklist
- 1 July 2024

First time renting with Click&Boat? Here’s What You Need to Know!
- 30 June 2024

- About Click&Boat
Click&Boat’s guide to using a boat licence abroad
- 29 June 2024
Leave a Reply Cancel reply
Your email address will not be published. Required fields are marked *
Save my name, email, and website in this browser for the next time I comment.
This site uses Akismet to reduce spam. Learn how your comment data is processed .
Input your search keywords and press Enter.

- Sails & Canvas
- Hull & Structure
- Maintenance
- Sailing Stories
- Sailing Tips
- Boat Reviews
- Book Reviews
- The Dogwatch
Select Page
Rise Up! How to Raise Your Sailboat Mast
Posted by Zoran Glozinic | Dogwatch , Projects , Sails & Canvas

Spring is here and marinas will soon be filled with mast-raisers. And while the world is filled (to the brim?) with mast-raising solutions, I have another. I believe my method is possibly the simplest solution most applicable to a wide range of boats. It allows a sailor to raise a mast independently, without a crane, affording freedom. It also enables a sailor to do it by themself. And while most mast-raising solutions require various panoply of items a sailor needs to either purchase or fabricate—various gin poles, A-frames, lifting poles, winches, 2×6 boards, lawn-mower wheels, and mast supports mounted to rudder fittings on the transom—and while sailors who trailer their boats to various waters have to carry all of that with them, the solution I’ve come up with uses a very small amount of extra equipment, so small it can almost be carried in one’s pocket.
Everything rigged and mast ready to be raised with a tug on the mainsheet.
So, what is required and how do you rig it?
- First, to use my solution, your mast should have a mast base/step or tabernacle on which the mast can pivot. This is common.
- Next, there will need to be an attachment point on either side of the boat, aligned with the mast pivoting point—athwartships and on the same axis. You might need to get creative here because each boat is different. The two attachment points (eyes are fine) can be permanent (as in this photo), or they can be made using a steel ring and two short lengths of steel wire or chain temporarily attached to an existing hardpoint. The wider these attachment points are spaced, the better, because they serve as hardpoints to attach two sets of temporary shrouds.
- About seven feet above the mast step (or as high as you can comfortably reach up the mast when it’s vertical) on either side of the mast, there must be tangs or permanent mounts to attach the mast-supporting set of temporary shrouds. I used a length of ¼-inch threaded rod that passes through the mast and through two small hardwood blocks and two small tangs made from mild steel. I install these tangs when needed, using wingnuts. When sailing, there is nothing on the mast to snag halyards, and the two small holes are not something I worry about.
And that is it for boat modifications.
Mast successfully raised, note the athwartships attachment points on the dorade boxes and the two sets of temporary shrouds.
A close-up view of the athwartships attachment points.
To raise and lower the mast, I rig things and operate as follows. In this example, the mast is attached to a pivoting base and stowed lowered onto the bow pulpit.
- Between the athwartships attachment points and the mast tangs, I attach a set of temporary shrouds. These I made from coated wire rope (the same as used for lifelines). These will remain taut for the duration of the mast raising or lowering (because they’re attached on the same axis on which the mast pivots) and serve to prevent the mast from swaying from side to side.
- I attach the boom like I’m ready to sail, 90 degrees to the mast, connected to the gooseneck fitting and with the topping lift and end-of-boom mainsheet rigged. I use the main halyard and boom downhaul to keep the gooseneck fixed (so it cannot slide up or down, if track-mounted).
- Between the athwartships attachment points and the clew end of the boom, I attach a second set of temporary shrouds. These I made from low-stretch braided line and they will also remain taut for the entire mast raising and lowering.
- Once all set, I pull on the mainsheet (rigged with 4:1 block-and-tackle for purchase) to raise the mast. It’s relatively easy and the mast remains in control; I can stop and start at any point in the process if needed.
If my mast was instead pivoted aft and stowed on an aft-rail support, I could still use the same method, but I would have to attach a separate gooseneck fitting on the front of the mast and some separate running rigging to function as the topping lift does.
Happy spring mast raising!
One nice-to-have modification I’ve made is to the pulpit where my mast rests when stowed. I made a wooden mast support mounted on the bow rail. The rubber roller has two positions: the lower position is used for winter mast storage, and the upper position allows for easy mast sliding, fore and aft, when getting it to the exact position in order to install (remove) the pivoting bolt/pin at the mast base or tabernacle. When not in use, I stow this support at the bottom of a sail locker.
About The Author

Zoran Glozinic
Zoran Glozinic is a retired business professional who has been messing around in boats and old cars all his life. He currently lives in Laval, Quebec, where he divides his free time between a good old English bilge-keel boat and a 16-year-old Saab car.
Related Posts

Endless Sea: Book Review
October 1, 2008

Dick Carter: Yacht Designer in the Golden Age of Offshore Racing
March 12, 2019

Susan’s Sailing Adventures: Book Review
December 1, 2002

Mudlark’s Ghosts: Book Review
April 1, 2007
Current Edition
Join Our Mailing List
Get the best sailing news, boat project how-tos and more delivered to your inbox.
You have Successfully Subscribed!
Sailboat Parts Explained: Illustrated Guide (with Diagrams)
When you first get into sailing, there are a lot of sailboat parts to learn. Scouting for a good guide to all the parts, I couldn't find any, so I wrote one myself.
Below, I'll go over each different sailboat part. And I mean each and every one of them. I'll walk you through them one by one, and explain each part's function. I've also made sure to add good illustrations and clear diagrams.
This article is a great reference for beginners and experienced sailors alike. It's a great starting point, but also a great reference manual. Let's kick off with a quick general overview of the different sailboat parts.
General Overview
The different segments
You can divide up a sailboat in four general segments. These segments are arbitrary (I made them up) but it will help us to understand the parts more quickly. Some are super straightforward and some have a bit more ninja names.
Something like that. You can see the different segments highlighted in this diagram below:

The hull is what most people would consider 'the boat'. It's the part that provides buoyancy and carries everything else: sails, masts, rigging, and so on. Without the hull, there would be no boat. The hull can be divided into different parts: deck, keel, cabin, waterline, bilge, bow, stern, rudder, and many more.
I'll show you those specific parts later on. First, let's move on to the mast.

Sailboats Explained
The mast is the long, standing pole holding the sails. It is typically placed just off-center of a sailboat (a little bit to the front) and gives the sailboat its characteristic shape. The mast is crucial for any sailboat: without a mast, any sailboat would become just a regular boat.
I think this segment speaks mostly for itself. Most modern sailboats you see will have two sails up, but they can carry a variety of other specialty sails. And there are all kinds of sail plans out there, which determine the amount and shape of sails that are used.
The Rigging
This is probably the most complex category of all of them.
Rigging is the means with which the sails are attached to the mast. The rigging consists of all kinds of lines, cables, spars, and hardware. It's the segment with the most different parts.
The most important parts
If you learn anything from this article, here are the most important parts of any sailboat. You will find all of these parts in some shape or form on almost any sailboat.

Okay, we now have a good starting point and a good basic understanding of the different sailboat parts. It's time for the good stuff. We're going to dive into each segment in detail.
Below, I'll go over them one by one, pointing out its different parts on a diagram, listing them with a brief explanation, and showing you examples as well.
After reading this article, you'll recognize every single sailboat part and know them by name. And if you forget one, you're free to look it up in this guide.

On this page:
The hull is the heart of the boat. It's what carries everything: the mast, the sails, the rigging, the passengers. The hull is what provides the sailboat with its buoyancy, allowing it to stay afloat.
Sailboats mostly use displacement hulls, which is a shape that displaces water when moving through it. They are generally very round and use buoyancy to support its own weight. These two characteristics make sure it is a smooth ride.
There are different hull shapes that work and handle differently. If you want to learn more about them, here's the Illustrated Guide to Boat Hull Types (with 11 Examples ). But for now, all we need to know is that the hull is the rounded, floating part of any sailboat.
Instead of simply calling the different sides of a hull front, back, left and right , we use different names in sailing. Let's take a look at them.

The bow is the front part of the hull. It's simply the nautical word for 'front'. It's the pointy bit that cuts through the water. The shape of the bow determines partially how the boat handles.
The stern is the back part of the hull. It's simply the nautical word for 'back'. The shape of the stern partially determines the stability and speed of the boat. With motorboats, the stern lies deep inside the water, and the hull is flatter aft. Aft also means back. This allows it to plane, increasing the hull speed. For sailboats, stability is much more important, so the hull is rounded throughout, increasing its buoyancy and hydrodynamic properties.
The transom is the backplate of the boat's hull. It's the most aft (rear) part of the boat.
Port is the left side of a sailboat.
Starboard is the right side of a sailboat
The bilges are the part where the bottom and the sides of the hull meet. On sailboats, these are typically very round, which helps with hydrodynamics. On powerboats, they tend to have an angle.
The waterline is the point where the boat's hull meets the water. Generally, boat owners paint the waterline and use antifouling paint below it, to protect it from marine growth.
The deck is the top part of the boat's hull. In a way, it's the cap of the boat, and it holds the deck hardware and rigging.
Displacement hulls are very round and smooth, which makes them very efficient and comfortable. But it also makes them very easy to capsize: think of a canoe, for example.
The keel is a large fin that offsets the tendency to capsize by providing counterbalance. Typically, the keel carries ballast in the tip, creating a counterweight to the wind's force on the sails.
The rudder is the horizontal plate at the back of the boat that is used to steer by setting a course and maintaining it. It is connected to the helm or tiller.
Tiller or Helm
- The helm is simply the nautical term for the wheel.
- The tiller is simply the nautical term for the steering stick.
The tiller or helm is attached to the rudder and is used to steer the boat. Most smaller sailboats (below 30') have a tiller, most larger sailboats use a helm. Large ocean-going vessels tend to have two helms.
The cockpit is the recessed part in the deck where the helmsman sits or stands. It tends to have some benches. It houses the outside navigation and systems interfaces, like the compass, chartplotter, and so on. It also houses the mainsheet traveler and winches for the jib. Most boats are set up so that the entire vessel can be operated from the cockpit (hence the name). More on those different parts later.
Most larger boats have some sort of roofed part, which is called the cabin. The cabin is used as a shelter, and on cruising sailboats you'll find the galley for cooking, a bed, bath room, and so on.
The mast is the pole on a sailboat that holds the sails. Sailboats can have one or multiple masts, depending on the mast configuration. Most sailboats have only one or two masts. Three masts or more is less common.
The boom is the horizontal pole on the mast, that holds the mainsail in place.
The sails seem simple, but actually consist of many moving parts. The parts I list below work for most modern sailboats - I mean 90% of them. However, there are all sorts of specialty sails that are not included here, to keep things concise.

The mainsail is the largest sail on the largest mast. Most sailboats use a sloop rigging (just one mast with one bermuda mainsail). In that case, the main is easy to recognize. With other rig types, it gets more difficult, since there can be multiple tall masts and large sails.
If you want to take a look at the different sail plans and rig types that are out there, I suggest reading my previous guide on how to recognize any sailboat here (opens in new tab).
Sail sides:
- Leech - Leech is the name for the back side of the sail, running from the top to the bottom.
- Luff - Luff is the name for the front side of the sail, running from the top to the bottom.
- Foot - Foot is the name for the lower side of the sail, where it meets the boom.
Sail corners:
- Clew - The clew is the lower aft (back) corner of the mainsail, where the leech is connected to the foot. The clew is attached to the boom.
- Tack - The tack is the lower front corner of the mainsail
- Head - The head is the top corner of the mainsail
Battens are horizontal sail reinforcers that flatten and stiffen the sail.
Telltales are small strings that show you whether your sail trim is correct. You'll find telltales on both your jib and mainsail.
The jib is the standard sized headsail on a Bermuda Sloop rig (which is the sail plan most modern sailboats use).
As I mentioned: there are all kinds, types, and shapes of sails. For an overview of the most common sail types, check out my Guide on Sail Types here (with photos).
The rigging is what is used to attach your sails and mast to your boat. Rigging, in other words, mostly consists of all kinds of lines. Lines are just another word for ropes. Come to think of it, sailors really find all kinds of ways to complicate the word rope ...
Two types of rigging
There are two types of rigging: running and standing rigging. The difference between the two is very simple.
- The running rigging is the rigging on a sailboat that's used to operate the sails. For example, the halyard, which is used to lower and heave the mainsail.
- The standing rigging is the rigging that is used to support the mast and sail plan.
Standing Rigging

Here are the different parts that belong to the standing rigging:
- Forestay or Headstay - Line or cable that supports the mast and is attached to the bow of the boat. This is often a steel cable.
- Backstay - Line or cable that supports the mast and is attached to the stern of the boat. This is often a steel cable.
- Sidestay or Shroud - Line or cable that supports the mast from the sides of the boat. Most sailboats use at least two sidestays (one on each side).
- Spreader - The sidestays are spaced to steer clear from the mast using spreaders.
Running Rigging: different words for rope
Ropes play a big part in sailing, and especially in control over the sails. In sailboat jargon, we call ropes 'lines'. But there are some lines with a specific function that have a different name. I think this makes it easier to communicate with your crew: you don't have to define which line you mean. Instead, you simply shout 'mainsheet!'. Yeah, that works.
Running rigging consists of the lines, sheets, and hardware that are used to control, raise, lower, shape and manipulate the sails on a sailboat. Rigging varies for different rig types, but since most sailboats are use a sloop rig, nearly all sailboats use the following running rigging:

- Halyards -'Halyard' is simply the nautical name for lines or ropes that are used to raise and lower the mainsail. The halyard is attached to the top of the mainsail sheet, or the gaffer, which is a top spar that attaches to the mainsail. You'll find halyards on both the mainsail and jib.
- Sheets - 'Sheet' is simply the nautical term for lines or ropes that are used to set the angle of the sail.
- Mainsheet - The line, or sheet, that is used to set the angle of the mainsail. The mainsheet is attached to the Mainsheet traveler. More on that under hardware.
- Jib Sheet - The jib mostly comes with two sheets: one on each side of the mast. This prevents you from having to loosen your sheet, throwing it around the other side of the mast, and tightening it. The jib sheets are often controlled using winches (more on that under hardware).
- Cleats are small on-deck hooks that can be used to tie down sheets and lines after trimming them.
- Reefing lines - Lines that run through the mainsail, used to put a reef in the main.
- The Boom Topping Lift is a line that is attached to the aft (back) end of the boom and runs to the top of the mast. It supports the boom whenever you take down the mainsail.
- The Boom Vang is a line that places downward tension on the boom.
There are some more tensioning lines, but I'll leave them for now. I could probably do an entire guide on the different sheets on a sailboat. Who knows, perhaps I'll write it.
This is a new segment, that I didn't mention before. It's a bit of an odd duck, so I threw all sorts of stuff into this category. But they are just as important as all the other parts. Your hardware consists of cleats, winches, traveler and so on. If you don't know what all of this means, no worries: neither did I. Below, you'll find a complete overview of the different parts.
Deck Hardware

Just a brief mention of the different deck hardware parts:
- Pulpits are fenced platforms on the sailboat's stern and bow, which is why they are called the bow pulpit and stern pulpit here. They typically have a solid steel framing for safety.
- Stanchons are the standing poles supporting the lifeline , which combined for a sort of fencing around the sailboat's deck. On most sailboats, steel and steel cables are used for the stanchons and lifelines.
Mainsheet Traveler
The mainsheet traveler is a rail in the cockpit that is used to control the mainsheet. It helps to lock the mainsheet in place, fixing the mainsails angle to the wind.
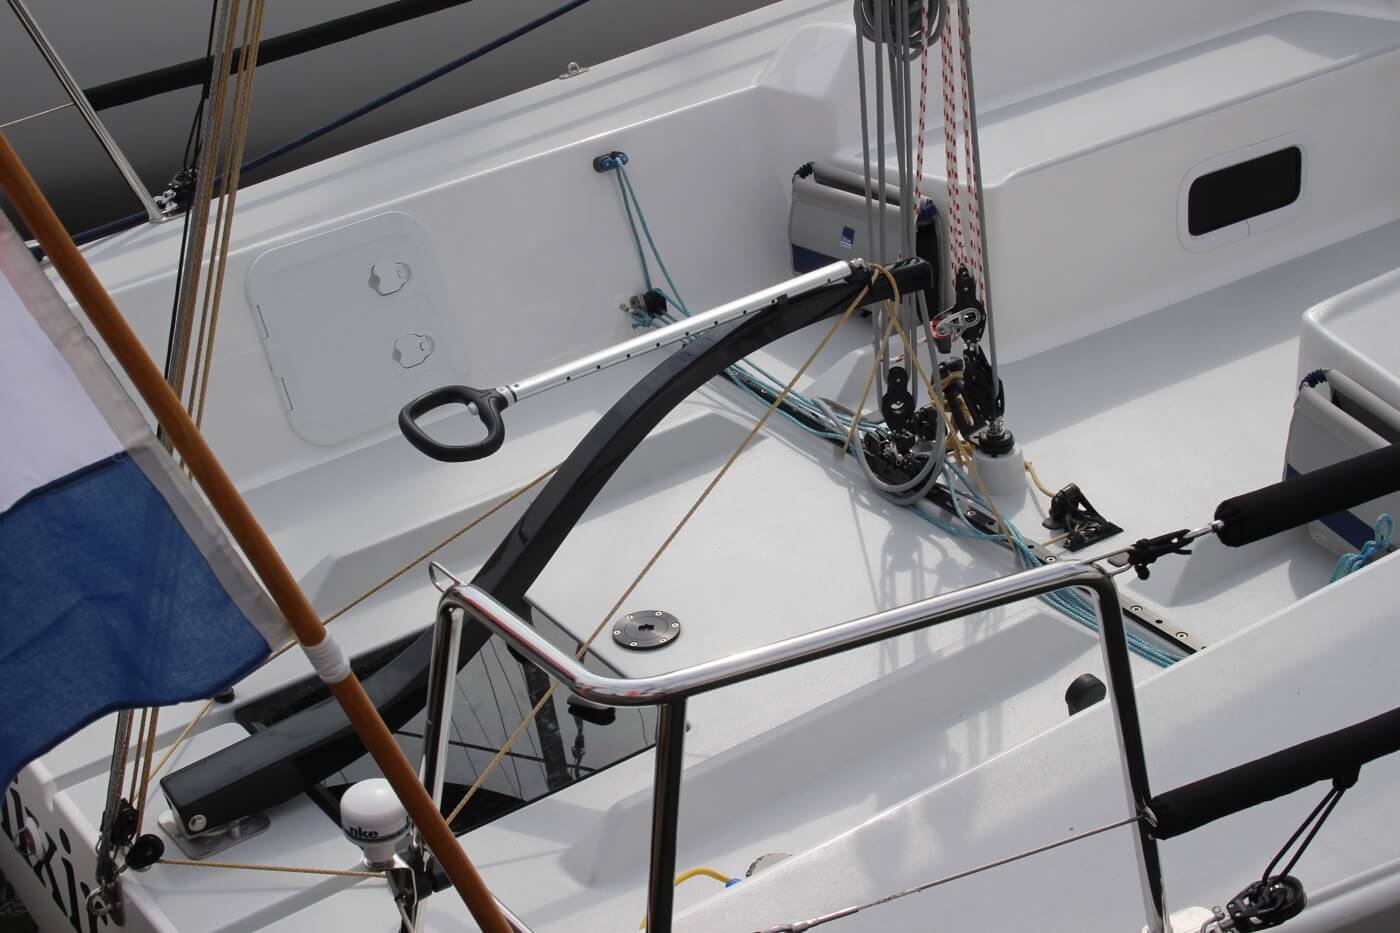
If you're interested in learning more about how to use the mainsheet traveler, Matej has written a great list of tips for using your mainsheet traveler the right way . It's a good starting point for beginners.
Winches are mechanical or electronic spools that are used to easily trim lines and sheets. Most sailboats use winches to control the jib sheets. Modern large sailing yachts use electronic winches for nearly all lines. This makes it incredibly easy to trim your lines.
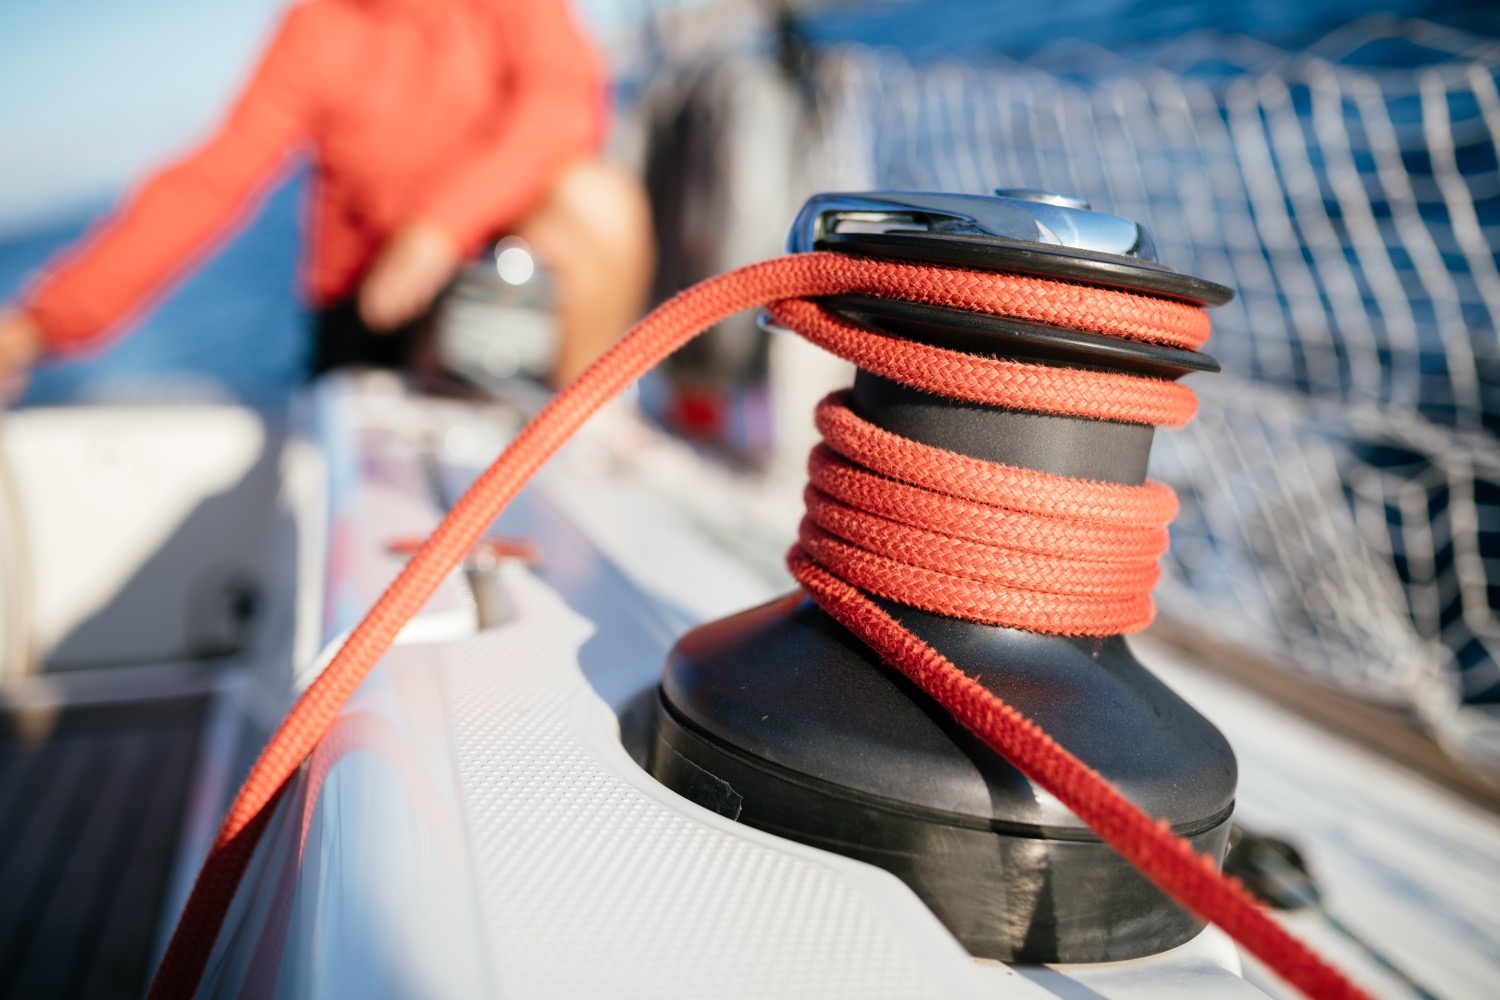
You'll find the compass typically in the cockpit. It's the most old-skool navigation tool out there, but I'm convinced it's also one of the most reliable. In any way, it definitely is the most solid backup navigator you can get for the money.
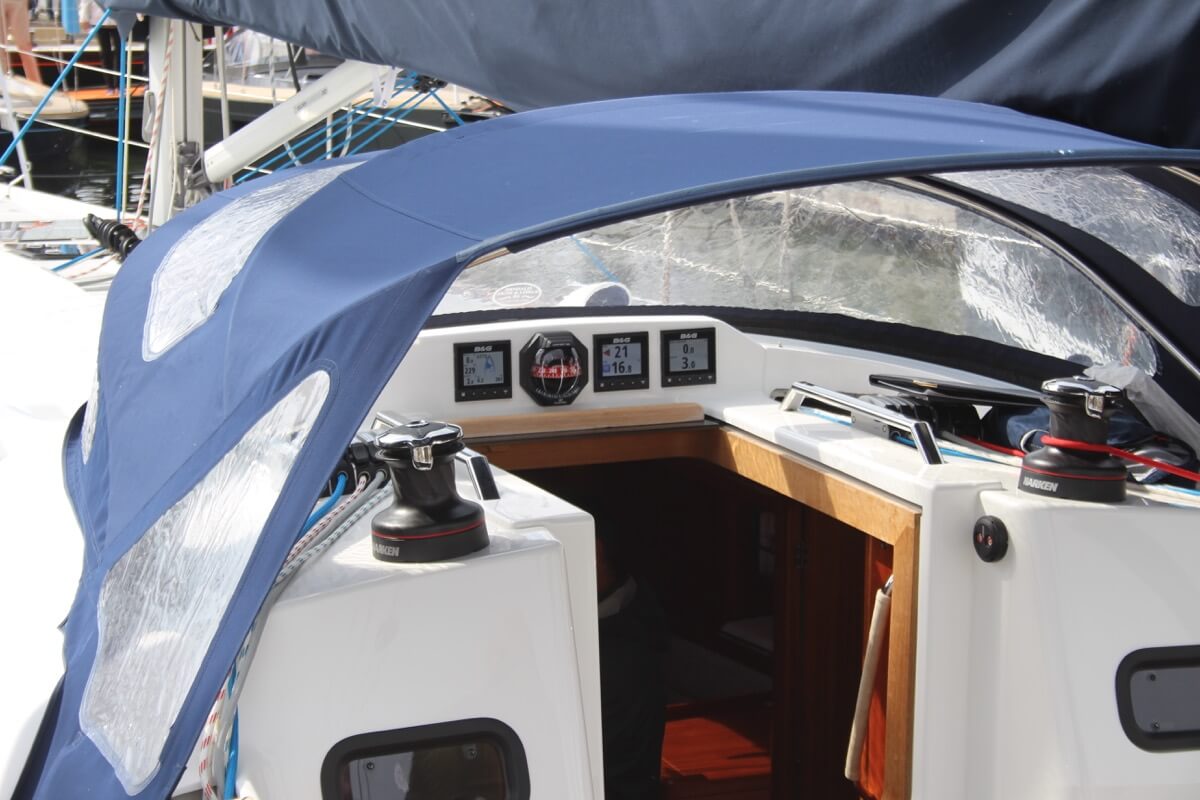
Want to learn how to use a compass quickly and reliably? It's easy. Just read my step-by-step beginner guide on How To Use a Compass (opens in new tab .
Chartplotter
Most sailboats nowadays use, besides a compass and a map, a chartplotter. Chartplotters are GPS devices that show a map and a course. It's very similar to your normal car navigation.
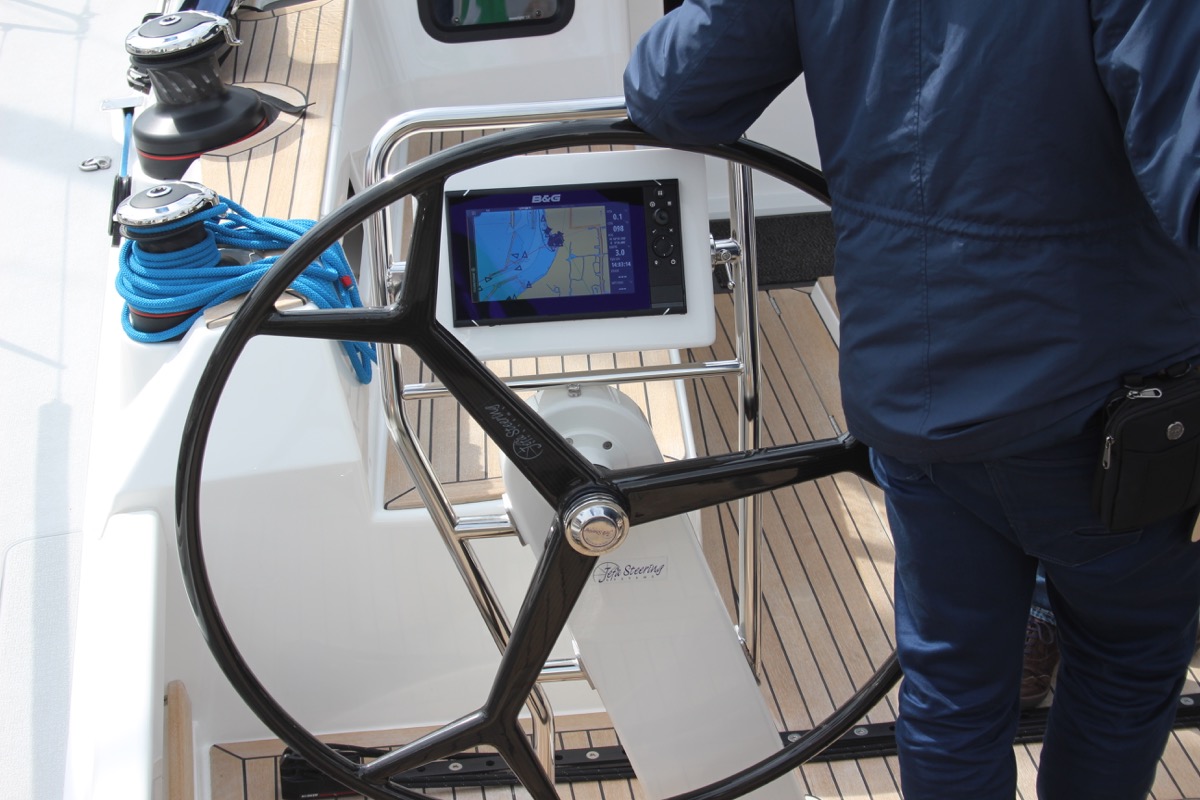
Outboard motor
Most sailboats have some sort of motor to help out when there's just the slightest breeze. These engines aren't very big or powerful, and most sailboats up to 32' use an outboard motor. You'll find these at the back of the boat.
Most sailboats carry 1 - 3 anchors: one bow anchor (the main one) and two stern anchors. The last two are optional and are mostly used by bluewater cruisers.
I hope this was helpful, and that you've gained a good understanding of the different parts involved in sailing. I wanted to write a good walk-through instead of overwhelming you with lists and lists of nautical terms. I hope I've succeeded. If so, I appreciate any comments and tips below.
I've tried to be as comprehensive as possible, without getting into the real nitty gritty. That would make for a gigantic article. However, if you feel I've left something out that really should be in here, please let me know in the comments below, so I can update the article.
I own a small 20 foot yacht called a Red witch made locally back in the 70s here in Western Australia i found your article great and enjoyed reading it i know it will be a great help for me in my future leaning to sail regards John.
David Gardner
İ think this is a good explanation of the difference between a ”rope” and a ”line”:
Rope is unemployed cordage. In other words, when it is in a coil and has not been assigned a job, it is just a rope.
On the other hand, when you prepare a rope for a specific task, it becomes employed and is a line. The line is labeled by the job it performs; for example, anchor line, dock line, fender line, etc.
Hey Mr. Buckles
I am taking on new crew to race with me on my Flying Scot (19ft dingy). I find your Sailboat Parts Explained to be clear and concise. I believe it will help my new crew learn the language that we use on the boat quickly without being overwhelmed.
PS: my grandparents were from Friesland and emigrated to America.
Thank you Shawn for the well written, clear and easy to digest introductory article. Just after reading this first article I feel excited and ready to set sails and go!! LOL!! Cheers! Daniel.
steve Balog
well done, chap
Great intro. However, the overview diagram misidentifies the cockpit location. The cockpit is located aft of the helm. Your diagram points to a location to the fore of the helm.
William Thompson-Ambrose
An excellent introduction to the basic anatomy and function of the sailboat. Anyone who wants to start sailing should consider the above article before stepping aboard! Thank-you
James Huskisson
Thanks for you efforts mate. We’ve all got to start somewhere. Thanks for sharing. Hoping to my first yacht. 25ft Holland. Would love to cross the Bass Strait one day to Tasmania. 👌 Cheers mate
Alan Alexander Percy
thankyou ijust aquired my first sailboat at 66yrs of age its down at pelican point a beautifull place in virginia usa my sailboat is a redwing 30 if you are ever in the area i wouldnt mind your guidance and superior knowledge of how to sail but iam sure your fantastic article will help my sailboat is wings 30 ft
Thanks for quick refresher course. Having sailed in California for 20+ years I now live in Spain where I have to take a spanish exam for a sailboat license. Problem is, it’s only in spanish. So a lot to learn for an old guy like me.
Very comprehensive, thank you
Your article really brought all the pieces together for me today. I have been adventuring my first sailing voyage for 2 months from the Carolinas and am now in Eleuthera waiting on weather to make the Exumas!!! Great job and thanks
Helen Ballard
I’ve at last found something of an adventure to have in sailing, so I’m starting at the basics, I have done a little sailing but need more despite being over 60 life in the old dog etc, thanks for your information 😊
Barbara Scott
I don’t have a sailboat, neither do l plan to literally take to the waters. But for mental exercise, l have decided to take to sailing in my Bermuda sloop, learning what it takes to become a good sailor and run a tight ship, even if it’s just imaginary. Thank you for helping me on my journey to countless adventures and misadventures, just to keep it out of the doldrums! (I’m a 69 year old African American female who have rediscovered why l enjoyed reading The Adventures of Robert Louis Stevenson as well as his captivating description of sea, wind, sailboat,and sailor).
Great article and very good information source for a beginner like me. But I didn’t find out what I had hoped to, which is, what are all those noisy bits of kit on top of the mast? I know the one with the arrow is a weather vane, but the rest? Many thanks, Jay.
Louis Cohen
The main halyard is attached to the head of the mainsail, not the to the mainsheet. In the USA, we say gaff, not gaffer. The gaff often has its own halyard separate from the main halyard.
Other than that it’s a nice article with good diagrams.
A Girl Who Has an Open Sail Dream
Wow! That was a lot of great detail! Thank you, this is going to help me a lot on my project!
Hi, good info, do u know a book that explains all the systems on a candc 27,
Leave a comment
You may also like, guide to understanding sail rig types (with pictures).
There are a lot of different sail rig types and it can be difficult to remember what's what. So I've come up with a system. Let me explain it in this article.

The Ultimate Guide to Sail Types and Rigs (with Pictures)

The Illustrated Guide To Boat Hull Types (11 Examples)

How To Live On a Boat For Free: How I'd Do It

How To Live on a Sailboat: Consider These 5 Things
Attainable Adventure Cruising
The Offshore Voyaging Reference Site
- Mainsail Handling Made Easy with Lazyjacks

Other sailors are often surprised that Phyllis and I set, reef, and strike our 56′ McCurdy & Rhodes cutter’s 600-square-foot mainsail without resorting to complex gear like roller furling masts or booms.
But, actually, it’s pretty easy using the simple gear that we have installed and fine tuned over 22 years and well over 100,000 miles.
The core of our system is our lazyjacks. In my opinion, any boat over about 45 feet that will be sailed shorthanded needs lazyjacks. Having said that, many of the systems we see out there are way too complicated. Here’s all you need:
Login to continue reading (scroll down)
Please Share a Link:
More Articles From Online Book: Sail Handling and Rigging Made Easy:
- Six Reasons To Leave The Cockpit Often
- Don’t Forget About The Sails
- Your Mainsail Is Your Friend
- Hoisting the Mainsail Made Easy—Simplicity in Action
- Reefs: How Many and How Deep
- Reefing Made Easy
- Reefing From The Cockpit 2.0—Thinking Things Through
- Reefing Questions and Answers
- A Dangerous Myth about Reefing
- Topping Lift Tips and a Hack
- 12 Reasons The Cutter Is A Great Offshore Voyaging Rig
- Cutter Rig—Should You Buy or Convert?
- Cutter Rig—Optimizing and/or Converting
- Cruising Rigs—Sloop, Cutter, or Solent?
- Sailboat Deck Layouts
- The Case For Roller-Furling Headsails
- The Case For Hank On Headsails
- UV Protection For Roller Furling Sails
- In-Mast, In-Boom, or Slab Reefing—Convenience and Reliability
- In-Mast, In-Boom, or Slab Reefing —Performance, Cost and Safety
- Making Life Easier—Roller Reefing/Furling
- Making Life Easier—Storm Jib
- Swept-Back Spreaders—We Just Don’t Get It!
- Q&A: Staysail Stay: Roller Furling And Fixed Vs Hanks And Removable
- Rigid Vangs
- Building A Safer Boom Preventer, Part 1—Forces and Angles
- Building A Safer Boom Preventer, Part 2—Line and Gear Strength Calculator
- Downwind Sailing, Tips and Tricks
- Downwind Sailing—Poling Out The Jib
- Setting and Striking a Spinnaker Made Easy and Safe
- Ten Tips To Fix Weather Helm
- Running Rigging Recommendations—Part 1
- Running Rigging Recommendations—Part 2
- Two Dangerous Rigging Mistakes
- Rig Tuning, Part 1—Preparation
- Rig Tuning, Part 2—Understanding Rake and Bend
- Rig Tuning, Part 3—6 Steps to a Great Tune
- Rig Tuning, Part 4—Mast Blocking, Stay Tension, and Spreaders
- Rig Tuning, Part 5—Sailing Tune
- 12 Great Rigging Hacks
- 9 Tips To Make Unstepping a Sailboat Mast Easier
- Cruising Sailboat Spar Inspection
- Cruising Sailboat Standing Rigging Inspection
- Cruising Sailboat Running Rigging Inspection
- Cruising Sailboat Rig Wiring and Lighting Inspection
- Cruising Sailboat Roller Furler and Track Inspection
- Download Cruising Sailboat Rig Checklist

We use an identical system on our boat, and it has served us very well. We even use a similar system to keep our hank-on headsail ( 900 sqft/83sqm) under control. Even while sailing singlehanded, we never lost control about any of our sails.
I did however decide to make only two reefs in the mainsail. The second reef is where normally the third reef would be, and the first one is approximately half way up that second reef. In addition to this, we used some smart panelling in combination with striped clews and tacks rather than layerd patches. This reduced the weight of the mainsail by approximately 30% and made it more flexible as well at the same strength.
We are very happy with the entire setup, and can, just as you do, recommend this to anyone who wants to go out there for some serious offshore cruising.

A couple of concepts from both sides of the size spectrum: The first from a discussion on Lat 38 about reefing catamaran mainsails off the wind. As was mentioned in the recent “multihull” discussion, one of the safety concerns about performance catamarans comes from the large size of the mainsails and the boats potential for rapid acceleration. With a high roach full batten main and a conventional reefing procedure as soon as the main halyard is slacked while running, the sail and battens are plastered/bent against the single aft swept shrouds. In the case of a fractional shroud wing mast there is nothing to prevent the top portion of the sail from blowing around to the point of damage of the track and batten car system. Reefing without damage is potentially difficult and requires some sort of downhaul line system.
Here is one take on the problem that makes sense. I’m not a fan of boom furling based upon a single delivery where the system was referred to as the Seizure Furl, but for this application it may be perfect because it allows single handed reefing of a large main while always maintaining halyard tension.
“FURLING MAINS HELP WHEN REEFING The August issue had some letters on the subject of reefing a cat off the wind, and it also had the interview with Jim and Kent Milski, who adhered to the ‘reef early’ credo while doing their three-year circumnavigation on Sea Level I never was caught in a big blow aboard my 40-ft catama- ran Oboe, but the team in New Zealand who rigged her said there were two essentials for reefing while sailing downwind in a blow: a roller furling boom and an electric winch. Here’s the one-man drill: 1) Set the boom at the proper angle with the topping lift and the mainsheet. (The proper angle is critical because it’s necessary for the main to roll evenly into the boom along the luff and leach.) 2) Take three turns on the winch with the roller furling line, hit the winch switch, and tension the furl line. 3) Take two turns above the roller furling line with the main halyard. 4) With both tails in your left hand, throw the clutch on the main halyard. The tensioned roller furling might pull in a half-inch of main, with the halyard now tensioned on the drum of the winch. 5) Your left hand now has the roller furl tail; your right hand has the main halyard tail. Using your foot or knee, hit the switch for the electric winch. 6) As the winch turns, the left hand pulls the roller furling lead while the right hand slacks, paying out on the main halyard, letting it slip on the winch drum. All this takes place in measured time — one hopes. Both lines remain tensioned, but the slip on the drum of the halyard keeps the main rolling in — slowly and tightly. It’s an easily rehearsed exercise, but getting the main onto the roller furling boom mandrel in a neat and tidy fashion does require some practice. Jay Bliss Oboe, 40-ft cat St. Augustine”
At the other end of the spectrum the sailmaker who built my first full batten main suggested a system that was simplicity in itself, and worked perfectly on the 350 sq ft main. At the end of each batten he supplied a reinforced grommet. I rigged a 1/4′ line as a topping lift from the spare main masthead shieve. Threaded on it were a number of 1′ rings for each batten end. All I had to do was lead a light line from each ring to the grommets tied just long enough to tighten when the topping lift line was taunt. Under sail the topping lift was slackened enough so the batten lines were free flying, and while reefing each batten fell neatly on the boom. Simplicity in itself. but probably not for a 600′ main. And I never tried it downwind in big breeze.

Hi Richard, My one exposure to a roller reefing boom was on a 90-foot sloop that I was guide/mate aboard for a voyage to Greenland and back. That experience doubled, trebled, and quadrupled, my commitment to simplicity, and my distrust of complex power driven systems like roller furling booms.
We reef downwind all the time with a full batten main and without problems, although I’m not sure our system would work for a cat because of the big roach.
Its not only the roach, but the location of the twin backstays/side stays on a catamaran mast that makes downwind reefing a challenge.
haha. Imagine the “challenge” of trying to reef Jim Clark’s sloop that was designed around the need to prove “mine is bigger than yours” and wouldn’t fit under the Golden Gate bridge. With the added complication that every function was performed from the windowless computer control room with buggy software running on Windows.

Have used lazy jacks for som time. Now I have upgrade / refined to a Lazy-Bag from Lundh Sails. Works great, peace of cake to reef and store the main. Check this out http://www.lundhsails.se/produkter/lazybag .

Very nice and perfected system. I can appreciate the time it take to instillate efficience in a mainsail handling system. This is why i choose mast furling for my new 45 feet sailboat – and altough i miss some aspects of performance, the peace of mind and the fact that a single person can handle the 550 square feet mainsail alone without leaving the cockpit is one step toward using the sails as a propulsion system rather than a sport. I guess there are already more new boats selling with in mast or in boom furling compared to traditional mainsail. Technology advance is impossible to stop…

We installed lazy jacks 3 years ago on our 36-foot cutter. We opted to use 1/8 amsteel with closed eyes —using a double brummel—thus no blocks and no chafe. We are very pleased with this set up. It deploys and retracts easily on all points of sail.
We have 4 legs, cheek blocks below the upper spreader on the mast and pad eyes on the boom. In a pinch, the lazy jacks can serve as a topping lift, should the dedicated topping lift need to be used elsewhere—think halyard failure.
The key to our system is the ability easily and quickly stow the lazy jacks out of the way with zero hassle on the boom.
The only thing I would consider changing, is placement of the upper blocks. Having the blocks on the spreader would make use even easier, but I suspect one would lose the extra topping lift feature.
Hi Michael,
Each to there own, but I really don’t like the idea of using Amsteel in this application.
Every rigging system on a boat has a weakest point: The item that will break if the system is overstressed. In my view, in a lazyjack system, that weakest point should be the line itself. By using Amsteel you are increasing the chance that if something snags, say when shaking out a reef, that something, like the mainsail itself, will be badly damaged, rather than the lazyjack breaking.
Its the same danger I see where cruising boat owners have gone over to high modulus sails and sheets and have unknowlingly created a system where, in an overload situation, something truly catastrophic will happen like a winch being torn from the deck, rather than the sail ripping or the sheet breaking.

Great article John. I’m bookmarking it to share with customers, especially the ones who think they need the Dutchman system. Don’t even get me started on why I don’t like that system, and I’ve yet to see a sailmaker put it on his or her own boat. The one argument for the integrated cover is when you have a boom well out of reach. Booms being out of reach could be a topic for another article. I am really not keen on having a boom that requires a stepladder but they’re increasingly common, particularly on the cruising cats. Whatever cover is employed, it should be easy to use. I’ve shared anchorages where some boats have left their mains unprotected for a week or more. It’s good for my business since sails can only absorb so much UV and they need to be replaced, but it’s such an easy way to extend the life of the mainsail.
Thanks for the endorsement of the piece.
I had not thought of the issue of a boom that is too high to reach. But then, as you say, that could inspire a whole rant all of its own!

On Danza we use a similar lazy jack system but we always run our lazy jacks forward when sailing. Using 1″ ss tubing I fabricated a rack that fastens to each side of the boom increasing the with of the boom to 18″. This runs from 6′ aft of the mast to 4′ from the aft end of the boom and gives a wide platform on which the sail lays when furled. It also provides lots of room for the foot of the sail when reefed. Everything is done at the mast and can be done by one person and even more easily with two. Our mizzen boom is higher than I like in order to accommodate the cockpit awning system so we use a Doyle stack pack there with all-day-every-day lazy jacks and it is great. Minor differences from John and Phylis’s system but the both work well and are fundamentally simple. And John, next time I sail I am going to reassess the mast block placement as fouling the upper battens on the mizzen while hoisting has always been an issue….
Sounds like a really interesting idea, sort of a home brewed Park Avenue boom. I have long lusted after a Hall Spars V boom, but my banker does not share my infatuation. It sounds like you have figured out a way to have many of the advantages at a fraction of the cost.

I am not a full time voyager but have sailed several thousand ocean miles with the Dutchman system without a problem. Have I just been lucky or do the problems only surface with long term ocean voyaging?
The best description for Dutchman is a solution in search of a problem. If you read the website for the product it claims it’s the answer because it won’t ever hang up the way conventional lazy jacks can. Truth is we’ve used retractable lazy jacks for decades and that’s simply not an issue. It introduces inordinate complication and cost. You have to punch holes in a perfectly good sail and install vastly overpriced discs. The sail cover has to be modified or built to accommodate the lines. The lines themselves can break. You can’t re-use the system when you change your mainsail. You basically buy it twice. I’ve compared the cost of setting up a main for use with Dutchman versus the cost of a complete new sail cover and integrated lazy jacks. It’s closer than you’d think.
At the end of the day, it’s just a lousy value IMHO. You’re paying an incredible amount of money for some injected molded crap that costs pennies to produce and some monofilament weedwhacker line. For far less money you can have an uber-reliable set of retractable lazy jacks that will work every time and you don’t have to buy the system a second time when you replace the mainsail.

Dave, Agree in all your concerns and another point re the Dutchman system: Those I have coached in accomplishing downwind reefing/furling of the main have felt that doing so puts too much strain on their mono-filament control lines as the sail gets pushed forward dramatically (but not problematically) in the initial stages of the process. This can be mitigated somewhat by keeping tension on the reef outhauls as the sail is brought down (keeping the sail more in the plane of the boom/mast) but certainly adds another complication. Dick Stevenson, s/v Alchemy
John, Nice article and agree on all particulars: set up, raising through the LJs, height of attachment on mast, dead-ending, etc. Two additional points: for smaller boats, we (40 foot cutter) have used a 2 fall LJ system rather than 4 fall for decades without problem. We changed to 2 fall when we went with fully battened mains. I also think of my LJ system as a back-up topping lift to keep the boom from becoming dangerous to boat and people if the topping lift fails. I do not have a boom support with the vang. I have seen a number of LJ designs, commercial and homemade, where the lines are strong enough to hold the sail, but may not be up to holding up the boom in the event of a TL failure. If wished, it is easy to cover this base on initial design. My best, Dick Stevenson, s/v Alchemy
Good point on a two fall system for smaller boats, particularly for those with full battens. Fits in well with your great point below too.
John, There is an over-arching theme on your suggestions which I believe to be under-appreciated. Your LJ system report is a very good example as many people might read it, agree with its thrust and points, but not appreciate just how much simpler it makes everyday life on a boat. And simpler means safe and secure when all else is messy. Most of us are inveterate fussers so that making adjustments, fussing, is right in line with our character. It is my take that the more miles put on your boat, the less fussing one wants. Fussing is also prone to error and fatigue. I look for what I refer to as no-brainer systems. It may be the growing older, but I appreciate no-brainers more and more. And having developed the same LJ system and used it over long periods and many miles, its robust simplicity and no-brainer aspects (design and forget) appeal. Dick Stevenson, s/v Alchemy
Brilliant point, very well put, and exactly my thinking. I have noticed over the years that there is an inverse relationship between number of miles a voyager has sailed and the level of complication of the gear and systems on their boat. More on that here .
John, You mention sail covers in the article with a suggestion to stay away from the built in covers with good reasons to back that up. There are two other considerations that argue (for me) against the built in sail covers. The first is that when closed up and zipped they are in a catch-rain configuration (high sides and trough in the middle). Because of this the sail becomes wet and stays wet after rain. Either (or both) the zipper down the middle allows water through or the material does (the usual cloth for this is not waterproof or is not waterproof for long). Then the cover keeps the sailcloth from drying. The second complaint is that these systems use cloth that is not UV proof or not for very long. You might say the same complaint can be levelled at conventional sailcovers and you would be right. I believe one of sailmaker’s best kept secrets (please confirm if I am correct) is the awareness that Sunbrella and its many clones let UV through and loose UV protection every year. This means that within a few short years your UV protection for your expensive sail cloth (and its stitching) is compromised. This happens well before the integrity of the sail cloth and its stitching start to make one think about a new cover. And, of course, this happens more rapidly in the areas where you need UV protection the most. Our solution was to have our sail cover made out of vinylized Sunbrella (this has some proprietorial name which escapes me right now). This killed 2 birds actually. Not only is the material completely opaque keeping all UV at bay, but it is completely waterproof so the sail remains dry even in the very wet weather that England brought us last season. At 8 years of age it hardly looks brand new, but still does the same functions it was originally designed to accomplish. The only down side is that the overall storage package is a bit heavier and bulkier. Lastly, I am fairly diligent about sail covers, but I do admit to not deploying mine when we get in late and intend to leave the next day. Other than fostering good habits, are there other reasons for your putting the cover on in those circumstances? My best, Dick Stevenson, s/v Alchemy
That’s interesting. I have always used plain Sunbrella and have never really noticed any deterioration in the sail due to sun shining through it, but that does not make you wrong to worry about it. Also, we replace our cover about every five years, so that may be helping.
I guess this is one of those classic trade off situations in that I have always worried that a waterproof sailcover would prevent the sail from drying properly when it has been stowed wet, or when water trickles through the holes where the lazyjacks exit. Humm…on reflection, I think your concern may be more valid than mine. Humm, again…bottom line, I really don’t know.
The reason we are so diligent—Oh, OK, anal retentive—is that in the north, even just Maine, it will often be light for several hours after we get in and the sun will rise many hours before we get up. Having said that, in the fall, when the days are shorter, we are not quite so careful.
John, I suspect 5 years in northern latitudes one may not see enough loss of UV protection in a sail cover to degrade the sail itself noticeably, although I suspect it is occurring. Dan Neri (in his excellent book, “The Complete Guide to Sail Care and Repair”) talks of a Caribbean winter, Maine summer boat whose mainsail not only had a mainsail cover, but had its aft half covered once again much of the time by a large cockpit awning. Four years of this had the forward half of the sail degraded, but not the aft (and only on the upper folds). regarding damp sails, I am fortunate to be living aboard so it is very rare to put a cover on a damp/wet sail. No longer do I have to cover the sail and leave the boat to go to work . Finally, I would not describe you as anal-retentive. Too often, discipline and good habits generate ridicule in the world at large, and, to my observation, most powerfully from those with little discipline and markedly poor habits. Thanks again for your thoughts
That makes sense.
One thing I can add from my days as a sailmaker, back when the world was young and so was I, is that it is generally better to stow a sail a bit wet, particularly one that is bent on, than try and dry it out by leaving the sail cover off, or worse still, as you see some do, hoist it to flap-dry.
The point being that a bit of mildew, while unsightly, has pretty much no effect on the useful life of a modern synthetic sail, whereas flapping and UV are a sailmakers’ best friends.

D Faivet Sur le HANSE 400 ( 40 pieds) c est un bateau sur-toilé en GV, sur lazy jack , j ai fait rajouter une 3eme prise de ris, il est toutefois pas possible de ramener les manoeuvres automatiquement au cockpit, ( je navigue en equipage réduit souvent seul pour manoeuvrer, il est necessaire pour affaler ma GV de ce positionner au pieds de mats et d aider manuellement la GV a descendre , et bien entendu mettre le pilote automatique dans l axe du vent, la manœuvre doit etre rapide et peut etre délicate par grand vent lorsque l on est seul, j ai installe un frein de bôme par sécurité, le système globale n est pas performant, c est pourquoi la lecture de cet article en vu d amélioration m a intéressé Cordialement Ulysse

John Would you please clarify the lazy jack upper line lengths . I know the height above the boom for blocks but the lines that hold them up two going to one line to mast . if the foot is 16 ‘ and the hoist is 48′ that puts the blocks 5′ above the boom and if the dead end on the mast is 20’-24’max so I guessed that I need a line from mast to eye splice and the eye splice to 2 lines to blocks those are the ones I am confused about. How far aft of the mast should the eye splice be ? Is it 50% of the foot? Thank You James Dylewski
Just measure so that the attachment point on the mast is about (and no higher) than 50% of the luff length as measured from the gooseneck. The length of the two legs that end in the block are not really critical. Make them say about 25% of the foot length with the aft one slightly longer so the blocks are level, and you should be good. You can also click on the picture at the top of the post to make it bigger, which should help clarify things.
Let me know if that doesn’t make it clear, and I will have another go.

John, Not sure if commenting now, a year and half later, is appropriate or efficient. But I could not find any other posting close to my question. How does one set up a trysail ready for hoisting after two or three reefs are not enough reduction in sail? it seems to me that the Lazyjacks will get in the way. The lazyjacks are up when you attach the trysail to its dedicated track and halyard. Trysail is in its bag at the foot of the mast. The undeployed trysail and its sheets are outside of the lazyjack system. When it is hoisted and sheeted in, it is inside the lazyjack system. I am picturing a bit of a tangle. Bringing the lazyjacks forward before hoisting seems not to solve the problem since they would cross the trysail track and still be in the way. You can probably tell that I have not yet hoisted my trysail! I am planning on doing so this spring when the cover is off and I am in the water. So I am anticipating as I plan for sheet attachment points and angles. If the answer to this question is already contained in another place on AAC, please lead me to it. I searched and could not find it. Thanks, Clifford
Hi Clifford,
Great question. You are right, the lazyjacks are an issue. What we do is slack the port (same size as the storm trysail track) off to the point that the can gather the whole bundle (boat hook) and loop it over a winch on the mast and pull tight. We then run the sheet between the bundled lazyjacks and the boom.
At this point we can hoist the trysail through between the bundle of lazyjacks and the boom. Once hoisted the trysail track is above the bundle.
Of course the key to all of this is practicing it at the mooring and then documenting the procedure with photos and text in the boat’s manual.
Thanks, John. Okay, let’s see if I have the picture. The sequence is what is important. The trysail is on the track at the deck and the halyard is attached. Everything, including the sheet(s), is in the bag ready to be deployed. There are two reefs (I have only two, taking 30% and 60% down with each). Time to deploy the trysail. Douse the reefed main. Tie it to the boom in a couple of places? Pull the lazyjacks forward to hook on a winch on the mast. Aren’t they going over the trysail track? What is different between your picture and mine. Perhaps, because the trysail is so small (but made of relatively heavy clothe!), it will fit up through the slot between the mast and the lazyjacks. But it is blowing like crazy! That is why we have applied the KISS(weetheart) principle. Help how do I hoist? Also, what is powering the boat if I have taken down the reefed main? Is the storm jib or staysail enough? I need to keep the boat moving to maintain steerage, right? Thanks, John Clifford
First issue, don’t take the main down first, or at least I would not. Rather, hoist the trysail next to the main. This gets rid of a lot of the problems because either the trysail is sheltered by the main, or it goes up plastered to the main. Of course, for this to work, you need a separate trysail halyard, which we have.
And yes, you are right, all of these things are a challenge when it’s screaming. Key is having really good practiced procedure inlace before you need it.
Okay, raise the trysail before dousing the main. But what about the lazyjacks being in the way, or are they? Are they not crossing over the trysail track? Clifford

Thank you! I had never thought of hoisting the trysail with the mainsail still set, because in every boat I have sailed before the one I have now, , such a thing was impossible. But now I have a spare halyard and a full length track. Brilliant!
Further to my above, the best option if you don’t have a separate storm trysail halyard is to use the motor to maintain stearage way while changing to the trysail.
See this chapter for more.
I do indeed have a separate trysail halyard. My question remains: how do you hoist the trysail through/past the lazyjacks, as described above? The lazyjacks cross over the trysail track and the path of the trysail as it is hoisted. What am I missing? Clifford
The lazyjacks are hooked around a winch forward of the trysail track so the sail hoists between the lazyjacks and the boom/mast. That’s why it’s important to reave the sheet between the two too.
Just went for a walk and realized that I have, I think, confused myself…not surprising that I confused you!
As I remember, we bring the lazy jacks forward on the port side and tie them, bunched up, on the reefing horn. The result is that they are between the main and storm trysail track so that the trysail hoists outside and to port of both sets of lazyjacks.
Having said that, it’s five years since I have practiced this, so I need to verify the way it works on the boat, and also check the boat’s manual,

Hi John I wonder why you decided on a splice for he top line, fixing the individual lengths of its 2 legs (like an inverted “Y”) rather than having the legs as a single line running hrough a block or alu ring. Is there any disadvantage to allowing the 2 legs to self-adjust? Yours aye Bill
Have another look at the pictures. Key point is that the lines pass through blocks on the boom, so they self adjust that way. Adding another set of blocks is added expense and complication without changing anything. And doing away with the blocks on the boom would prevent us from running the jacks forward to the mast.
Hi John Thanks for the reply, but I obviously didn’t phrase my question right. Unfortunately having another look at the pictures doesn’t help, as my question relates to “the single line just above the picture”. You comment that making a “splice in braid to marry up the two lower legs” is difficult. My question, I hope clear this time, is whether it might not be easier and cheaper to replace the splice with an Antal ring, with the two lower legs being a continuous line. The rest of your set-up is absolutely clear and looks excellent. Yours aye Bill
That’s what I’m trying to say, because of the blocks on the boom the four legs of our lazyjacks automatically achieve the same tension and that tension can be adjusted simply by tightening of loosening the forward leg. Adding blocks at the point where the two top legs branch off would not do anything useful and would increase chafe the chances of something fouling said blocks a long way out of reach.
Look at the second picture down (click on the photo to make is bigger.) and follow the forward leg from where it cleats on the boom to where is dead ends about one third in from the boom aft end and you will see that it is all one line that self adjusts. (Click on the photo to make is bigger.)
Having said that, yes, using a ring would be easier than the splice, but I guess my thinking is that this has worked for going on 100,000 miles so “if it works, don’t fix it” would be my approach. The law of unintended consequences lives in sailboat rigs as I found out when I used a lighter line and it jammed horribly behind a batten car necessitating a trip up the mast (see post). I can see the same kind of thing happening with a ring. My mantra: simplify, simplify, simplify.

Hi John, What do you call it when you splice two lines to one? And how is it done? A quick search of the google turned up nothing. I appreciate the advise to have a qualified rigger perform the union, but I am curious more than anything. Thanks, -Michael
In three strand rope there are two options: a long splice or a short splice. The long is more difficult to execute, but adds less bulk, than the short. I don’t know of a splice in braid to do the same thing, but there maybe one. Splice or not, if a rope is too short, it’s probably better to buy a new piece the right length, rather than join.
If you are referring to our lazy jack system, Jay Maloney, our rigger, did a very elegant braid splice to join the two parts together, but he did mention that its a tricky one to execute well.

Hi Bill and John. I’m commenting years later than the post, but maybe it’s still useful to add a detail: I also have a fanatic love for simplicity, which is good enough reason for preferring a splice, but in this case there’s another reason to not put a ring where the line from the mast splits into two lines.
Such a ring would make the tension between them equal, but in this setup there’s another load balancing setup in the lower line. The two balancing systems will sabotage each other. There is no neutral balanced position. Balance can be found with one system at the extreme edge ant the other at the opposite extreme. This way, it will look untidy and behave unpredictably.
Now that’s something I had not thought of, and a very good point too.

I can attest first hand that using rings from the initial line front the mast does not work well. They are so smooth it caused the split line to move around and sometimes bringing the continuous line up to the ring which leaves a very long leg of the split line. Plus it doesn’t look uniform. I didn’t ask for them the yard did it. I have to cut them out because I can’t pry them out(tried).
We did use a type of smooth block similar to a ring for the split lines instead of small blocks. They work well. And I think will work better when I get the other part fixed.
Thanks for that corroboration. Isn’t it amazing how these small things make such a difference to overall function?
John, I don’t think I saw a mention about where and how to terminate the mast line. I understand no more than 50% of luff length. What I’m asking is should the terminations be on the mast sides or under the first spreader(so get a wider termination than the side of the mast)? Our rigs are similar in design, not size though close, so I was thinking around the first spreader. I’m just not sure where to put the pad eye. Any clarification would be helpful as I have all the gear to make it up.
Regards, Ronnie
Scratch that, I see it! I must have overlooked the wording.

Lowering the mast attachment of lazy jacks is great advice. Huge improvement.
I have a single spreader masthead sloop and the lazy jacks passed through blocks well above the spreaders. Some time ago, on the advice in this article, I lowered them to the spreaders. I also placed them outboard of the mast, about midspreader. I chose to keep the termination at the mast base and I stow the lazy jacks forward when covering the sail.
When raising the main sail, if an upper batten (full batten main) catches a leeward lazy jack, and I am on the windward side of the boom, I have to lean far to leeward to tug the leech. I plan to move the lazy jacks inboard to the mast. I suspect they will not be more likely to catch and guiding the leech may require less of a stretch on my part.
Anyway, this was a great article and I have incorporated much of it into my setup, which continues to evolve. I encourage anyone with lazy jacks high on the mast to lower them. Thanks.
Glad that helped. One thought. I really don’t like to see lazy jacks attached to spreaders, particularly outboard from the mast. I’m planning to write a post on why not, but the short reason is that a snagged lazy jack can pull the spreader out of column, which can result in it collapsing, a quick way to a dismasting.
The point being that spreaders are only intended and engineered to take compression loads, not bending.
So, I’m really glad to hear you are moving the lazy jacks off the spreaders.
Hi Stein I have just changed (I hope improved) our lazyjacks system. Your comment was also an eye-opener for me. Of course John’s system is an improvement over my old system with endless line connecting the two sides. In spite of being frustrated when the two sides became “unbalanced” , it never occured to me that John’s system solved this problem. ? Regards Bill

Thank you for your suggestions. There are certainly many ways to skin the cat.
We used a Dutchman system for years, which worked beautifully, leaving the mainsail nicely flaked ready for ties, and easy to hoist without snags, while providing helmsman visibility. It took some trial and error to adjust it properly.
A new main with 2 long + 2 battens ended the Dutchman, and eventually we migrated to lazy jacks recently. We have not found a sweet spot yet, because snags are occasional and the sail does not flake like it used to. This is a small Bristol 32′ single spreader rig with 13′ boom.
I’ll try lowering the mast attachment to below the spreaders (losing the cheek blocks) and reconfigure to this system. I’ve been tying the lazy jack boom end lines to boom sail slugs and leaving some slack in the system (which seems to work, sort of).
With this new system I will need to commit to drilling holes in the boom, which is fine if it works better, however I do like to loosen the lazy jacks to pull them forward to the jiffy reef horns to fit the sail cover (Elimination of the Dutchman made the sail cover simpler.)
I assume this system will still let me use the jiffy reef horns to store the lazy jacks? BTW We just used 1/4″ double braid with nylon eyes where necessary.
Thanks, Rick
We prefer to have zippers in the sail cover, but each to their own. If you will be regularly bringing the lazyjacks forward see the paragraph under “An Exception”.
Re-reading I saw this: “We have left enough length in this line so that we can let it run through the blocks without losing the end when we gather the lazyjacks forward to the mast.”

Dear John, I am fitting out a new 41 ft aluminium cutter, and I would like to follow your advice on rapid manual hoisting of the main as far as possible. My question is how do you belay the main halyard: You mention that there should be no clutch between the 8 ft-high halyard outlet and the winch. The halyard stays on the winch all the time? If it is self-hauling, what happens if the loose end becomes accidentally pulled out from the winch crown? If not self-hauling, do you have cleats or clutches below the winch? So it cannot be used for anything besides the main? Sincerely Hendrik (Calling from the Netherlands so I hope my nautical terms do not cause confusion…)
Hi Hendrik,
Good question. We have a standard old fashioned horn cleat just below the dedicated self tailing (hauling) main halyard winch so we cleat off to that. Also makes a great place to hang the coil of halyard.

I am redoing my lazy jacks, which work but are not as elegant as yours. My first question has to do with the upper legs to the single line to the mast. Need that be a firm attachment, using a fancy splice? How about an eye in the single line with the legs run through it? Or even another block? Second, are those upper legs the same length on each side of their attachment to the single mast attachment line? Finally and separately, is your dedicated trysail hailard full hoist to mast top. I have two main hailards, but we have always used the spare to carry, at the ready, a Lifesling lifting tackle. I sort of hate to give that up, even though we always are supposed to wear harnesses with short tethers off shore. But if a crew member slipped off the boat under the lifelines, we might need the lifting tackle to bring him or her aboard. But I take your point about hoisting the trysail before striking the main.
Hi Terence,
On the LJs, yes, an eye would work, rather than the fancy splice. Don’t use blocks there though. The legs are slightly different lengths with the aft one being longer so that they end up the same hight from the boom when fully deployed—not sure it matters that much though.
On the TR halyard. No, not full hoist. It exits the mast just above where the head of the TR will be. We have a spinnaker halyard earmarked for POB recovery, but that does mean flicking it around the spreaders.

Absolutely valuable piece, along with the comments. I’d been searching for just this information in anticipation of refitting our new (to us) cutter.
Why not have a instead of a single lower line, terminated first on the port side near the mast (as I’m assuming you do), but then instead of terminating separately near the outer boom end, passing the line through a low-friction fairlead (centered on bottom of boom) and then roved back up through the upper line blocks eventually back to the cleat forward as you have it?
Our previous boat had an off the shelf Harken LJ system set up this way, and had very little adjustment issues. If not for absurd $ cost, I’d probably just go buy one!
If I understand you, you are suggesting making both sides all one line? Have I got that right? If so, I think that would make it a lot more difficult to slack off both jacks and bring the bundles forward, when necessary, for example taking the sail on and off or setting a storm trysail. Also, I think the line would chafe where it passed under the boom aft.
But, most always with these things, the only way to know for sure is try it. You can always revert to our way if it does not work.
Ok; good reason. Thanks. Perhaps the prior-mentioned Harken version didn’t have significant friction issues because it was a simpler 2-leg system on a relatively short boom (higher-aspect) rig. I’m sticking with your version this time.
I’m going to copy your system. I wonder if I can use low friction rings in place of the bullet blocks?
I have not tried it, but my guess is it should work fine with rings and might even be an improvement. (Low friction rings were not a thing when I originally designed it.)

We have a two legged system with one lower line that runs from a cleat on the bottom of the boom a few feet aft of the gooseneck, up through a ring on the part that comes down from the mast, back down under the boom and through a little padeye, back up the other side and down to the same cleat. Super simple and works fine except that I should move the upper attachment on the mast down a little way.

Hi John, is it possible to get a picture of the upper part of your lazy jack system?
Possibly, but it would require a big search of my photo stock to find it, and I’m not sure what it would tell you that this sentence does not:
We dead-end the lazyjack upper line, which combines to a single line just above the photograph, to a pad eye each side of the mast with a cow hitch using a soft (no thimble) eye splice.
What is it, specificaly, that you need clarified?

I am a newbie and have enjoyed following all of your articles and their comments. I am trying to install a lazy jack system on my Pearson Triton. I have researched the web looking for instructions on how to install. Surprising to me there aren’t very many. There are a few sources discussing the mast side line lengths, ratios. I have been unable to find any sources discussing the line lengths, ratios, for the boom side of the system. There were hints in a you tube video, but part 2 never happened (The comments said the author was in a motorcycle accident) I have tried, using strings and clamps, to determine the necessary lengths, I have been unsuccessful as of this date. I am interested in guidance on the boom side line lengths, but what am I am more interested in, is why this part of the lazy jack system hasn’t been discussed.
I’m confused since my article above has exact instructions on locations for the boom side terminations and blocks expressed as a percentage of mainsail foot length.
It also includes photographs showing the set up and the location for the mast termination expressed as a percentage of mainsail luff length.
Have another read through and then if you still have specific questions I will answer them in the comments.
I agree with you, the mast, and boom termination points for either for either 3 or 4 lines, are well documented. My question is about the line lengths between the mast and boom termination points. I am jury rigging the line setup by using ring clamps on the boom and paracord, for the boom lines to mast line connection, to find a best fit for my configuration.
I see what you mean. I have updated the article to fix that. Thanks for the heads up.

Mike you may be interested in US Patent 5,327,842 which describes a lazy jack system that pulls forward to the mast to allow its use with a standard sail cover. The patent also provides references to previous work in the field both patented and printed.
Sailboat Mast: Everything You Need To Know
Anyone who loves sails and boating needs to know their sailing boat from the inside out. If you are new to the sport, then you are probably wondering about things like a sailboat mast and everything around it.
In this article, we have everything you need to know about a sailboat mast, like what it is, its different types, as well as the material it is made of.
All you have to do is keep reading below to find it all out!
What Is A Sailboat Mast?
A sailboat mast is a tall pole that is attached to the deck. It helps secure the sail’s length to the boat and upholds the sail’s structure.
A sailboat mast is the most defining characteristic of a sailboat, helping keep the sail in place. What’s amazing about it is that it can even be taller than the vessel’s length!
Although conventional sailboats use wood, the majority of the newer sailboat masts are constructed of aluminum. The kind of sailboat mast a vessel has depends on the kind of sail plan supported.
What Are The Parts Of A Sailboat Mast?
The sailing mast is essentially a pole that cannot operate effectively without certain critical components.
Moving from the deck to the rest of the sailboat, we can first see the mast boot, which prevents the water from draining down the mast and flooding the cabin.
The stays are the long cords hooked up on each side of the mast, and they hold the mast up off the ground under massive force.
A gooseneck pipe fitting joins the boom to the mast. The sail is raised and lowered using halyard lines that go to the mast’s highest point.
Types Of Sailboat Masts
Rigs with one mast.
Many people that are not aware of the modern sailboat design envision single-mast sailboats.
The reason why this type of sailboat is so widely known is that these masts are low-cost to construct and fairly simple to operate alone.
Sloops, cutters, and catboats are among the most popular rigs with only one mast.
Sloop Masts
Nowadays, sloop rig vessels are the most popular type of sailing boat. Sloops typically have only one mast positioned somewhere on the front third or the middle of the deck, even though some boat models might vary a bit.
A sloop mast is equipped with a big mainsail and a jib sail (see also ‘ Why Are Sails Made In A Triangular Shape? ‘). A Bermuda-rigged sloop has only one towering mast and a triangle-shaped sail. Other not-so-popular gaff-rigged sloops have a significantly smaller mast and bigger 4-point mainsails.
Catboat Masts
Catboats are distinctive New England boats that have a forward-mounted standard mast and a long boom. A catboat, unlike a sloop-rigged boat, is only equipped with one sail.
It is also typically mounted (more or less) right in front of the boat, and it is commonly short and relatively thick.
Catboats are frequently gaff-rigged. In a single-mast design, gaff-rigged sail designs (see also ‘ The Definition And History Of The Lateen (Triangular) Sail ‘) succeed in making the most out of short masts and are relatively simple to maneuver.
The mast of gaff-rigged catboats is shorter than that of a Bermuda-rigged boat of comparable size, but it is typically taller than that of comparable gaff-rigged crafts.
Cutter Mast
A cutter-rigged sailboat has only one towering mast and several headsails, which is why it can be mistaken for sloops when seen from afar.
However, because cutters use numerous headsails rather than one standard jib (see also ‘ Everything You Need To Know About Sailboat Jibs ‘), their masts are typically taller than those of comparable-sized sloops.
In several places, a gaff-rigged cutter is far more usual than a gaff-rigged sloop. Even at times when its sails are folded, a cutter can be distinguished from a sloop.
This is due to the fact that cutters frequently have a protracted bowsprit and two front stays; the forestay and the jib stay.
Rigs With Multiple Masts
Multi-mast sailboats (see also ‘ Small Sailboats: What Are They Called? ‘) are not as popular as single-mast sailboats. That is why the design and structure of a multi-mast boat usually make it classier and more navigable.
A multi-mast boat provides more than simply great looks. It also provides speed and efficient control for skilled seamen.
Most of these boats have two masts, which seem to be frequently smaller than the masts on comparable-sized single-mast crafts. Yawl, ketch, as well as schooner rigs, are among the most popular types.
Yawls are sturdy multi-mast boats whose length ranges from 20 to more than 50 ft. A yawl has a lengthy forward main mast and a small mizzen mast at the back of the vessel. This type is also frequently gaff-rigged and was previously used as a utility boat.
A yawl-rigged boat can also self-steer by using the mizzen mast and sail. The yawl can be distinguished from many other double-mast vessels by its short mizzen mast, which is frequently half the size of the main mast.
Furthermore, the mizzen mast is located toward the back of the rudder post.
Ketch Masts
Ketch masts can be mistaken for yawls with a quick look. However, ketch masts are equipped with two masts of comparable size and a significantly bigger mizzen mast. A ketch boat’s mizzen mast is located at the front of the rudder post.
Ketch-rigged vessels are frequently gaff-rigged, with topsails on each one of their masts. Triangle-shaped sailplanes on some ketch-rigged vessels prevent the necessity for a topsail.
Ketch masts, much like the yawl ones, have a headsail, a mainsail, and a mizzen sail that are similar in size to the mainsail. Finally, a ketch-rigged vessel can sail while handling more than one rear sail.
Schooner Masts
Schooners are some of the most beautiful multi-mast sailboats. They are clearly more similar to ketches than yawls. However, if you closely look at a schooner, you will see that it will feature a smaller foremast and a longer (or nearly equal-sized) mast behind it.
Schooner masts are large and heavy, but they are generally shorter than single-mast vessels of comparable size.
This is due to the fact that double-masted vessels share the sail plan over 2 masts and do not require the additional length to compensate for the reduced sail space.
Finally, they are typically gaff-rigged, with topsails and topmasts that expand the mast’s length.
Masts Of Tall Ships
Tall ships are those traditional large cruising ships that ruled the seas well before age of steam. Renowned ships with this massive and intricate rig setup include the U.S.S Constitution as well as the H.M.S. Victory.
Tall ships have 3 or more massive masts that are frequently constructed using big tree trunks. Tall ships with 5 or more masts are quite common too.
Tall ships typically are as long as 100 feet or more, since the size and sophistication of these square-rigged vessels render them only useful at scale.
Tall ships have main masts, foremasts, mizzen masts, and gaff-rigged jigger masts at the back of their mizzen masts.

Mast Materials For Sailboats
The masts of sailboats (see also ‘ Two-Mast Sailboat Types ‘) are typically constructed of aluminum or other specific types of wood. Until the 1950s, almost all sailboat masts were constructed of wood.
That began changing around the time that fiberglass vessels rose to fame, with aluminum being now the most used mast material.
Aluminum Masts For Sailboats
Aluminum has become the most popular modern mast material. Aluminum masts are lighter in weight, hollow, and simple to produce. Such reasonably priced masts efficiently withstand seawater. These masts are also heavy for their size.
If there is one drawback to this type of mast that would be galvanic corrosion, which happens extremely quickly once seawater is in contact with aluminum and another metal, like steel and copper.
So, in types like the Bermuda-rigged sloop which are frequently made with aluminum, that is an issue.
Wooden Masts For Sailboats
The typical material for sailboat masts is wood, which is still employed for many specially designed boats nowadays.
Wood masts are big and bulky, yet very sturdy, and proper maintenance can guarantee their lengthy (over 100 years!) lifespan. They are also prevalent on gaff-rigged vessels because wood is best suited for short masts.
The Fir family provides the most popular mast wood. Although Douglas Fir is widely used, regional models (such as British, Columbian, and Yellow Fir) are also ideal.
Several sailboats, especially the tall ships, have masts made of pine and sometimes redwood. Other cedar species like the Port Orford or the Oregon cedar, can also be used for masts and spars.
Carbon Fiber Masts For Sailboats
Carbon fiber masts are a relatively new addition to the boatbuilding industry, and they have a few perks over the wood and aluminum ones.
First of all, carbon fiber is both strong and light, making it perfect for sailboats designed for races and which typically have tall masts. The best top-quality carbon fiber masts in the business are used by ships competing in America’s Cup races.
Maintenance Of Masts
It is critical to maintaining the sailboat masts and all of their associated hardware. Masts’ stays, lines, and halyards must be regularly checked, modified, and replaced on a regular basis. Masts made of wood must be lacquered and inspected for rot.
Masts made of aluminum do not typically require regular checks and maintenance, but any indications of a corrosive environment should be acted upon right away.
Build a clear maintenance schedule with your regional boat repairman or boating specialist. Keep in mind that preventative maintenance is always less expensive and simpler than repair work.
Choosing The Right Mast
For those who own a production boat, the options will be determined by the model and manufacturer.
The important factors to keep in mind for one-off boats without a designer sail plan are:
- the masts step’s features
- the length and displacement of the boat
- the addition of backstays and running backstays
- the quantity and placement of chainplates
If the mast is on a step on deck rather than on the structural beam, an image of the step may be useful to the mast maker.
For those who frequently take part in races, a carbon mast will save them from the extra weight and enhance their performance.
The Bottom Line
We hope that this article was helpful in learning more about a sailboat mast, the different types of mast you can see on vessels, as well as the materials they are made of, and their maintenance requirements.
Masts play a vital role in holding the boats in place, allowing people to keep on sailing to their dream destination, and they are also an eye-catching element of sailboats thanks to their vertical form and their length that often surpasses that of the sailboat itself.
Depending on the use of the boat, you will get a different type of mast, and the material it will be made of, its size, height, and weight, will guarantee the best sailing experience!
Related Posts:

- New Sailboats
- Sailboats 21-30ft
- Sailboats 31-35ft
- Sailboats 36-40ft
- Sailboats Over 40ft
- Sailboats Under 21feet
- used_sailboats
- Apps and Computer Programs
- Communications
- Fishfinders
- Handheld Electronics
- Plotters MFDS Rradar
- Wind, Speed & Depth Instruments
- Anchoring Mooring
- Running Rigging
- Sails Canvas
- Standing Rigging
- Diesel Engines
- Off Grid Energy
- Cleaning Waxing
- DIY Projects
- Repair, Tools & Materials
- Spare Parts
- Tools & Gadgets
- Cabin Comfort
- Ventilation
- Footwear Apparel
- Foul Weather Gear
- Mailport & PS Advisor
- Inside Practical Sailor Blog
- Activate My Web Access
- Reset Password
- Customer Service

- Free Newsletter
Blue Jacket 40 Used Boat Review

Catalina 270 vs. The Beneteau First 265 Used Boat Match-Up

Ericson 41 Used Boat Review

Mason 33 Used Boat Review

How to Create a Bullet-Proof VHF/SSB Backup

Tips From A First “Sail” on the ICW

Tillerpilot Tips and Safety Cautions

Best Crimpers and Strippers for Fixing Marine Electrical Connectors

Polyester vs. Nylon Rode

Getting the Most Out of Older Sails

How (Not) to Tie Your Boat to a Dock

Stopping Mainsheet Twist
Fuel Lift Pump: Easy DIY Diesel Fuel System Diagnostic and Repair

Ensuring Safe Shorepower

Sinking? Check Your Stuffing Box

What Do You Do With Old Fiberglass Boats?

Boat Repairs for the Technically Illiterate

Boat Maintenance for the Technically Illiterate

Whats the Best Way to Restore Clear Plastic Windows?

Stopping Holding-tank Odors

Giving Bugs the Big Goodbye

Galley Gadgets for the Cruising Sailor

The Rain Catcher’s Guide

Sailing Gear for Kids

What’s the Best Sunscreen?

UV Clothing: Is It Worth the Hype?

Preparing Yourself for Solo Sailing

R. Tucker Thompson Tall Ship Youth Voyage

On Watch: This 60-Year-Old Hinckley Pilot 35 is Also a Working…

On Watch: America’s Cup

On Watch: All Eyes on Europe Sail Racing

Dear Readers
- Sails, Rigging & Deck Gear
Revive Your Mast Like a Pro
Each spar section has unique signs of trouble to look for during inspection..

Unobtainium is the metal at the top of every Naval Architect’s wish list. It’s a perfect marine material; light, strong, stiff yet flexible—it’s as inert as gold, but costs only pennies per pound. Sadly, like the search for El Dorado, this metal quest remains more alchemy than chemistry.
For now, aluminum, especially the alloy 6061-T6, is the solid performer. It singlehandedly upstaged spruce as the mast material of choice, and for decades it’s done its job admirably. The alloy isn’t perfect, but by understanding its vulnerabilities, and mitigating those negative characteristics, the functional lifespan of an aluminum spar can be measured in decades not years.
Yes, carbon fiber spars are in many ways the next step forward. But for those intent on being cost effective and not in the hunt for a few tenths of a knot increase in boat speed, aluminum remains the cost effective alternative. In a future issue we’ll focus on carbon’s influence on spars, hulls, rigging, and sails.
Most metal masts are made from long, cylindrical billets of aluminum alloy. Each tube section is created using a powerful ram to force a heated billet (400-500 C) through a set of dies that squeeze and shape the billet into the cross section and wall thickness of a specific spar. Lots of lubricating release agent and 15,000 tons of ram pressure are used to reshape the malleable aluminum.
Billet residue is captured and recycled, while the tube shape undergoes quenching as it moves off on the runout table. The next stop in the line involves a process that draws (pulls) and straightens the tube section.

Once fully cooled, it goes through a T6 heat tempering process that elevates tensile strength from 35,000 to 45,000 psi. Lastly, spars can be anodized, painted, powder coated, or left uncoated. Some masts are extruded in half sections and machine-welded together lengthwise.
There are other aluminum alloys that are better suited to welded hull construction or used for metal casting purposes, but 6061-T6, containing small amounts of silicon, magnesium, and other trace elements, delivers the strength, stiffness and lightness that’s vital when it comes to making spars.
The “T6” alloy is weldable, but doing so anneals and weakens the area that’s welded. This is one of the reasons why, when splicing two sections together, a doubler is added internally that overlaps the junction. Excess heat buildup during the plug welding process that joins the sections is kept to a minimum. Some manufacturers mechanically fasten the junction using machine screws or heavy duty pop rivets.
Unfortunately, aluminum isn’t quite the sequel to tomorrow’s Unobtainium . Aluminum, like steel alloys, show a proclivity to oxidize. But in the case of most steel alloys, oxidation is an ongoing process that only reaches completion when the object in question has become an unrecognizable pile of rust.

Bare aluminum, on the other hand, reveals a very different oxidation curve. A shiny new piece of aluminum develops a speckled, gray, oxidized coating that actually becomes a protective layer, preventing further oxidation. Ironically, this means that the ugliest looking mast in the marina, that non-anodized, unpainted one with the aesthetic appeal of dirty socks, is about as well protected from further deterioration as the spar on the gold-plater with the automotive finish. This is the reason why most commercial mariners restrain from painting the deck and topsides of their aluminum workboats.
The root cause of this aesthetic injustice is the way moisture, especially salt water, finds every microscopic void or coating imperfection and causes aluminum to oxidize around voids and spread beneath the paint layer. By the time blisters appear and paint begins to flake, the sub surface is covered with aluminum oxide and starting to pit.
There are several ways to tame the effect of chloride-rich seawater. But when it comes to a failing painted surface, thorough prep work is essential. Modern epoxy primers help hold corrosion at bay, and single and two-part urethane coatings seal the surface. Hard-anodized or powder coated spars are even better protected, but cost more and are more complicated to refinish when they finally fail.
GALVANIC CORROSION
Galvanic corrosion is aluminum’s second major nemesis, and it stems from an electrical interaction rather than oxidation. Metals are rated on a galvanic corrosion scale that places less reactive (more noble) metals at one end and more reactive (less noble) ones at the other end.
Platinum, beryllium and magnesium lean against one of the bookends of this scale. Magnesium, a plentiful element, is strong and light, 35 percent lighter than aluminum, but way too reactive in the marine environment. Platinum and gold sit at the opposite bookend of reactivity and are so inert that all other metals become anodic in their presence. The metals that lie in between these are relatively ranked according to their behavior in an electrolyte such as seawater.
When it comes to marine applications, there aren’t many platinum thru hulls, but silicon bronze is a pretty good compromise between cost and corrosion resistance. It’s rank on the galvanic scale is toward the more noble end and it behaves as a cathode to less noble metals like zinc, brass, and aluminum, which become anodes in the proximity of more noble metals.
Unfortunately, when dissimilar metals are in direct contact, all it takes is a little rain or morning dew to set up a temporary galvanic cell. Salt spray finds all the nooks and crannies on a sailboat and as the water evaporates it leaves behind crystalized sodium chloride (NaCl). Each raindrop, wave splash or drop of dew rehydrates the electrolyte. And as every galvanic cell demonstrates, wherever two or more dissimilar metals are immersed, a current flows and the less noble material (anode) corrodes causing electrons to flow toward the more noble metal (cathode). The net result is pitting and eventual destruction of the anode.
This prolonged, double-barrel assault on an aluminum spar is most noticeable in areas where dissimilar metals make contact.
There’s an old superstition about putting a couple of silver or copper coins under the mast step, just before stepping the spar. It may have been a good luck charm in the days of iron men and wooden masts. But today, placing a copper penny or silver eagle in a wet mast step completes a highly reactive galvanic cell and creates a corrosion experiment of the first order. The right answer is to do everything possible to separate dissimilar metals. Putting a Delrin strip or dielectric PTFE tape between the hardware and the mast wall really helps.
When installing larger stainless steel hardware on a mast, it’s easy to cut out a gasket from a sheet of 30 mil thick Teflon. Also be sure to use Tef-Gel or a similar dialecrtic grease or sealant on all screw threads.
MAST INSPECTION
Once the mast has been unstepped, positioned horizontally on horses and the headsail furling gear removed, it’s time to take a close look in all the nooks and crannies where things can go wrong. I prefer a bottom up approach and group the mast into four related subsets: base, column, spreaders, and masthead. If the mast is going to be painted, postpone this DIY inspection until all the rigging and hardware has been removed. In either case, scrutinize the spar, hardware and rigging attachment points, especially where high loads are focused.
It helps to have a good magnifying glass, a pick, knife and small scraper on hand to expose and inspect oxidized areas. Place a piece of contrasting color masking tape on each point of concern as you progress toward the masthead. Once the inspection is complete, use a digital camera or smartphone to document the more serious issues. These snapshots provide a record of the location and extent of all corrosion, deep pitting and any cracks emanating from fasteners or hardware. Also record all dents or other impact damage and any sign of ongoing abrasion. Serious damage can be caused by misled wire running rigging and the cycle loading wear linked to variations in tension. Naturally, all standing and running rigging should be thoroughly inspected at this time— a topic of a future article.
AT THE BASE
Keel-stepped masts aboard many cruisers and racers are hidden below the cabin sole and reside in a wet, corrosion prone, bilge ambiance. And it’s another reason why, when a mast is unstepped, the entire support structure, step and the heel fitting deserve a close look. Check for signs of corrosion and make sure the hardware that fastens the heel fitting to the grid or other transverse and fore-and-aft support is in good shape. This structure supports compression loads and also must respond to changes in backstay tension and side loading, not to mention the shock loads of a beat to windward in heavy seas. This is also the time to do what I call spar-oscopy. Take a compact LED flashlight and tape it to the end of a long, thin PVC tube or bamboo fishing pole that will be used to look at the mast interior.
This jury-rigged light on a pole, allows you see signs of internal corrosion and gives you a chance to locate abrasion points where halyards have been misled or are rubbing on hardware. A narrow spot beam will illuminate much of the inner wall of the mast, and if the running rigging has been replaced with thin messengers and the spreader “dog bones” (cross connecting supports) have been removed, you will have a clear sight line up the spar. This is a good time to sort out any halyard overlaps.
Riggers also look for an ailment called “elephant foot.” It’s a descriptive name for the partial crumpling of the spar near the base of the mast, It’s caused by over-compression and/or a wall section that is too thin. This wrinkling is usually just above the mast step, and it indicates a condition just shy of complete failure. It can be linked to prolonged ponding to windward with excessive backstay tension and overpressuring mast jacks. In some cases a new section can be spliced into the spar. By if it’s an older mast and other significant signs of deterioration are present, it may be time to opt for a new spar. Don’t bet the farm on an “it hasn’t failed yet” assumption; hire a skilled rigger to advise on the tough calls.
At first glance, the mechanical challenge linked to stripping hardware from a mast seems rather simple. All you need are a couple of screwdrivers and you’re ready to go. Unfortunately, the gods of galvanic corrosion have placed another obstacle in the sailor’s way.
The threads of those stainless steel screws attaching hardware to base plates or to the mast wall itself have become so corroded they are likely to be screwdriver-proof. Part of the blame goes to original hardware installers, who gave little attention to coating threads with an anti-seize compound and the effect it would have on future maintenance.

So after some years or decades, when it’s time to see what lies underneath the hardware, my first step is to clean all oxidation, paint and grime away from the screw slots and make sure that the chosen screwdriver fills the entire slot. A snug fit is the goal. Then, if a good counter clockwise twist fails to elicit any rotation, it’s time to add a wrench to the screw driver and deploy a good deal more torque.
If this also fails to loosen the bugger, I go to plan B before I ruin the screw slot. Step one is to use a pick to scrape away oxidation around the screw head perimeter. The next step is to douse the area with a penetrant such as PB Blaster, CRC’s Ultra Screwloose, Knocker Loose Plus, Gasoila Free-All or a similar product (see Inside Practical Sailor blog post, “More Boat Tips: Unsticking Stuck Nuts and Bolts”).
Before once again applying torque to the problem, I spend some time using a drift pin and a small ball-peen hammer to tap each chemically soaked fastener. Afterwards I add more penetrant around each screw head. Instead of immediately reverting to a brute force approach, which more often than not leads to a broken fastener or a damaged screw slot, I let the penetrant do its thing and return the next day with my portable impact driver and assortment of screw driver bits. The small Makita impact tool applies a pulsing torque. Combined with a little penetrant and a lot of patience, I’ve found this tool to be very effective on stubborn fasteners. Screw diameters of ¼ inch or less are not hard to snap so use pulsing torque is far better than more leverage and brute force.
If the screw slot is damaged it’s time to switch gears and be ready to drill out the head of the screw and pull the hardware off the remaining stud. A stud remover fitted to a socket wrench works better than vise grips when it comes to backing out a headless screw. But it requires a half-inch or more of the screw stem to be exposed.
The secret to drilling off the damaged head of a screw involves the use of a drill bit made for stainless steel. Place it in the chuck of a low-speed drill that delivers ample torque at slow speeds. Those using a dull bit and a high-speed drill are likely to work-harden the stainless steel screw head, making it even harder to drill. Applying cutting oil that both cools and lubricates a bit will make drilling more effective.
ALONG THE COLUMN
A sailboat mast is like a long electrical fuse: one bad spot and the show is over. Critical failures are usually linked to standing rigging failures and can occur at toggle or tang attachment points, on the spar itself or at spreader tips and roots. Upper shroud tang fittings, near the masthead, need a close look. Check clevis pin holes for elongation and Tball or stem ball cups for deformation.
Sight along the open spans of the spar, where no hardware is attached. It should be free of abrasion marks and signs of halyard shackle damage. It’s surprising how many painstakingly applied paint jobs are ruined by halyard slating cause by poorly set halyards. During this part of the inspection also check exit sheaves, winch bases/pads, mast steps, the bow light, radar bracket and other attached hardware.
The gooseneck fitting and boom vang points of attachment are highstress areas and prone to developing stress cracks. Just below this union, forces converge at the mast partners, the reinforced area where a keelstepped spar passes through the deck. Check here for stress-related damage as well as corrosion issues. If you find signs of extensive pitting or stress cracks, a cosmetic repair can be more harm than help. Have a local rigger with a good reputation take a close look at what you have uncovered.
The mainsail mast track should be straight and the slugs, slides or cars that run in or on them should slide freely. Take an extra slide or car and hand test the track, identifying any points where friction increases. Problems are often caused by burred or dented metal, oxidation in an internal track or misalignment at track joints. Most of these issues are easy to resolve while the spar is horizontal and access is optimized. In-mast or in-boom furling systems each have an inspection and maintenance routine outlined by the manufacturer. Maintaining optimum reliability revolves around following these guidelines. Care should be taken to avoid keeping paint and primer from hampering track function.
Search for causes of abrasion, eliminate the dings and dents from halyard shackles by solving lead problems. And be on the lookout for hairline cracks emanating from fasteners on the leading edge of the mast. Modern spar design accounts for backstay tensioning that induces bend in the mast to adust headsail shape. This bending results in an intentional tension increase on the spar’s leading edge, adding new stress to a column already in compression. Small cracks emanating from fasteners on the leading edge of the mast can be enlarged as the mast is intentionally bowed.
Every sailor who’s painted anything on their boat has plenty of tips to share. But when it comes to useful insider advice, pay more attention to the pros who have learned what works over many years. The good news is that although paint brand allegiance may vary, generic mast prep and painting techniques have a high degree of correlation.
When it comes to the first step in the prep process, every expert sings the same refrain. Remove the hardware if possible, especially if there’s any sign of blistering or paint failure around the edges. If there’s no sign of any corrosion at all, and the fasteners are likely to snap rather than release, carefully prep and tape around the hardware.
Sand, wire brush or sand/soda blast all areas where corrosion has pitted or left the surface covered with white aluminum oxide. Take a close look at the heel of the mast and the mast step itself. Both need to be free of corrosion and not damaged by metal loss or physical damage. The same goes for the area where spreaders, stays and shrouds attach. The masthead fitting also deserves close scrutiny. Inspect the aluminum around where the sheave axle(s) attach. A corroded aluminum masthead truck, with deterioration around the support for headstay or backstay toggles, can spell disaster. This corrosion inspection is a good time to catch pending problems.
In most cases, OEM painted spars hold up quite well, especially those that have been carefully prepped, epoxyprimed and LPU top coated. Eventually, weathering causes the gloss to disappear, but the paint retains excellent adhesive quality. If you’re facing such a challenge and there’s little or no sign of physical damage or corrosion around hardware, there’s nothing wrong with simply renewing the top coat.

In such cases, begin with a wash and/ dewax cleanup, sand with 220/320, remove dust, tape off hardware, solvent wipe and apply of two coats of the same (or similar type) topcoat, scuff-sand between coats.
However, if there are dings, scrapes or areas where corrosion has damaged the coating or areas where paint adhesion is failing, a decision must be made between spot repairs and complete mast redo. The latter involves removal of most or all of the hardware and stripping off every bit of the old paint. A spot repair approach is much less labor intensive, but if corrosion is rampant, spot repairing can be counterproductive.
During the prep process it’s essential to clean and degrease the surface before doing any sanding or other abrasive work. I prefer to use the solvent/cleaner of the paint manufacturer I’ve chosen. Clean cotton rags work best, and by meticulously wet wiping the surface you eliminate contaminants that can be forced into the substrate during sanding.
In the case of a repair and recoat effort, once the corrosion and flaking paint have been removed, feather in the adjacent painted mast surface with 60- 80 grit paper to achieve a toothy grip for the epoxy primer that follows. When doing a spot repair, this taper zone becomes an important test of one’s ability to feather an edge and hide the old to new paint junction. Seamless blending of the primer sets the stage for a successful, smooth transition spot repair. If, as you sand the boundary, the old paint continues to flake rather than allow you to feather the edge, It time to switch gears and consider removing all the paint.
An important step in painting aluminum is to get an epoxy primer on a freshly sanded and clean surface as soon as possible. When painting an entire spar, It helps if you can set up a way to hang the mast at waist level so it can be rotated in order to access all surfaces efficiently.

PRODUCT UPDATE
Interlux recommends doing the degrease wipe down with their 202 Solvent Wash prior to sanding. Then prime the spar using their InterProtect 2000E/2001E, thinned 15-20% with their brush or spray reducer. It’s a user friendly epoxy primer and easy to sand. Two coats makes the 60-80 grit sanding marks disappear. Both single-part Bright Sides and two part Perfection deliver a smooth glossy finish. The former is easier to apply and the latter is more durable and long lived.
Pettit offers a complete lineup of aluminum paint and prep products. Their approach kicks off with a solvent clean and a medium grit emery cloth sanding. When the residue has been removed, a thin coat of #6455 Primer should be applied. Two hours later, EZ Prime #6149 is applied and when it’s cured and sanded with 220 (repeat if necessary). Finish with two coats of Easypoxy.
Awl Grip recommends an initial cleaning with their surface cleaner T340 followed by a vigorous Scotchbrite scrubbing with Deoxidine and a thorough rinse to remove all residue. When dry prime with 30-Y-94 and within 3-6 hours, without sanding, apply 545 epoxy primer. Sand 220/320 and top coat with Awl Craft 2000.
If the spar was previously anodized precede the above with a 10-minute wash using a 33% solution of natrium hydroxide. Don’t let the solution dry on the spar. Immediately water-rinse and follow the prime and paint process above.
Spreader junctions are like a dangerous highway intersection, a point where competing forces interact and where there are no traffic lights to tame the flow. Rigging tension on the windward side of a sailboat cause compression loads to increase in the windward spreader(s) and decrease in the leeward spreader(s). Discontinuous standing rigging optimizes wire/rod diameter in each panel section, but it also complicates spreader tip hardware. All too often, spreader boots or a well-meaning taping effort, ends up looking like a response to an ankle injury. Even worse it creates a moisture-holding corrosion bath that enhances galvanic corrosion and oxidation. The goal is to avoid going overboard with padding and tape and making sure that water will not collect around spreader tip hardware.
Spreader bases are another realm of serious concern due to cycle loading, multidirectional forces and dissimilar metal contact. Swept back spreaders, especially those that eliminate the need for a backstay, cope with even greater loads. So when the rig is un-stepped, check how the spreader attachment was engineered. Was a doubler added to the mast wall and/ or were cutouts installed and hardware added to connect spreader pairs? In either case, corrosion in key load path areas can greatly decrease the spar’s ability to cope with the fluctuating loads. It’s no surprise that masts often break just above a set of spreaders.
AT THE MASTHEAD
Once launched, it’s hard to see what’s going on at the masthead. This means that when the spar is down it’s time to get a really close look at the mast truck and its associated fittings. Begin by disconnecting the standing rigging and checking the geometry of every hole that supports a clevis pin. The rule of thumb is: round is good, elliptical is bad. This goes for the tangs that connect upper shrouds to the spar as well as the holes in a welded aluminum masthead fitting. The loss of an upper shroud while beating to windward usually brings down the mast, so extra attention in this area is time well spent.
Carbon spar manufacturing mimics the engineering pioneered in the aerospace industry. They have become an essential component In the most competitive ranks of sailboat racing and caught on with cruising sailors who own lighter, more performance oriented sailboats.
Most spars are built on metal mandrels by carefully aligning layers of prepreg unidirectional and multi-axial carbon fiber from masthead to heel. Intermittently, a debulking process is used to squeeze the layers together, and after the laminate schedule has been carefully aligned, it’s placed in an autoclave. Here the epoxy prepreg in the carbon material becomes viscous and cures under controlled heat and air pressure. These materials are expensive, the labor is time-consuming and the quality control must be rigorous.

One of the major advantages of carbon mast building is the ability to engineer the layup to coincide with the load paths and stresses in the structure. Finite element analysis has helped identify how and where forces are transferred through the tube section. Weight is saved by only adding material where it is needed.
A cruising boat designer may opt for extra reinforcement that increases the safety factor by raising the breaking point of the material. Racing sailors have validated the performance uptick associated with carbon spars. Carbon/epoxy laminates do not suffer from corrosion but they are anything but immune to UV light. It’s one of the reasons a white primer and LPU topcoat is the sensible finish.
Minor impact damage and abrasion from poorly led running rigging is fairly straight forward to repair. But damage linked to sailing loads that cause major cracks in the laminate or interlayer delamination is another story altogether. In these cases, the spar builder or a composites shop engineer has some tough decisions to make. The big challenge is when a high-tech laminate bundle fails it’s very difficult to scarf in a new section that will handle all the loads in a manner that’s equivalent to, let alone, better than new. Some insurance companies put restrictions or higher premiums on coverage of carbon masts.

RELATED ARTICLES MORE FROM AUTHOR

Working with High-Tech Ropes
Leave a reply cancel reply.
Log in to leave a comment
Latest Videos

Cabo Rico 34 Boat Review

Super Shallow Draft Sailboat: The Leeboard Sharpie

Hans Christian 41T – Boat Review

Seven dead after superyacht sinks off Sicily. Was the crew at...
Latest sailboat review.

- Privacy Policy
- Do Not Sell My Personal Information
- Online Account Activation
- Privacy Manager

- AMERICA'S CUP
- CLASSIFIEDS
- NEWSLETTERS
- SUBMIT NEWS
The Aluminium Cocktail: what goes into the perfect mast

Related Articles
Upcoming Events

The $tingy Sailor
Diy trailerable sailboat restoration and improvement without throwing your budget overboard.

How to Step a Mast Single-Handed With or Without Using the Boom as a Gin Pole
How do you step the mast on your trailerable sailboat? With a gin pole? With the trailer winch? With the help of friends or family? With your fingers crossed? No single system works for every sailboat or for every skipper. If you’re new to mast stepping, you don’t like your current method, or you just want to simplify or speed up the process, this post is for you. I must warn you though, this is a long post, even for me. To make it as short as possible, I’ve included five YouTube videos that show how this system works. By the end of this post, you’ll know everything about how I step the mast on Summer Dance single-handed in minutes, even on the water.
I’ll describe two ways that I step the mast, including one way that doesn’t use a gin pole at all. Both are fast and mostly use the boat’s own rigging and very little extra gear.
I’ll also explain some topics that lead up to and follow mast stepping, like how I:
- Use a DIY telescoping mast crutch for easier stepping and secure trailering.
- Tie down the mast and rigging for trailering.
- Keep my mast in tune without having to loosen and re-tighten the shroud turnbuckles to step the mast.
What do you really need?
When I started trailering Summer Dance years ago, I researched a lot about mast stepping. The Catalina 22 Owner’s Manual and General Handbook is pretty brief on the subject.
Walk the mast aft and drop the mast foot into the mast step on top of the deck, keeping the mast in center line of boat, insert the pivot bolt and locking nut. One crew member should pull on a line tied securely to the forestay while another pushes up on the mast and walks from the cockpit forward. With the mast erect, attach the forestay and forward lower shrouds.
Poorly written but pretty simple, huh? One crew member pulls on the forestay while another pushes on the mast. That’s how the mast was designed to be stepped and it works well if you’re young, strong, and there are two or more of you to do the job.
But what if you don’t normally have a second able crew member? What if you need to step the mast on the water? What if you want to lower the mast to go under a bridge? What if you or your crew have a physical impairment that prevents them from performing one of the tasks? That system may not work for you and you need an alternative. If you believe in the rule that you should have a backup for every critical part and system, then you also need a backup mast stepping plan even if you normally step the mast with the factory recommended method.
I’ve read about lots of different systems. Maybe you have too:
- Factory-built gin poles, braces, guy wires, and mast-ups
- DIY wooden gin poles with winches, bridles, and brace poles
- Blocks attached to the pulpit to reuse the trailer winch cable
- Electric winches on the trailer or in the tow vehicle
- Jumbo bungee cord connected to the forestay
- Assorted Rube Goldberg variations on all the above
They all struck me as overkill for the real problem. What do you really need once you have the mast bolted to the step? What do all of these system have in common? Some mechanical advantage to raise the mast and a way to keep it from swinging too far sideways until the shrouds tighten.
If you’ve read this blog for very long at all, you know that I’m really big on reusing or repurposing things for other uses. It’s something of a prerequisite to be a stingy sailor. If you’re lucky, it’s in your DNA and it comes easily to you. Being an armchair engineer qualifies too.
Let’s see — sailboat design is all about capturing, multiplying, and redirecting forces for mechanical advantage: the hull, keel, rudder, mast, sails, rigging, almost everything. What’s the most compact, portable piece of gear on a sailboat that creates mechanical advantage? The main sheet or the boom vang typically multiplies the force applied to it by three or four times. What are all gin poles in their most basic form? A big stick. Is there already a long, stiff, portable, stick onboard? The boom. Can we raise and lower the mast single-handed with the main sheet and the boom?
As it turns out, it’s really pretty easy to do. But it’s not very easy to describe in words, so rather than write an entire book about it, I’ve made a series of short videos that each show a different aspect of my mast stepping system. I’ll give you an overview of each aspect in the text below but to really get it, you should watch the videos.
Getting it to the water
Besides being simpler, one of the basic principles of this system is to make launching and retrieving the boat as quick as possible while also being safe. That starts with securing the mast and rigging for trailering. For me, it has to be secure enough to tow for a hundred miles over bumpy state highways and county backroads to my favorite cruising spots. This is in north Idaho, mind you, which is relatively remote compared to the Florida coast or southern California.
I use a combination of DIY mast supports, motorcycle straps, and inexpensive ball cords to secure the rig. The mast is supported on both ends and in the middle. This follows closely the Catalina 22 Owner’s Manual and General Handbook recommendation.
Tie the mast and boom securely to the bow and stern pulpits. The spars should also be supported in the middle by the cabin top. Pad the mast at all contact points to prevent damage.
No tools or knot tying are needed for my system and any one of them works in seconds and stows easily either onboard or in my pickup.
Here’s a tour of the rig tied down just before I step the mast.
The previous video mentions my DIY mast stepper, also called a Mastup by a popular online Catalina parts retailer. I haven’t yet devoted a blog post to it but it was pretty easy to make. If you’re interested in a fabrication drawing and materials list, keep reading to the end of this post and a special offer.
I bought the steel myself from the cutoff pile at a local metal distributor. I took the metal and my drawing to a local welder who advertised on craigslist.com. I painted and assembled it myself. The total cost was half the price of the commercial version and in some ways, works even better. I especially like the D rings, which make it simple to secure the top of the mast stepper to the aft mooring cleats while trailering. It holds the mast very solid that way. And because the pintles are welded in place instead of adjustable, they can’t accidentally loosen and drop the mast.
Following is a close-up video of just the mast stepper. You can see it in action in the last two videos.
Setting up the boom as a gin pole
The basic theory of a gin pole is to lift a heavy object below one end while it remains stationary at the other end. Support lines called guys position the lifting end over the object that is raised. A mast raising gin pole has one end stationary near the base of the mast, uses the forestay to support the lifting end, and uses a winch or a block and tackle to theoretically raise the bow of the sailboat to the end of the gin pole. In reality, the bow stays stationary and the entire gin pole system including its base (the mast) are raised towards the bow.
Most C-22 gin poles use one of two methods to attach the gin pole to the mast:
- A peg on one end of the pole that fits in a hole in the mast (the factory system for 2nd generation C-22s)
- A saddle on the end of the gin pole that fits around and is strapped to the mast (most DIY systems)
Neither of those gin poles serve any purpose after the mast is raised. They’re useless extra weight that takes extra storage space.
The system I use attaches using a small right angle bracket. I fabricated it out of a piece of scrap aluminum I already had. One side of the bracket is bolted through the mast step and the cabin top in front of the mast. The other side the bracket points upward and has a 1/4″ hole through it to act as a hinge for the gooseneck (stationary lower) end of the boom. If you’re a follower of this blog and have the password, you can find a scale drawing of this bracket on the Downloads page.

I connect the gooseneck fitting to the bracket with the same quick pin (drop cam or toggling bimini type) that I use to connect the gooseneck fitting to the mast slide while sailing. The pin is tethered to the boom with a stainless steel lanyard so it can’t get lost and it’s always near at hand.
I connect the forestay to a shackle on the top side of the (upper) end of the boom. On the opposite (bottom) side of the boom from the forestay, I connect the end of my main sheet tackle that doesn’t have the cam cleat. This is the same configuration as when the main sheet is attached for sailing. I connect the other end of the main sheet (that’s normally attached to the traveler car) to the stem plate where the forestay is normally attached.
To hold the boom vertical during raising, I sometimes use two pieces of pre-tied accessory cord. They connect to the sides of the boom with clips through the eye straps where my boom topping lift and jiffy reefing lines attach. The other ends of the cords have loops tied into them that I tie to the upper ends of the midship lifeline stanchions with girth (cow) hitches. The mast step is nearly in-line with the tops of the stanchions, so the cords rotate around the same pivot point as the mast and the boom.
If your sailboat doesn’t have the same style of gooseneck fitting as a Catalina 22 or you can’t use your boom for some other reason but you do have a spinnaker pole, you might be able to use it instead as this picture from a Westerly 21 owner shows. This picture also shows that a gin pole can be a great help with lifting the extra weight added by a furler.

That’s kind of hard to visualize, so here’s a short video that takes you on a tour of the setup.
This is a stickup with a boom!
After I rig the boom like shown above, the hard part is over. The rest is just pulling the main sheet with one hand while I steady the mast with my other hand. I also watch the stays and shrouds to be sure they don’t catch on anything as they raise off the deck.
With the main sheet cam cleat at the stem plate, I can easily stop raising the mast at any point, cleat the line with a sharp tug, and then clear snags or move to a better lifting position. Then I uncleat the main sheet at the stem plate first and hold light tension on the main sheet while I get into position to resume raising the mast.
The mast only needs to be held centered until it reaches about a 45° angle. Then the upper shrouds begin to tighten and they hold it centered the rest of the way up.
When the mast is vertical, I reconnect the forestay and forward lower shrouds using quick release levers . The mast is back in tune and requires no further adjustment. I disconnect the boom from the system and attach it in its normal place between the mast slide and the topping lift or backstay pendant. I disconnect the main sheet and attach it to the traveler car. All I need to put away are the two accessory cords if I used them, which I typically only do when it’s windy, when I’m setting up in a unlevel area, or on the water when its choppy.
Here’s a video showing the entire process completed in about 4 and a half leisurely minutes.
Single-handed speed stepping
In good conditions (light breeze, level area, or calm water), I skip over using the boom as a gin pole entirely and just use the main sheet to pull the mast up by the forestay. It saves several minutes and is nearly as easy to do but you should be fitter than average to attempt it. It’s the single-handed equivalent of having a crew member in front of the boat pull a line attached to the forestay. Bystanders seem to enjoy watching me raise the mast by myself in seconds.
Here’s what it looks like when it’s done on the water.
Back to the beginning
At the end of a road trip, I never look forward to tearing down Summer Dance , pulling her out of the water, and tying her down for the ride home. I’ve had a great time but I’m tired and there’s many miles to go before I sleep. I don’t want to spend an hour lowering the mast and tying the rig down. I want it to be quick and simple.
Almost always, I lower the mast without using the boom as a gin pole even if I raised it that way. A gin pole is just not usually necessary so long as the mast comes down slow enough and lands in the crutch. You might not want to do it that way your first few times, so here’s what it looks like using the boom as a gin pole.
Then I tie it all down in a few minutes like shown in the first video.
Special offer for blog followers
Whew! That’s a lot of info. If you stuck with me through it, I really appreciate it. I want to thank you by offering not one, but two free bonuses to my blog followers.
The first is the launch checklist that I use to prepare and launch Summer Dance . It’s two pages of items that can help make sure you don’t forget something important for your next cruise — everything from an umbrella for the first mate while she waits for you to step the mast, to step-by-step instructions that you can have on deck for the gin pole method described above. Use it as a starting point to add and remove items to make your own checklist.
The second bonus is a dimensioned drawing and materials list for my DIY mast crutch that is described at the beginning of this post. Use it to build your own and save some money for something else.
If you’re already a subscriber to this blog, you can download both of the free bonuses from my Downloads page using the password that you received when you subscribed. If you’re not already a subscribed to this blog, sign up and you’ll join the thousands of other stingy sailors. Just enter your email address in the box at the bottom of this page and then click the Subscribe button. You can unsubscribe at any time and I won’t share your address with anyone, ever.
I hope you’ve picked up some tips from this post that you can use to optimize your mast stepping system and spend more time on the water.
Would you like to be notified when I publish more posts like this? Enter your email address below to follow this blog and receive notifications of new posts by email. You will also receive occasional newsletters with exclusive info and deals only for followers and the password to the Downloads page. It’s free and you can unsubscribe at any time but almost nobody does!
Subscribe to Blog via Email
Enter your email address to subscribe to this blog and receive notifications of new posts by email.
Email Address:
Share this:
58 thoughts on “ how to step a mast single-handed with or without using the boom as a gin pole ”.
Love your vids on raising mast. Could you send a pic of quick release on forward shrouds and forstay and the pin you spoke of in vid.
Stay tuned here for a separate post on the quick releases and maintaining mast tune that’s coming soon!
I like the idea of using PVC tube & fence to make mast supports.
Just some scraps I had on hand; lightweight, strong, and they don’t look too ghetto.
Hey $tingy,
Thanks for another great post.
You mention the newsletter. I am definitely a long time blog follower, and look forward to every post, but I have never gotten a newsletter. Could you add me to whatever email list you use? I don’t want to miss any more.
Hi, CapnRehab
You weren’t receiving the newsletter initially because you’re a WordPress user so if you follow, my posts should show up in your Reader list instead of by email. But I added your email address to the newsletter recipient list back on May 11. The last newsletter went out on May 21 titled What’s Your Favorite DIY Project? Did you get that one? I’ll probably shoot out the next one at the end of the month. If you don’t get it, I don’t know what more I can do on my end.
Brilliant repurpose of mainsheet. I’ve struggled with this procedure for years, just man-handling it up there. Can’t wait to try this!
I hope it works for you. Let me know how it goes!
For mast raising and lowering, I have it a little easier with a 16ft boat, and can raise the mast single handed juat by manually lifting and walking forward in the cockpit and onto the keel case with the hatch slid forward, although I usually have my wife tension the forestay for some extra assurance.
I like your use of the “ball ties” for securing the rigging on the trailer. I usually use the halyards to tie everything up, but that takes more time than it should. I use some “sail ties” which are very similar to your ball ties to secure the sail on the boom and the boom is stowed inside the cabin. I think I will either get some more sail ties for securing the rigging on the trailer, or make up some velcro webbing straps. At the bow, my mast is tied down using my bowline and the DIY timber A frame mast crutch tied down at the rear with a rope tied to cleats on either side of the transom. The boat is held to the trailer using a stern ratchet strap and a turnbuckle on the bow, and the winch cable attached.
I really like the idea of using the boom as a gin pole. Brilliant. I wonder if you could post a picture of the L-shaped aluminum bracket that you fabricated and how it is attached to the boom? Making that may be the tricky part for me to get this thing. I could not really see a clear picture of it in your videos. Thanks!
I’ll add a close-up shot of it soon.
I added a close-up picture of the hinge bracket about midway through the post.
Excellent blog and report. I struggle with the mast raising and have an assistant. I will give your system a try. I finally understand the function of a gin pole and how to use it.
That’s awesome, Richie. I’m really glad it helped. In the case of a sailboat, it’s just a long, temporary lever. Aha moments are great!
Excellent report and diagram on the mast stepper. What would you think about using aluminum to build it instead of steel?
I think aluminum would work great so long as the wall thickness of the tubes is adequate. You wouldn’t need to be concerned about painting or rust. The critical area is where the outer tube overlaps the inner tube when the crutch is extended. Depending on how close the fit is and how much overlap, when you’re rolling the mast back to set it in the step, there can be considerable strain on that “joint.” A thin wall or soft aluminum might deform so make it beefy there.
Thanks for your comment, Michael!
I spoke to my fabricator friend about using aluminum and, him not knowing about the stepping process was most concerned about the hinges holding weight while trailering over the road. He also suggested using a beefier thickness if choosing aluminum just like your suggestion.
thanks for all you do!!!
The gudgeons can easily handle the weight so long as the pintles on the crutch are sturdy.
Send us a good picture of the final product and I’ll add it at the end of the post as an example!
Great post. Just started following your site. You have a lot of good projects on here. Where did you find such thin-walled square tubing for your mast stepper? All I can find is telescoping 1-3/4 & 1″ tubing. I don’t think I need that much strength or weight. Also, I receive the posts by e-mail but I never received the password for the download section. Thanks
There are a couple of industrial metal suppliers in my area that sell their cut-offs retail to the public by the pound. One of them also sells small quantities of standard sizes. I found all the sizes I needed with very little cutting. You definitely don’t need much strength and as little weight as possible. Aluminum would be even better if you can get it welded.
I’ll send you the password by email.
Thanks for your question.
I really like the simplicity of raising the mast without a gin pole. I use a gin pole now but prefer a simpler approach. How to you lower your mast? Do you use your mainsheet tackle when lowering? Thanks for the great video.. Jim Mathews
That’s right, Jim. I lower the mast by the same method but in reverse, which helps to remember the steps in both directions.
Thanks for your question!
Hi. I’m making the mast crutch and downloaded the drawing. How far down is the second hole in the 1″ tubing? ie. the hole where I would put the lock pin when the crutch is raised. Thanks.
That’s an excellent question, Jim, since it wasn’t shown on the drawing. I’ve since revised the drawing to show the hole 2″ up from the bottom of the inner tube.
The distance isn’t critical but depending on how tight the fit is between the inner and the outer tube, the hole might work better even farther up the inner tube. Try it at 2″ and if the top tube is too loose for you and it wobbles around, drill another hole farther up the inner tube, say at 4″ and try that. The mast will sit 2″ lower but it shouldn’t affect how you step the mast other than by making the crutch sturdier. Then you will have two holes to choose from. You can even drill more holes at different heights for different purposes.
Hi Thanks for the blog. Some pretty interesting ideas here, I’m borrowing some, especially related to the sails… Seeing your “system” to step the mast, I’m trying to adapt it to my boat, a ’82 French Rocca Super Chausey. The mast step has no pin to lock to the mast foot, it just falls into place between two pins that limit its longitudinal travel. Hence, nothing for the mast to pivot on. Any thoughts on how I could achieve that effect? Thanks.
If you have the tools and the ambition, you could replace your existing tabernacle with a custom made pivoting one. Find a piece of heavy gauge aluminum channel that you can cut into a shape similar to the C-22 tabernacle shown in the picture above. The channel should be just wide enough for the mast to sit into and the height a couple of inches. Cut slots in the sides for the through bolt to slide up and down. Cut the channel long enough and drill holes in the bottom of the channel to fit your existing deck bolts.
Then drill a hole through the base of the mast to accept the through bolt. It should be close to the bottom of the mast, 1/4″-1/2″ from the bottom. Angle the aft edge of the end of the mast so that it will rotate without binding in both directions. As it rotates backward during unstepping, the bottom end of the mast and the through bolt should ride up in the slots. Put a wingnut on the end of the through bolt for easy removal and you’ve got a pivoting mast.
If you don’t have the resources to make one yourself, maybe you can find a friend or a metal fabricator to help.
Good luck with your projects and thanks for your question! $tingy
When installing the gin pole hinge bracket you drill through the cabin roof. Have you experienced any water penetration through this hole?
I sealed the plate and hole perimeters with butyl tape, so no problems.
Wow! Love the post and videos!! So clear and easy to follow. I’m going to try this for my Columbia 8.3. I tried to follow you but got an error code. Can you manually add me, please?
Please try following again and if the error repeats, send me the text or a screenshot of the error so I can investigate.
My Venture 21 tabernacle and mast look like yours (sans the plate for your swivel blocks) and I have often wondered if there is wear on the trailing edge of the mast foot after repeated raising/lowering? Or does yours have some reinforcement?
Also, have you ever noticed the boom baby stays pulling too much on the stantions? I wonder if mounting the ropes at the base would be less apt to damage them if the mast were to go somewhat off-center (to the exrent the upper shrouds allowed)?
Love your site. I shared the 2017 DIY competition on Small Craft Advisor Magazine’s Facebook page and I noticed the 10 most popular projects link…most of which are on my to-do list!
There is a tiny bit of wear after 36 years but not enough to matter. Tying the baby stays to the stanchion bases would be more solid but then their pivot points would be too low. The reason that I tie them up at the top of the stanchions is so that the baby stays keep in relatively constant tension throughout the range of motion of the mast/boom. They’re almost perfectly aligned with the tabernacle. The stanchions aren’t in much danger because the boom doesn’t weight much and it can’t wander very far at all since it’s held in tension between the forestay (running aft) and the main sheet (running forward). They really just help to hold the boom vertical while you’re setting the system up until you begin to raise the mast. The mast can wander side to side some until its raised about halfway, then the upper shrouds come taught and keep it centered.
Thanks for the share!
Your site has been a tremendous help and inspiration for me and my 1988 Cat 22. My mast step has welded loops fore and aft. Can you suggest a structurally sound way to secure the boom to the loop for lifting/lowering?
Link showing the step: http://www.catalinadirect.com/index.cfm/product/345_18/mast-step-c-22-cp-22brcp-18-wwelded-vang-loop.cfm
Hello, KGUNN
Since the loop is perpendicular to the line of the mast/boom rotation, it won’t work well using only off the shelf parts. I suggest you consider mounting a tang like the Garhauer BT-1 to the bottom of the mast instead. You can pin the boom to it similar to how I do it to my bracket. The boom will then rotate with the mast as it raises and lowers.
Great suggestion. Thanks!
Hmmm, this asks more questions for than answers. I don’t have the lower stays, nor do I have any of the attachment point on the mast that I can see. The thing is the boat is smaller 20′ vs 22′ I have no lifelines nor a rear rail, walking down the side of the boat would be a challange, never mind running lines while doing so. The mini stays have no place to attach to. Not sure how to go about raising the mast without help…even with this setup…
A smaller sailboat could indeed be trickier to step the mast single-handed since it has less rigging to aid the process. If you’re not committed to perfecting a single-handed technique, I’d suggest you consider a two-handed process with one crew member in the cockpit to steady the mast laterally while the second crew member pulls the mast up by the forestay or foresail halyard from the bow or on the ground in front of the bow. A mast crutch would also help in that case. Otherwise, you might be looking at extensive fabrications or commercial mast stepping hardware with a winch.
Where there’s a will, there’s a way!
How could your system be used with a furling 150 genoa on a Catalina 25?
Hello, Thomas
It could be used in a similar way on your C-25 with a couple of adjustments. First, your mast is longer and heavier than a C-22 so I would always use the boom as a gin pole. You’ll need the leverage for the extra weight, especially with the addition of the furler. Second and more importantly, you’d need to lift the furler as well as the mast somehow. I’d suggest using a main or spinnaker halyard to hold the mast and furler together. Wrap it around them from top to bottom before you lower the mast, then handle them as one unit until after you raise the mast again and unwrap the halyard to reconnect the forestay/furler. Use the jib halyard with its working end securely tied off instead of the forestay to connect the masthead to the boom/gin pole. The rest of the process would work the same.
Stay tuned because I’ll be publishing a post soon about choosing and using a furler with a trailerable sailboat.
Appreciate your reply Stingy. I need to carefully review your technique but it seems one’s boom would remain upward; although I’m sure you lower it when finished? Sorry for my ignorance. I’m also looking at the idea from the clever MacGregor 26 mast raising pole that uses a winch on the pole with baby stays with a special one to automatically keep the lowered furler up off the deck. I read about it on TropicalBoating ( https://www.tropicalboating.com/2010/04/the-perfect-solo-mast-raising-system-for-small-sailboats ). I’ll have a look at your mast crutch but I can’t use the gudgeons for the rudder as I’ll need to motor over to the Cave Run Lake (KY) boat launch for the haul out. Thanks!!
Winch-powered mast raising systems are a good choice for owners with impaired physical abilities. I might have to resort to one as I get older and am not able to do everything I once could. Beats giving up sailing!
One needs to attach a mast bail with the MacGregor 26 solo mast stepping system. I’m reluctant to drill into the mast though. This is my first cruiser (purchased in July) and I’ve much to learn from your blog. I was only introduced to sailing two years ago when I bought a Sunfish.
My C-25 teak companionway/hatchboards need replacement after 20 years, probably all standing rigging needs replacement even though it all looks fine at deck level (in the Lake continuously since ‘08), etc., etc. I pulled two through hull Airmar transducers out to check them and found only thin layer of algae on them – tells me the lake water has been very clean. The old KVH display is dead so I’ll switch it out (plugging holes with marine plastic and epoxy) with a new RayMarine i40.
I see that the boom is removed of course in your video. I also see the stress on the mast crutch essentially dictates one use the transom gudgeons for support. I had thought I could use 1” pipe secured to the stanchions but then there would not be enough telescoping height available either. You’ve devised a very clever approach- I’ve never remounted my boom so will need how I can attach it to the fore ring on the step plate.
You might consider modifying my crutch design so that the bottom end rests in the cockpit sole forward of the transom instead of on the rudder gudgeons. It would probably need additional support or to be fastened to the mast to keep it from falling over. Offset to one side a little, you should still be able to use your rudder to steer. That, or use the outboard tiller instead of the rudder to get to the ramp if you can. I do that sometimes.
Just what I have been looking for to give me some information to guide me in raising and lowering the mast for maintenance on my 26 foot Grampian without the expensive use of a crane this spring.
Hi, I like your idea of the mast raising system without a gin pole. Does your block & tackle include a ratchet or brake? Thanks!
Hello, Laura
Since I use my mainsheet tackle, no, but if you want to use a separate tackle, that would be a good idea.
Thanks, $tingy
Sure beats my system of using 2 sons to help out, they’re never around when you need them !
Thanks for the video on the no pole lift, that’s pretty much how I need to do it though I usually am working on the hard before getting a lift in.
I have tried raising the mast as you show in the video. I have the same quick release. But when I try to lift the mast with the forstay can’t do. I’m wondering maybe your mast is lighter or do I have the wrong set up to raise mast. I have the mast step which I can raise for a better angle…but it’s not happening.
Hello, Mark
Are you using a gin pole or trying to lift it only by the forestay? Either way, it takes quite a bit of strength to get the mast up that first few feet since you’re not pulling directly vertically on the masthead. If you’re not able to do it by yourself, you might need a helper for at least that part of the setup.
Dear sir My name is Mark Monteverdi. I have followed your web site for a while…and always turned out good. I have looked at the mast rising video countless times. I have the quick release for the shrouds. I’m guessing you are using a basic vang ? Well either I’m very weak or i have the vang set up incorrect or my mast is made of different material …when i go to raise my mast it will fall off to one side it just feels as though I’m pulling a truck up a hill. If you would be kind enough to send a pic of what ever type of pulley system i would greatly appreciate that very much. It’s hard to get any one to go sailing with me and that’s more just so i have some one to push and one work the winch. Thank you Mark
I’m sorry to hear you’re having trouble. When raising or lowering my mast, it too will tend to swing to one side or the other until it’s about half way up and the upper shrouds tighten and hold it centered the rest of the way up. That’s why I always have at least one hand on the mast to keep it centered during the lower half of the lift. I use the standard C-22 main sheet tackle which has a 3:1 mechanical advantage. You could use a stronger tackle (try 4:1) if you need the additional lifting power. You can see the whole main sheet in the video in Quit Spending Setup Time on Turnbuckles .
Hope that helps, $tingy
Hi Stingy Sailor, First of all, thanks for all your tips, tricks, and videos. Your site is awesome and very helpful! I have a C-25 with swing keel so most of all your tips are applicable, very nice, and handy. I really like your mast securing device located at the bow for trailering; easy and simple. I was wondering if you do have the drawings available for it so I could use it to build my own? Thanks! Alex
I did not make a fabrication drawing for the pulpit saddle because of the complex angles of the railing cutouts. Most readers wouldn’t be able to cut them accurate enough, so it’s a trial and error fit. Lay your material centered across the top of the pulpit, trace the railing edges onto the underside of the material, then cut a little at a time until the saddle sits down securely over the rails. Do the same with the mast on top of your material and you’re done.
Good morning, what a beautiful boat you have there ! that is an ingenious way to raise a mast,nice work ! I am curious about what the black,plastic/rubber item is that looks like it’s attached to the stern rail by the mast crutch @ 2:45 of the first video Please respond because my curiosity is killing me because I don’t get it. Thanks, Mick
You can read all about it in Add a Solar-Powered Flood Light in Your Cockpit .
Hi! I just subscribed to your blog, and I’d like the instructions for building a mast crutch like yours. Wasn’t sure whether that would be sent out automatically, or whether I needed to specifically ask for them. Thanks!
Lenny, You can find a dimensioned drawing of the mast crutch on my Downloads page if you’re a subscriber. The password to open that page was sent to you when you subscribed. $tingy
Leave a comment Cancel reply
This site uses Akismet to reduce spam. Learn how your comment data is processed .

- Already have a WordPress.com account? Log in now.
- Subscribe Subscribed
- Copy shortlink
- Report this content
- View post in Reader
- Manage subscriptions
- Collapse this bar
Open for Retail and OEM/Rigger Sales! Check out the updated Dwyer Mast catalog and order online today.
Aluminum Sailboat Mast & Boom Extrusion

Want this question answered?
Be notified when an answer is posted
Add your answer:
What kind of simple machine is a train?
A train is not a simple machine.
What is a simple machine with 3 simple machines in it?
A complex machine.
What length of antenna?
unlimited most radio supply outfits will provide an antenna mast to 78 inches, but you can get your machine shop to make a longer mast for a few $$$ extra
Is a fulcrum a simple machine?
A fulcrum is a part of a simple machine, the lever. Without the fulcrum what is left of the simple machine can no longer increase the applied force and is no longer a simple machine.
Is spade is a simple machine?
A spade is a simple mechanical (tool) machine.
What type of simple machine is a sailboat mast?
A sailboat mast is a type of lever, as it allows sailors to adjust the sails' position to catch the wind effectively. By changing the angle of the mast, sailors can control the direction and speed of the boat.
What is the pole on a sailboat?
a pole on a sailboat is a mast
What is a pole in the middle of a sailboat that holds up the sail called?
A pole in the middle of a sailboat that holds up sails.
It is called the mast
What do wires called stays' hold up on a sailboat?
What is name for the top of the mast of a sailboat, what is the pole in the middle of a sailboat.
Do you mean the mast?
A pole in the middle of a sailboat?
Is called a mast
What is the rhyme for cast that is belonging to a sailboat?
What are sailboat spars.
sailboat spars include the: mast boom sprit (if the boat has one)
What is the length of a Snark Mayflower sailboat mast?
What do wires called hold up on a sailboat.
Top Categories
| (001) 401-739-1140 -- (001) 401-739-1149 ---
|
Rigging - Turnbuckles , Toggles , Wire & Rod Components, Norseman Cones & Fittings.
Furling Systems - Systems and replacement parts from a variety of Manufacturers.
Traveller Systems - Adjustable Track Systems for Mainsheet and other applications.
Sailboat Hardware - Rope Clutches, Blocks, Track & Fittings, Winches, etc.
Custom Parts - Custom items, or those out of production or otherwise unavailable.
Consultation - Special projects, research, or information not detailed on-site.
Copyright 1996 - 2024, Rig-Rite, Inc. Disclaimer Web Site maintained by The WATER Group
Mast Steps Sailboat: A Guide to Choosing and Installing the Perfect Mast Steps
by Emma Sullivan | Aug 10, 2023 | Sailboat Gear and Equipment

Short answer: Mast steps on a sailboat
Mast steps are devices installed on sailboats to aid in climbing the mast. They consist of small platforms or rungs attached to the mast, allowing sailors to ascend safely for maintenance or rigging purposes. These sturdy steps provide stability and ease of access while working aloft.
1) Introduction to Mast Steps: A Must-Have for Every Sailboat
Introduction to Mast Steps: A Must-Have for Every Sailboat
Sailing is an exhilarating experience that allows individuals to harness the power of the wind and immerse themselves in the wonders of the open water . Whether you’re a seasoned sailor or a novice, it’s essential to have the right equipment on board to ensure safety and convenience. One such tool that every sailboat owner should consider investing in is mast steps.
Mast steps, as the name suggests, are secure footholds attached to the mast of a sailboat . They provide sailors with a safe means of climbing up and down the mast, allowing them to perform various tasks such as adjusting sails, inspecting rigging, installing or repairing equipment, and even taking stunning aerial photographs.
But why are mast steps considered a must-have for every sailboat? Let’s dive into their benefits.
1. Accessibility: When navigating through rough waters or adverse weather conditions, it may become necessary for sailors to ascend the mast quickly. Mast steps provide an easily accessible route up the mast without relying on haphazard makeshift solutions or dangerously improvising climbs. Having well-installed mast steps ensures swift and secure access when you need it most.
2. Safety: Safety should always be a top priority while sailing . By having mast steps installed on your boat, you eliminate potential risks associated with climbing masts without proper footholds. With each step firmly anchored to the mast and designed for optimal grip, sailors can confidently ascend even in challenging sea conditions while minimizing accidents or falls.
3. Versatility: Apart from aiding navigation during demanding situations at sea, mast steps offer versatile functionality during regular maintenance activities as well. Whether it’s routine inspections or replacing rigging elements like spreaders or lights, being able to climb up your mast safely makes these tasks significantly more manageable.
4. Efficient Rigging Adjustments: Properly trimmed sails play a crucial role in maximizing speed and improving overall sailing performance. With mast steps, sailors gain the ability to make on-the-go adjustments without having to rely solely on electronic or hydraulic systems. Climb up the mast, analyze sail shape, tension lines, and make necessary tweaks to ensure your sails harness the wind to its fullest potential.
5. Aesthetic Value: Mast steps not only provide practicality but also add a touch of elegance and sophistication to your sailboat. The sight of well-designed and expertly installed mast steps can awe fellow sailors and generate admiration for your attention to detail.
In conclusion, mast steps should be viewed as an investment rather than just another accessory for sailboats. Their numerous advantages in terms of accessibility, safety, versatility, efficiency, and aesthetic value make them a must-have tool for every sailor looking to enhance their sailing experience. So why compromise on convenience and risk safety when you can ascend your mast confidently with secure footholds? Upgrade your sailboat today with mast steps and embrace the full potential of joyful sailing!
2) How to Install Mast Steps on Your Sailboat: A Step-by-Step Guide
Installing mast steps on your sailboat is not only a practical addition but also an essential safety measure. These handy devices allow you to climb up and down the mast with ease, making tasks like changing sails or inspecting rigging much simpler. So, if you’re ready to take on this DIY project and enhance your sailing experience, here’s a step-by-step guide on how to install mast steps.
Step 1: Assess Your Boat and Choose the Right Steps Before diving into the installation process, it’s crucial to assess your boat and determine which type of mast steps will work best for you. There are various options available, including folding steps, ladder-style steps, or even custom-made ones. Consider factors such as the size of your mast, the material of the steps, and your personal preferences. This initial research will ensure you make an informed decision that suits both your boat and your needs.
Step 2: Gather Your Tools To successfully complete this project, gather all the necessary tools beforehand. Typically, you’ll need a drill with different-sized bits (depending on the screw dimensions), a measuring tape or ruler for accurate placement, a wrench or socket set for tightening bolts or screws, some sealant to prevent water ingress around screw holes if required in your specific setup.
Step 3: Determine Step Placement The next step is determining where exactly you want to place your mast steps along the length of your mast. It’s crucial to consider factors such as proper weight distribution and ease of access when deciding on their placement. Keep in mind that each step should be evenly spaced for optimum usability during ascent or descent.
Using a measuring tape or ruler as guidance can help ensure equal spacing between each step while maintaining symmetry visually appealing aesthetic.
Step 4: Prep Your Mast After marking out where each step will go along the mast length using tape or pencil marks in line with measured placements determined in Step 3 – it’s time to prepare the mast. Use a wire brush or a fine-grit sandpaper to clean the surface where each step will be mounted. This ensures excellent adhesion for proper installation.
Step 5: Drill Pilot Holes To ensure secure mounting of your mast steps, it is imperative to drill pilot holes before inserting screws or bolts. Having pilot holes helps prevent splitting the wood and makes screwing in much smoother – especially if your mast is made of wood. Match the size of your pilot hole with that of your chosen screws or bolts – a slightly smaller diameter would suffice.
Step 6: Install the Mast Steps Now comes the exciting part – installing the mast steps! Follow the instructions provided by the manufacturer, specifically focusing on how to attach them securely to your specific mast type. Typically, you’ll insert screws or bolts into each pilot hole and then tighten them carefully using a wrench or socket set. Be cautious not to overtighten as this can damage both the steps themselves and compromise the integrity of your mast .
Step 7: Test and Refine Once all steps have been installed, take some time to test their functionality. Inspect each step closely for any signs of looseness or instability while applying controlled weight pressure during testing period which simulates climbing conditions; resolve any issues promptly by tightening necessary bolts or screws further if required. It’s better to catch any potential problems now rather than dealing with them while out at sea!
And there you have it – a straightforward, step-by-step guide on how to install mast steps on your sailboat! By following these detailed instructions and taking care throughout each stage, you’ll be able to navigate up and down your mast effortlessly, opening up new horizons in terms of maintenance and adjustment options while enhancing both safety aspects and overall convenience during your sailing adventures .
3) Frequently Asked Questions about Mast Steps on Sailboats
Frequently Asked Questions about Mast Steps on Sailboats
Are you curious about mast steps on sailboats? Whether you’re a seasoned sailor or just starting out, understanding mast steps is essential for your safety and convenience while sailing. In this blog post, we’ll tackle some of the most frequently asked questions about mast steps and provide detailed professional, witty, and clever explanations that will leave you with a deeper knowledge and a smile on your face.
1) What are mast steps?
Mast steps are sturdy platforms or rungs attached to the mast of a sailboat . They serve as vertical ladders that allow sailors to climb up and reach different areas of the rigging while aloft. In simple terms, they act as stepping stones to ensure safe access to the top of the boat ‘s mast.
2) Why do sailboats have mast steps?
Sailboats have mast steps for several reasons. Firstly, they make it easier for crew members to perform maintenance tasks, inspections, and repairs on the rigging at heights. Secondly, they provide an efficient way to access the upper parts of the sails for adjustment or reefing when necessary. Lastly (and let’s not forget!), they add an element of adventurousness – who doesn’t enjoy feeling like a fearless pirate climbing their way up towards new horizons?
3) Do all sailboats have mast steps?
No, not all sailboats have pre-installed mast steps. While some yachts come equipped with them from the factory, others rely on alternative methods like bosun’s chairs or ascenders for ascending their masts safely. However, many experienced sailors prefer having fixed/mounted mast steps due to their sturdiness and less reliance on additional equipment.
4) Can I add/remove my own mast steps?
Absolutely! Adding or removing your own mast steps is possible but should be approached with caution if you aren’t an experienced sailor or lack proper knowledge in rigging. It’s crucial to consult with a professional or expert before making any modifications to your sailboat’s mast . The last thing you want is for your mast steps to become a liability rather than an asset.
5) What materials are mast steps made of?
Mast steps can be constructed from various materials such as stainless steel, aluminum, or even high-strength plastics. Each material has its pros and cons, including resistance to rust and corrosion, weight considerations, durability, and overall aesthetic appeal. Whichever material you choose, always prioritize safety and reliability over everything else.
6) Are there different types of mast steps?
Yes! Mast steps come in a variety of designs and styles. Some boats have individual rungs that need to be bolted onto the mast individually, while others feature pre-fabricated platforms that can be easily attached and secured in one go. Additionally, some mast steps are specialized for specific boat models or sizes, so it’s essential to know what works best for your vessel before making any purchases or installations.
Now that we’ve answered some of the burning questions about mast steps on sailboats in a detailed yet witty manner (hopefully tickling your funny bone along the way), you’re armed with newfound knowledge about this crucial aspect of sailing. Remember, whether you’re climbing up towards uncharted territories or fine-tuning your rigging like a pro, having safe and reliable mast steps will set you on the right course towards nautical success!
4) Benefits of Having Mast Steps on Your Sailboat
Title: Enhance Your Sailing Experience with Mast Steps: A Clever and Versatile Addition to Your Sailboat
Introduction: Sailboat owners are always on the lookout for ways to improve their sailing experience; from upgrading equipment to fine-tuning techniques, every small adjustment makes a difference. One remarkable addition that can elevate both the functionality and enjoyment of your sailboat is the installation of mast steps. These nifty structures provide an array of benefits, allowing sailors to easily access various parts of the mast while ensuring safety and convenience. In this article, we delve into the world of mast steps and explore their invaluable advantages.
1) Enhanced Safety for Ascending the Mast: Ascending a towering mast can be a daunting task for any sailor. However, with well-placed mast steps, this once laborious activity becomes significantly safer and more manageable. The presence of sturdy steps not only ensures stability but also provides climbers with secure footholds at regular intervals. By eliminating unpredictable and hazardous gripping points found on traditional masts, mast steps considerably reduce the risk of accidents caused by slippery or unstable surfaces.
2) Simplified Maintenance and Repair Work: Owning a sailboat entails regular maintenance and occasional repairs, particularly regarding rigging or electronic installations mounted high up on the mast. The incorporation of mast steps renders these tasks far more convenient than ever before. Accessing hard-to-reach areas becomes effortless as sailors can now comfortably distribute their weight across each step when carrying out inspections or performing necessary replacements. This increased accessibility saves valuable time and energy while minimizing discomfort during challenging repair work.
3) Efficient Sail Changes: Sailing enthusiasts know all too well that wind conditions can change rapidly on the open waters . Being able to adjust your sails accordingly is crucial for optimal performance and speed control. With strategically positioned mast steps, quickly climbing up towards the headboard to alter your sail trim is no longer an arduous chore but rather an agile maneuver. The more efficiently crew members can engage with sail changes, the greater their sailing proficiency becomes, leading to a smoother and more responsive overall sailing experience.
4) Observing and Photographing Scenic Vistas: Sailors are often privileged to witness breathtaking scenes while on the water: picturesque sunsets, wildlife encounters, or simply breathtaking landscapes. Mast steps provide an excellent vantage point for embracing these visual delights by enabling sailors to climb up the mast safely and snap remarkable photographs or simply soak in the stunning surroundings. By providing a higher and unobstructed viewpoint, mast steps turn your sailboat into a floating observatory and enable you to capture memorable moments that would otherwise be missed.
Conclusion: Investing in mast steps for your sailboat is undoubtedly an astute decision that unlocks both practicality and enjoyment. From improved safety during ascents to simplified maintenance work, efficient sail changes, and offering stunning vistas from atop the mast, there is no shortage of benefits to reap. So why limit yourself when it comes to exploring the full potential of your sailboat ? Embrace this clever addition today and elevate your sailing adventures like never before – all while keeping your witty mind at ease!
5) Choosing the Right Type of Mast Steps for Your Sailboat
When it comes to sailing, having the right equipment can make all the difference in your experience on the water. One crucial aspect that often goes overlooked is choosing the right type of mast steps for your sailboat. Mast steps may seem like a small detail, but they play a significant role in ensuring the safety and convenience of accessing different areas of your boat’s mast .
So, what exactly are mast steps? In simple terms, they are metal or wooden installations attached to the mast of a sailboat that provide a series of steps or rungs, allowing sailors to climb up and down easily. These steps allow sailors to access various parts of their boat ‘s rigging for maintenance and repairs while at sea.
The first factor you need to consider when selecting mast steps is the material used in their construction. You’ll typically find mast steps made from either stainless steel or aluminum. Both materials offer their own unique advantages. Stainless steel is incredibly durable and resistant to corrosion, making it suitable for long-term use. On the other hand, aluminum is lighter and more cost-effective while still providing adequate strength.
Next, you’ll want to consider whether you prefer folding or fixed mast steps. Folding steps are hinged at one end, allowing them to be folded up against the mast when not in use. This feature not only improves aerodynamics but also prevents accidental injury by reducing snagging hazards while moving around on deck. Fixed mast steps, on the other hand, remain stationary and securely attached at all times.
Another key consideration is step design and spacing. The design should be ergonomic and comfortable for climbing without causing strain or discomfort over extended periods. A common step design includes squared off edges with non-slip grooves or grip pads for enhanced safety during wet conditions – after all, nobody wants slippery steps! Additionally, focus on finding an appropriate space between each step that allows for easy foot placement while accommodating different shoe sizes.
Aside from functionality considerations, it’s worth noting that mast steps can also enhance the aesthetics of your sailboat. Many sailors consider their boats to be a reflection of their personality, and having well-designed mast steps can contribute to an overall sleek and polished appearance. Some manufacturers offer customizable options, giving you the opportunity to showcase your unique style on your vessel.
When choosing mast steps for your sailboat, it is essential to prioritize safety and convenience without disregarding aesthetics. Ensure the material is durable and corrosion-resistant, select a folding or fixed design that suits your needs, and opt for a step layout that provides comfort during climbing. By carefully evaluating these factors, you’ll find yourself with the perfect set of mast steps that meet your sailing requirements while adding a touch of elegance to your boat.
In conclusion, selecting the right type of mast steps for your sailboat is crucial for maintaining safety, efficiency, and a visually appealing aesthetic. Consider materials such as stainless steel or aluminum based on durability and cost-effectiveness. Evaluate whether folding or fixed steps would better suit your sailing needs. Focus on ergonomic design and appropriate spacing to ensure comfortable foot placement during climbs. Remember that personalized customization options are available if you desire additional style elements on your boat. So next time you’re gearing up for an adventure on the open water, take a moment to appreciate the often-underestimated value of properly selected mast steps!
6) Tips and Tricks for Maintaining and Using Mast Steps Safely
In the exhilarating world of sailing, safely navigating through various tasks and maneuvers is of utmost importance. One crucial aspect that often gets overlooked but plays a critical role in maintaining a sailboat is mast steps. These handy little devices are not only essential for scaling the heights of your boat ‘s mast effortlessly, but they also serve as platforms to perform maintenance tasks efficiently. Whether you are a seasoned sailor or a novice just getting acquainted with sailing, we have gathered some expert tips and tricks to help you maintain and use mast steps safely.
1) Regular Inspection:
Like any other component on your boat, mast steps require regular inspections to ensure their functionality and structural integrity. Before each voyage, take the time to closely examine the condition of all your mast steps. Look out for signs of corrosion, loose or damaged fasteners, cracks, or any other visible damages that might compromise their safety. By detecting potential issues early on, you can prevent accidents from occurring while ascending or descending from your mast.
2) Corrosion Prevention:
As sailors well know, exposure to saltwater can accelerate corrosion on metal surfaces. To keep your mast steps in top-notch condition, it is vital to implement preventive measures against corrosion. Applying an anti-corrosive coating like zinc chromate paint serves as an effective barrier against saltwater-induced damage. Additionally, regularly rinsing off salt residue from your mast steps with fresh water after each sailing trip helps prolong their lifespan.
3) Lubrication and Tightening:
Over time, due to constant exposure to harsh environmental elements such as wind and waves, screws or bolts securing the mast steps may loosen up. To ensure safe usage and stability while climbing up the mast, it is imperative to periodically inspect and tighten these fasteners using appropriate tools. Additionally, consider applying a small amount of silicone lubricant to pivot points or hinges within your mast step system for smooth operation.
4) Consider Non-Slip Enhancements:
As you ascend or descend from the mast, the journey can become hazardous if your footing is compromised. Adding non-slip enhancements to your mast steps significantly decreases the chances of slips and falls, thus ensuring your safety. Non-slip adhesive tapes or rubberized coatings are popular options that improve traction on mast steps.
5) Proper Climbing Technique:
Maintaining proper climbing technique is essential for avoiding accidents when using mast steps. Always ensure both of your hands are free while climbing, as holding tools or equipment increases the likelihood of losing grip and falling. It is also crucial to wear a snug-fitting harness to maintain stability and enhance safety throughout the process.
6) Do Not Overload:
While mast steps are designed to support sailors during maintenance tasks, it is crucial not to overload them with excessive weight or pressure. Mast steps have their limits, and exceeding these limits can result in damage and compromised safety. Be mindful of the maximum load specifications provided by the manufacturer and distribute your weight evenly across multiple steps when necessary.
By following these tips and tricks diligently, you can guarantee a safe and hassle-free experience when maintaining or ascending your boat’s mast using mast steps. Remember, prioritizing safety ensures that you can enjoy sailing adventures with peace of mind while taking full advantage of this invaluable accessory. Happy sailing!
Recent Posts

- Sailboat Gear and Equipment
- Sailboat Lifestyle
- Sailboat Maintenance
- Sailboat Racing
- Sailboat Tips and Tricks
- Sailboat Types
- Sailing Adventures
- Sailing Destinations
- Sailing Safety
- Sailing Techniques
IMAGES
VIDEO
COMMENTS
After a rig refit, the mast of Sampaguita, a Pacific Seacraft Flicka 20, was ready to be raised. Still in her Port Townsend slip, the process was, generally, the opposite of lowering, presented in 'Lectronic Latitude on June 16, 2021 — Lowering the Mast on a Small Sailboat with The Resourceful Sailor. It required the same bridle setup.
The Mast Raising Solution for Single-Handed Sailors . I recently saw a solution that addresses all these problems and makes single handed mast raising on the water or on the trailer a fairly simple procedure. This system was in use on a Precision 23 sailboat, but can be used on any small sailboat.
8. hunter 23 wyoming. Sep 5, 2018. #1. I have a Hunter 23 and have tried several mast raising systems over the years and have finally found one that is superior to all others. It is fast, easy and safe, I found it on youtube under "mast raising tool". I made mine for under $50 and it works great.
The two-masted rigs are: Lugger - two masts (mizzen), with lugsail (a cross between gaff rig and lateen rig) on both masts. Yawl - two masts (mizzen), fore-and-aft rigged on both masts. Main mast is much taller than mizzen. Mizzen without a mainsail. Ketch - two masts (mizzen), fore-and-aft rigged on both masts.
Deck-Stepped Masts. Deck-stepped masts rest on the deck of the boat, making them easier to install and remove. They are commonly found on smaller sailboats and are more forgiving in terms of maintenance. However, they may offer slightly less stability than keel-stepped masts.
Yacht Masts: Designed for grandeur, these masts are equipped to handle multiple heavy sails, sophisticated rigging systems, and the weight and balance demands of a large vessel. Sailboat Masts: Engineered for agility, they prioritize speed, wind optimization, and quick adjustments. Maintenance, Repairs, and the Importance of Both.
A sailboat mast consists of several integral parts: ... The sloop rig is one of the most common and simple configurations for a single mast sailboat. It features a single mast with two sails - a mainsail and a foresail (jib or genoa). Attached to the boom is the mainsail. The foresail secures to the forestay at the bow and a headsail furler ...
A sailboat mast is a vertical pole or spar that supports the sails of a sailboat. It provides structural stability and allows for adjustment of the sail position to effectively harness wind power. Typically made of aluminum or carbon fiber, mast design varies based on boat size, sailing conditions, and intended use.
To raise and lower the mast, I rig things and operate as follows. In this example, the mast is attached to a pivoting base and stowed lowered onto the bow pulpit. Between the athwartships attachment points and the mast tangs, I attach a set of temporary shrouds. These I made from coated wire rope (the same as used for lifelines).
The sails seem simple, but actually consist of many moving parts. The parts I list below work for most modern sailboats - I mean 90% of them. However, there are all sorts of specialty sails that are not included here, to keep things concise. Mainsail. The mainsail is the largest sail on the largest mast.
Short answer sailboat masts: Sailboat masts are vertical structures that support the sails on a sailboat. ... So next time you set foot on a sailboat, take a moment to appreciate how this seemingly simple structure can make all the difference in your sailing experience! ... the maintenance of your sailboat mast. Like any well-oiled machine, a ...
Measure the distance from the upper termination point on the mast to the middle of the boom halfway between the tack and clew positions. Divide that measurement by three. Make that the length of the upper lazyjack line from the mast termination to where the legs split off. Make the forward leg length the same.
Stepping the mast on a sailboat is a critical procedure that sets the foundation for successful and safe sailing adventures. ... this step might require a crane or a simple manual lifting mechanism. Communicate clearly with your team and follow a synchronized approach while hoisting the mast to avoid any accidents or setbacks. Step 7: Aligning ...
A sailboat mast is a tall pole that is attached to the deck. It helps secure the sail's length to the boat and upholds the sail's structure. A sailboat mast is the most defining characteristic of a sailboat, helping keep the sail in place. What's amazing about it is that it can even be taller than the vessel's length!
Once fully cooled, it goes through a T6 heat tempering process that elevates tensile strength from 35,000 to 45,000 psi. Lastly, spars can be anodized, painted, powder coated, or left uncoated. Some masts are extruded in half sections and machine-welded together lengthwise.
The Aluminium Cocktail: what goes into the perfect mast. While carbon is the 'sexy' material of choice for spars, aluminium accounts for a far greater proportion of the masts and booms used in sailing and is much cheaper. What goes into an aluminium mast, and the processes to consistently produce a good spar, though are far from simple - like a ...
Mast Mate (mastmate.com, from $280): Made from tough 2in-wide nylon webbing, the Mast Mate is about as simple as a mast climbing device could be. The webbing steps are 17in apart, and there's a grommet just below each step to which a plastic sail slide shackle is attached. There are four standard lengths, from 27ft to 50ft.
Setting up the boom as a gin pole. The basic theory of a gin pole is to lift a heavy object below one end while it remains stationary at the other end. Support lines called guys position the lifting end over the object that is raised. A mast raising gin pole has one end stationary near the base of the mast, uses the forestay to support the lifting end, and uses a winch or a block and tackle to ...
Quality Sailboat Masts, Booms, Hardware and Rigging Since 1963. Dwyer Mast & Rigging manufactures high-quality sailboat masts, booms, hardware, and rigging. Originally founded in 1963 as Dwyer Aluminum Mast Company, the legacy continues as an OEM supplier by taking advantage of improved manufacturing methods to offer a wide range of products ...
What type of simple machine is a sailboat mast? A sailboat mast is a type of lever, as it allows sailors to adjust the sails' position to catch the wind effectively. By changing the angle of the ...
Since 1961, RIG-RITE has engineered, manufactured and distributed Spars, Rigging and Hardware Systems for Sailboats. RIG-RITE stocks the largest variety of related Systems and Hardware available anywhere, Specializing in original replacement parts for Systems on yachts built the world over. Spars - Masts, Booms, Spreaders, Spinnaker Poles ...
Short answer: Mast steps on a sailboat Mast steps are devices installed on sailboats to aid in climbing the mast. They consist of small platforms or rungs attached to the mast, allowing sailors to ascend safely for maintenance or rigging purposes. These sturdy steps provide stability and ease of access while working aloft. 1) Introduction