- No products in the cart.

Catamarans and Trimarans
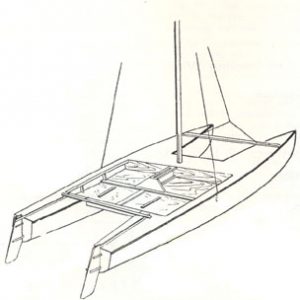
Catamaran and Trimaran Boat Plans make it a reality to build your own catamaran or trimaran. Multi-hulled sailing vessels are a special class of boat. A very different mind set is required when thinking about sailing a multi hull, let alone getting your head around building one.
There are some unique challenges building a multi-hull sail boat, the extra beam added by each hull for instance can create storage issues while under construction. Hartley boat plans make the build process straight forward for even amateur builders. However with all things considered, building a multi can be an amazing journey.
Fast Twin Catermaran
Lively 28 Cruising Trimaran

Lively 35 Cruising Trimaran
Time For a Catamaran Adventure
Isn't Time For Yours?
Building Your Own Catamaran
Building your own catamaran is another option to getting into your own boat. In this page we will go over the advantages, considerations, and a detailed history and journal of our boat-building adventure with Light Wave . We hope this will give you a clear picture of what lies ahead if you go this route, including:
- Construction methods
- 9 essential design features
- Review of the four leading catamaran designers for home builders
- Construction times
- Budget: How much did it cost to build a basic cruising catamaran?
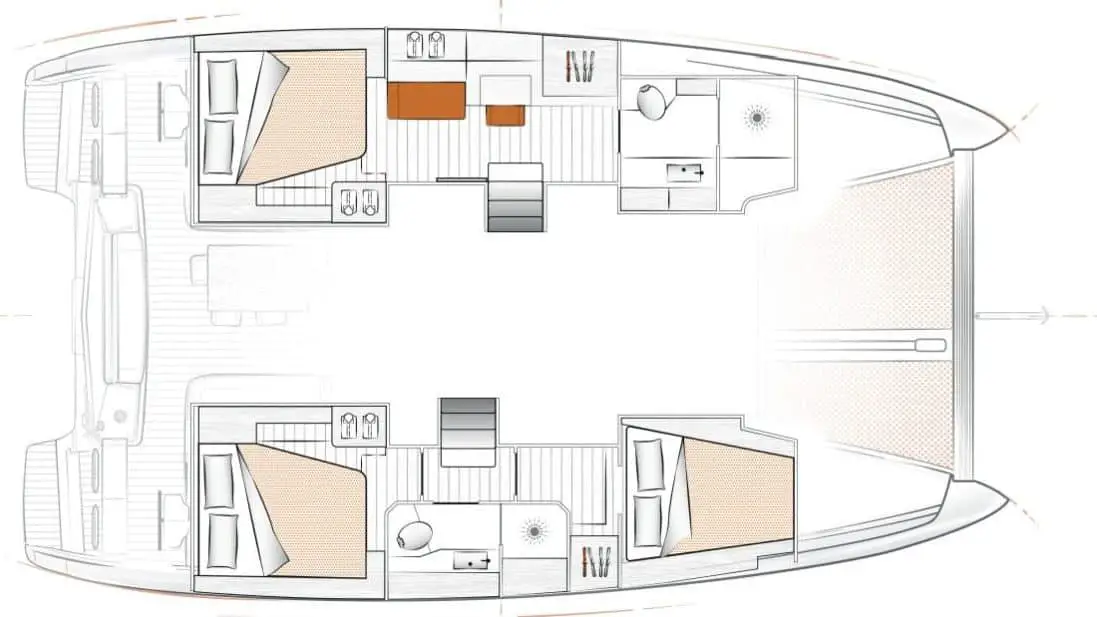
- Layout of our catamaran, LightWave , and lots of pictures
- Carllie’s article from September 2000 Multihulls Magazine: “The Boat Builder’s Wife “
- Equipment outfitting
- Radio and communication outfitting
- Dinghy selection and considerations
- Having a boat custom-built for you
| |
Because of the huge dollars needed to buy a new or even a used catamaran, we would never have gotten a catamaran if we hadn’t built it ourselves.
Let’s start by saying that building any type of larger boat, especially a catamaran, can be one of the most intellectually and physically challenging things you will ever do.
It has been said that building a large boat is the closest a man can come to giving birth to a baby. In other words there is going to some discomfort and pain along the way; you will question yourself on whether this was such a good idea; it’s very difficult to reverse the decision; and though friends will support you, you will be on your own most of the time with your significant other if he/she is game.
Know your boat
You will intimately know every part of your boat. You will know where every wire, hose, bolt, bulkhead, rib, and support is because you installed them!
Pride of ownership
We have often thought what it would be like to just buy a boat from a manufacturer, and know that while owners who have spent a lot of cash (or future life to pay off the lien) their often possessive and competing-with-the Joneses could not begin to compare to our quiet glow of happiness and akinship we feel with Light Wave .
Our boat is like part of the family. So much time was spent on her that we have a major emotional investment. Every time we see our vessel – from a distance at anchor or approaching her in our marina, we say, “What a pretty boat! I can’t believe we built it!” Then that sense of accomplishment settles back in and we feel we have indeed earned the privilege of all of the beautiful experiences we have had sailing, cruising, exploring the beautiful BC Coast and much further a field (or should we say “an ocean”?).
You will be able to pay for the materials as you go and “donate” your time to the cause.
Get a newer design
Many of the production boats that are out there are designs of many years ago because the manufactures have to recoup their capital investment on the mold and production setup. When you build your own you have much newer designs to draw from.
Details on Our Boat Building Adventure
We had sailed our first boat Wave Dancer for five years and had many adventures on the British Columbia coast. In May 1996, I had just returned from a little one-week solo trip in the Gulf Islands of BC when I bought the book, The Cruising Multihull by Chris White (Future link to book review on our web site).
This is the book that got me going (Carllie was not yet convinced). I must have read it a half dozen times over the next 6 months, each time becoming more convinced that this was the way to go for our next boat. It was really still pre-internet web site days so I wrote to all the designers that were listed in the back of the book. Over the next several weeks packages of information started appearing in the mailbox (there is just something about getting packages in the mail – I guess it’s the anticipation). I would pour over these preliminary printed pages with pictures and accommodation layouts. Next, I put a few dollars down to buy the information packages and study plans from the top prospects.
I waited patiently for the study plans. It was like the night before Christmas when I was kid. Oooh the wait! Finally they came, and again I carefully scrutinized the next level of detail. Things were getting a little more serious. The top contenders were:
- Richard Woods
- Chris White
- James Wharram
Click here to read my comments and reviews on their catamaran designs as well as those of Jeff Schionning.
I remember initially drooling over the Atlantic 42 by Chris White, still one of my favorite designs. It seemed to be so seaworthy (by the way if I run into about $800,000 USD any time soon, I am going to buy an Atlantic 55). The most important piece of advice that came out of the material was from Richard Woods:
“Build the smallest boat you‘d be happy with it.”
Axiom #1: The hours to build a catamaran is in almost in direct proportion to its weight.
Which brings us to Axiom #2:
Axiom #2: It takes about 1 hour to create 1 pound of finished boat.
In our case we spent 3,500 hours ( click here for full details on the construction hours ) to build a 4,000 lb. boat (just a little less than 0.9 hours per pound). If a boat’s empty weight is 8,000 lbs., it will probably take about 6,000 hours to build.
When you think about it, you can only mix and handle so much material per hour. More boat weight, more material, more hours. Sure there are some economies of scale on a bigger boat, but usually the systems become more complex and these take longer to install.
This decision process took 8 months and I figured we’d launch in 6 months. It was now January of 1997. Little did we know it would be 26 months and 3,500 hours between the two of us until we launched on June 5, 1999. We ordered the full plans and we were off and running.
We were ready to build, but where would we start the process? First of all, we live in a tiny 480 sq. ft. apartment in Vancouver. Back-yard building wasn’t exactly an option so I found a small garage nearby that we rented for 5 months.
After about 4 months in the garage, I had made all the small parts and it was time to build the hulls. This meant that we had to go larger facilities. We found space at Shelter Island Marina and Boatyard in Richmond. This is the biggest boat yard in the Vancouver area with dozens of commercial and private projects, big and small, under way.
We were out of money by then, so we sold our first boat so we could buy resin and fiberglass. It was a traumatic time as we said goodbye to our beloved Wave Dancer . We were now committed. We than had all the foam for the hull cores, barrels of resin, and huge rolls of matting and roving needed for the fiberglass skins delivered to our “domed stadium”. We kicked ourselves many times that we didn’t take a picture of this raw material stacked in one corner of the empty shed, so we could later show “before” and “after” photos. It was time to build the hulls.
Over the next several months we proceed to join the hulls with the beams I had built in the garage, and then to install the cuddy cabin, cockpit, and decks. By the spring of 1998, it was staring to look like a catamaran. Through the spring and summer of 1998, we continued with the major structural components: mini-keels, hatches, stairs, and interior. Then we went on to the very laborious work of fairing the boat before painting. Don’t under estimate that job!
By October 1998 we were ready to prime the boat and start painting. I really thought this would go quickly. I forgot that I would have to do two more complete sandings to sand off and finish the two layers of primer application. In addition we had to fill countless pinholes – a laborious process somewhat like hiking up a mountain – each time you get to what you think is the top, you see another summit!
The boat seemed to get bigger and bigger. Believe me, there is a lot of surface area on a catamaran. I clearly remember that last sanding: I had reached the end of my physical and mental endurance – I was exhausted. I was ready to move on to the next phase – any phase but more sanding!
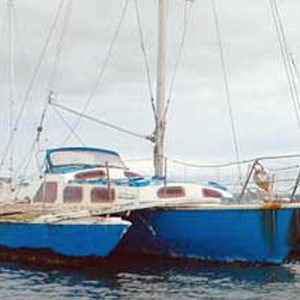
We now started spray-painting the hulls bright yellow. It was around this time we decided on our boat name of Light Wave . The painting took over a month: the hulls being the easy part, it was the topsides, the nonskid, and all the masking and prep that seemed to take forever. Happily, the worst of the dust was gone.
By March 1999 we were in the home stretch. The center bridge deck cabin was completed so we took a week off from our paid jobs and lived on the boat in the shed so we could work all day and not waste time commuting. March, April and May were frantic months as we finished all the final touches: engine installation, rudders, windows, deck fittings, electrical, plumbing, mast, and rigging. See our outfitting page (for more details on what we picked and why, and things we would do differently now.
Initially, our electronic systems were relatively basic but included GPS and autopilot see the following link for all our electronic outfitting choices and reasoning for more details.
It was May 22, 1999 and we decided that Saturday, June 5th would be “Launch Day” so we could send invitations to all of our friends. On the Friday night before Launch Day, we still had a number of final things to do, many of them outside. Unfortunately it was pouring rain. We were tired and very wet but the boat had to go into the water next day so we persevered on till everything was ready.
The moment of truth came as Light Wave was lowered into the water. While still in the slings of the Travelift, I jumped aboard to check for leaks. Of course there weren’t any! More food and laughs and tours of the boat for all attending. It was a great day.
Emotionally drained that night, we slept in Light Wave in the water for the first time. It was another week before we actually went out for our first trip as we had to sell the shed, setup sails, and install some final deck hardware.
To sum it up, building a catamaran was a great experience. We learned a lot. Carllie and I grew closer together through it all. We had a great time doing it. We had a beautiful catamaran to show for it. Now it was time for a catamaran adventure !
| |
How to Build a Catamaran Boat? (Step-by-Step Guide)
Building a catamaran boat from scratch is a rewarding and challenging endeavor.
It takes a combination of skill, dedication, and hard work to craft a seaworthy vessel.
In this step-by-step guide, you’ll learn how to design and size your catamaran, gather the necessary materials, cut and assemble the pieces, lay fiberglass and apply epoxy, make finishing touches, add hardware and paint, and rig the boat.
With the right tools, planning, and patience, you can make your dream of sailing in a catamaran a reality.
Table of Contents
Short Answer
Building a catamaran boat requires a lot of patience and skill.
The first step is to choose the right materials for the hull, such as fiberglass, wood or aluminum.
Then, you will need to build the frame of the boat, which includes the crossbeams and the main hull.
After that, you will need to install the decking, the rigging, and other components.
Finally, you will need to paint and varnish the boat, as well as install the outboard motor and other accessories.
Design & Size Considerations
When it comes to building a catamaran boat from scratch, the first step is to determine the design and size of the boat.
This should take into account the intended use of the boat, such as sailing, fishing, or leisurely cruising.
The size of the boat will depend on the number of passengers and the type of activities the boat will be used for.
For instance, a larger boat may be needed if passengers will be standing or participating in watersports.
The design of the boat is also important and should be chosen based on the intended use.
If you are looking to build a sailboat, you will need a design that is optimized for sailing.
On the other hand, if you are looking to build a fishing boat, you will need a design that is optimized for fishing.
There are a wide variety of boat designs available, so it is important to research and choose the one that best suits your needs.
In addition to the design and size, you will also need to consider the materials used for construction.
The most common materials for building a catamaran boat are wood, fiberglass, and epoxy.
Each material has its own advantages and disadvantages, so it is important to research them and determine which one is best for your project.
Finally, you will need to consider the cost of the project.
Building a catamaran boat from scratch can be a costly endeavor, so it is important to have a budget in mind before you begin.
The cost will depend on the type of materials used and the complexity of the design.
It is also important to factor in the cost of any tools that may be needed for the project.
By taking into account the design and size, materials, and cost of the project, you can be sure to build a catamaran boat that meets your needs and budget.
With the right amount of patience and attention to detail, you can build your own catamaran boat in no time.
Gathering Materials

Gathering the materials needed to build a catamaran boat from scratch can be a daunting task, but it is essential for creating a sturdy and safe vessel.
Before starting the building process, it is important to have an accurate and detailed plan for the boats design and size.
Once a plan is in place, it is time to begin sourcing the necessary materials.
The most common materials used to construct a catamaran boat are wood, fiberglass, and epoxy.
When choosing wood, it is best to select a species of timber that is strong and durable, such as mahogany, teak, or cedar.
Additionally, the wood should be clear and free of knots, splits, and other defects.
Fiberglass is a lightweight fabric that is resistant to water and provides additional strength to the boats hull.
Epoxy is a waterproof adhesive that is used to seal the boat and ensure that it is watertight.
It is important to ensure that the materials are of high quality, as this will help to ensure the boats longevity.
Additionally, it is important to purchase the necessary materials in the correct amount and size.
Too little or too much of a material can be a costly and time-consuming mistake.
Finally, it is important to keep any leftover materials for future repairs or modifications.
With the right materials gathered, the next step is to cut the wood and begin the assembly process.
Cutting & Assembly
Cutting and assembly are the most important steps when it comes to building a catamaran boat from scratch.
The first step is to decide the design and size of the boat.
This will determine the type of materials you need to gather and the amount of effort that needs to be put into the project.
After deciding on the design and size, you will need to cut the wood to fit the design.
This includes cutting the wood to the desired size, as well as cutting any additional pieces that may be needed to complete the design.
It is important to ensure that all the pieces fit together correctly and securely, as any mistakes could lead to a weak boat.
Once the wood has been cut, it is time to assemble the pieces together.
This involves attaching the pieces together with glue, screws, and nails, and ensuring that the pieces fit together securely.
It is important to be careful and patient when assembling the pieces, as any mistakes could result in a weak and unstable boat.
Once the frame is ready, it is time to lay the fiberglass, and apply the epoxy to seal the boat.
This is an important step, as it will make sure that the boat is waterproof and durable.
Finally, you can add the finishing touches, such as the hardware, paint, and rigging.
With the right amount of patience and attention to detail, you can have your own custom catamaran boat in no time.
Laying Fiberglass & Applying Epoxy

When laying the fiberglass and applying epoxy, it is important to take your time and be precise.
Fiberglass and epoxy are key components of a catamaran boat, as they provide the strength and waterproofing necessary to keep the boat afloat.
Start by laying the fiberglass over the frame of the boat.
Make sure to cut the fiberglass to size and overlap the edges for a strong seal.
Once the fiberglass is in place, mix the epoxy and begin to apply it.
It is important to apply the epoxy in a thin, even layer to ensure a proper seal.
Make sure to move the epoxy around to get it into all the nooks and crannies of the boat.
Allow the epoxy to cure and then you can begin to add the finishing touches.
Finishing Touches
Once the frame of the catamaran boat is built, it is time to add the finishing touches.
This includes adding the necessary hardware, painting, and rigging the boat.
Hardware: Before adding the hardware, it is important to ensure that the frame is stable and secure.
Add the appropriate hinges, screws, and nails to the frame.
Make sure that the screws and nails are the correct size and do not exceed the recommended load capacity of the frame.
Painting: Once the hardware is added, it is time to paint the boat.
Choose a paint that is suitable for the materials used in the construction.
Make sure that the paint is applied evenly and that the frame is completely dry before applying the next coat.
Rigging: The last step is to rig the boat.
This involves attaching the sails, running rigging, and standing rigging to the masts and booms.
Make sure that the rigging is properly tensioned and secured.
Once all of these steps are complete, your catamaran boat is ready to sail.
Hardware & Paint

The last step in building a catamaran boat is to add the hardware and paint.
This step is often the most rewarding, as it is the finishing touch.
Depending on the design of your boat, there are various types of hardware you may need.
Some of the most common items are cleats, winches, fasteners, and decking.
After selecting the required hardware, you will need to install them on the boat.
It is important to use the correct type of screws and bolts, and to secure them tightly.
Once the hardware is installed, it is time to apply the paint.
The type of paint and color you choose will depend on the design of your boat.
It is important to use a high-quality marine grade paint that is designed to handle the extreme environment of the ocean.
If you are up to the challenge, you can add some custom artwork or detail to your catamaran boat.
Adding the hardware and paint is the final step in building a catamaran boat.
With patience and attention to detail, you can create a beautiful and unique boat that will last for many years.
Be sure to take your time and enjoy the process of constructing your own boat.
Once you have finished the frame, fiberglass, and epoxy of your catamaran boat, you will need to move onto the rigging.
This is a crucial step in the construction process, as it will keep your boat safe and secure on the water.
When rigging a catamaran, there are a few key components that must be taken into account.
First, you will need to determine the type of rigging you will be using.
Typically, catamarans use a combination of standing and running rigging.
Standing rigging consists of cables and lines that stay in a fixed position to provide stability and strength to the boat, while running rigging consists of lines that are used to adjust the sail and mainsheet.
Additionally, you will need to choose the right type of rope and hardware for your rigging setup.
The rope should be strong and durable, and the hardware should be made of stainless steel and be corrosion-resistant.
Once you have chosen the type of rigging and hardware, you can start assembling the rigging lines.
This process involves carefully measuring and cutting the lines to the proper lengths, and then attaching them to the mast and boom.
Depending on the type of rigging setup, you may also need to attach the lines to the hulls and deck.
It is important to inspect the rigging lines and hardware regularly to ensure that everything is secure and in proper working order.
Rigging a catamaran boat can seem like a daunting task, but it is essential for the safety and comfort of your vessel.
With the right tools, materials, and attention to detail, you can successfully and safely rig your catamaran boat.
Final Thoughts
Building a catamaran boat is a rewarding experience that requires patience and attention to detail.
With the right plan, materials, and steps, you can build your own boat in no time.
Now that you know the basics of how to build a catamaran boat, why not grab your tools and get started on your very own project? With the right motivation and dedication, you can make your dream of owning a catamaran boat a reality.
James Frami
At the age of 15, he and four other friends from his neighborhood constructed their first boat. He has been sailing for almost 30 years and has a wealth of knowledge that he wants to share with others.
Recent Posts
When Was Banana Boat Song Released? (HISTORICAL INSIGHTS)
The "Banana Boat Song" was released in 1956 by Harry Belafonte. This calypso-style song, also known as "Day-O," became a huge hit and remains popular to this day for its catchy tune and upbeat...
How to Make Banana Boat Smoothie King? (DELICIOUS RECIPE REVEALED)
To make a Banana Boat Smoothie King smoothie at home, start by gathering the ingredients: a ripe banana, peanut butter, chocolate protein powder, almond milk, and ice. Blend the banana, a scoop of...
[email protected]
Category: Our Catamaran Build Kits
Recommended equipment.
Quality suppliers & manufacturers
The schionning team have a lot of contact with equipment suppliers and manufacturers, and hear feedback on certain brands or systems from our many customers. there are many schionnings cruising the world and testing products longevity and the customer service offered by the manufacturer., on this page we will list products and companies that we know to provide above average quality and service. it is always growing, and if your company provides equipment used on our designs and you would like to be included - please contact us., engines & drive systems.

Visit: https://oceanvolt.com
Batteries, Power Management

LITHIUM POWER (VIC)
Back in 2013 I knew that my boat batteries were reaching the end of their lives, I had been researching LiFePO4 cells for a few years and decided that I should install them. Unfortunatly I was unable to find a local supplier. So Lithium Power was established.
Technical Information
The technical information page is a collection of documents (mostly in pdf format) on the materials and systems used in schionning catamarans. including data sheets, engineering information, strength comparisons of each core material and informative articles from jeff outling the design of certain system such as engine choices and main sheet systems., detailed engineering data for your research, we understand that getting your head around the process of building your own boat, or having one built, can take a little while. to gain a greater understanding of the materials used in our designs, the below data sheets have been supplied by atl composites, and contain all of the technical data you could need regarding the composites we use. in addition are articles or documents written by jeff about certain systems used on our designs and why., all technical information and data sheets on west system/duflex/durakore provided courtesy of atl composites. for more information please see the atl composites website here., documents library.
Information Sheet – CE CERTIFICATION PROCESS
- Mainsheet Systems for Catamarans
- Motor Choices for Schionning Designs
- Weight and Weight Distribution Schionning Designs
- Schionning Designs Sailing Performance and Tips
- Hull Shapes and Performance – Power Designs
- Outboard Engines VS Diesels – Written by Ross McCombe
- An Outboard Installation That Works – Ross McCombe Follow up
- Data Sheet – DUFLEX BALSA for Catamaran Kit Builds
- Data Sheet – DUFLEX FOAM
- Data Sheet – FEATHERLIGHT Paper Honeycomb
- Data Sheet – WEST SYSTEM R105
- Data Sheet – PUMP SYSTEMS
- Data Sheet – MICROFIBRE BLEND 403
- Data Sheet – MICROLIGHT 410
- Data Sheet – MICROSPHERES 411
- Information Sheet – USING FILLERS
- Data Sheet – KINETIX RESIN Thixotropic
- Information Sheet – DURAKORE PLANKS 413
- Data Sheet – DURAKORE PLANKING 414
Kit Materials Contents
Kit materials' contents, so if you order a schionning kit, what exactly is going to arrive see an overview of the materials you will receive, and what each is used for during the build process. fibreglass cloth or tapes microspheres, microballoons or microfibers take a closer look and you can answer these questions., our schionning kits are a no nonsense, common-sense approach to building a boat. we offer great service, fast delivery and access to anything you could need for your boat straight from the supplier to your door. our construction plans and kits are sold with 100% professional boatbuilder support via phone and email, any time you're unsure or just need a second opinion, we're here..

Our kits contain all of your basic materials to build your boat to a faired shell stage, ready for painting and fit-out. We have sail-away costing estimates available for all of our standard designs, and this will give you an accurate idea of the overall cost of your project. This costing varies depending on your level of finish, as you can imagine different options vary greatly in price.
Below is a quick glance at what your Schionning Kit will include and what each item is primarily used for, we hope this is helpful and if you should require more detailed information please don’t hesitate to contact our office.
What do I actually receive?

DUFLEX PRE-LAMINATED PANELS
DuFlex pre-laminated panels are the main and most important material used in our kits, predominantly in the flat panel designs, however they are used in Strip-planked designs also, though to a lesser extent. These panels are 2400mm x 1200mm and are CNC routed to speed up build time on our Wildernes X Series, as well as some of our power designs. For internal furniture, a paper honeycomb core is used instead of the end-grain balsa wood core that is used for main structural areas. The use of this is purely to save weight in the shell and therefore produce a faster, more responsive catamaran.

KINETIX LAMINATING RESIN & HARDENER

WEST SYSTEM EPOXY RESINS

FIBREGLASS TAPES (DOUBLE BIAS)

CARBON FIBRE CLOTH

FIBREGLASS CLOTH
The kit process, building your own boat can be a daunting prospect, however to demonstrate each step in the kit assembly process, we've created this guide for you to study. as you can see our kits are the ultimate in building efficiency and have been streamlined over 30+ years to ensure that you're on the water faster and with less effort., how does it all go together.

The first step to building your dream catamaran begins with a strongback – this is a square frame used to position the temporary frames that will be used to form the hull shape. This frame will be set up and must be square and accurate, a string or laser level can be used to achieve this.

The forebeam is now installed along with the striker attachment fitting, as shown above. The bridgedeck is installed shortly after and taped onto the bulkheads with webs installed, this now completes what is a quite stiff and strong platform to work on.

Now that the bridgedeck is in place, the forward webs and dash will be fitted. At this stage, all furniture and internal work begins, with the main panels left off for ease of access when working.

Material Choices
Schionning material choices, solutions that work best for catamarans & why, our designs are based on cored composite construction techniques using west system epoxy resin and knitted fabrics. but given the range of today's composite technologies, which solution works best for catamarans and why written by jeff schionning, selecting the correct materials, resin choices.

It also fully protects the boat against water absorption and it can not develop the dreaded Osmosis.
We choose ATL Composite’s resin systems for their superior quality, reliability and value for money.
Having worked closely with the ATL Composites team and their products for many years, we know we can stand by their material solutions, and rely on great service should something unexpected happen.

This may not seem important but when working with a material for an extended period of time, the small things make all the difference.
CORES Which One to Use?

- End-Grain Balsa – 150kg per cubic metre
- Superlight Balsa – 94kg per cubic metre
- Western Red Cedar – 360-380kg per cubic metre
- Foam – 80kg per cubic metre
BALSA END GRAIN (150 kg/cubic metre)
Balsa has very good values and we can produce a shell using a very light laminate. It will be very stiff and very resilient to fatigue.
It has exceptional qualities including very high compression strength, extremely good sheer capabilities and fantastic sheer stiffness.
Compressive strength is the resistance to collapsing when pressure is applied perpendicular to the surface as when pushing directly onto the material with the point of your finger. Balsa is far stronger than Foam (80kg/cubic metre) in compression.
Balsa is also very strong in shear. This is when the core sample is held flat between your hands, one hand slid one way and the other slid the opposite way, when the core tears through the middle the core has failed in sheer. The amount of stretch you feel before the core shears is shear stiffness. To compensate for sheer weakness the core is made thicker. So 13mm Balsa may be equal in sheer to 19mm Foam.
(80 to 200 kg/m³)
There are many boats sailing that are built from foam as it’s mechanical properties are good for boat building.
- Initially one would expect this cat shell to be lighter as it is ½ the weight of Balsa. We do have to compensate for its weaknesses and will then add to the reinforcement the reinforcement on the outside to spread that compression load over more core and need a triaxial type weave to compensate for the veneer content that runs fore and aft on the Durakore.
- Secondly, we need to increase the Core thickness to compensate for the shear value, usually neutralizing the weight advantage.
- We only use structural foam core that is closed-cell and cross-linked.
The end result using foam core amounts to a very similar total boat weight. Professional builders can achieve a good result but usually use vacuum bagging and very good molds to achieve this.
Secondary Issues
Balsa can absorb water. It needs extreme neglect to rot (very unusual). Water soaks along the end grain quickly. It travels very slowly across the grain. We use balsa under the waterline especially because of it’s high compression strength for beaching etc. any core type must be sealed. Damage to all cores results in the same sort of repair. Notice a damp spot remaining when drying out to anti-foul… simply grind back the surface glass exposing the core, dry it out and re-glass – it’s that easy.
Timber cores are cheaper than Foam in most cases.
A light, high tech cat returns a far better (often 2 – 3 times) re-sale than lower tech materials. Often saving $10,000 on materials initially, loses $200,000 on re-sale – a serious reality.
Our boats can be built using Balsa, Foam or Western Red Cedar. Combine strength, stiffness, lightness and cost, with ease of use – it just makes good sense!
|


COMMENTS
If you were to build a 40-foot (12.1-meter) catamaran, your cost of materials would range between 20-30% of the total cost. Therefore, for $300,000 total, the boat's materials would range between $60,000 and $90,000. The hull tends to range between 15-35% of the total build.
Catamaran and Trimaran Boat Plans make it a reality to build your own catamaran or trimaran. Multi-hulled sailing vessels are a special class of boat. A very different mind set is required when thinking about sailing a multi hull, let alone getting your head around building one.
Axiom #1: The hours to build a catamaran is. in almost in direct proportion to its weight. Which brings us to Axiom #2: Axiom #2: It takes about 1 hour to create. 1 pound of finished boat. In our case we spent 3,500 hours ( click. here for full details on the construction hours) to build a 4,000 lb. boat.
The Best Advanced Build System in the World. The Schionning Advanced Build System are one of the simplest ways to build your own boat, or have a custom design built faster and more accurately by a professional. Utilising DuFlex panels with a balsa core, large sheets are joined on their long edge to form full length hull panels, bulkheads etc ...
A 3-year DIY homebuilder project — building a 40ft catamaran. If you have dreamed of making a boat and sailing off over the horizon — do it. The book "Build...
The ultimate multihull design and building resource - catamarans and trimarans to 150 feet. Visit Multihullblog.com for latest work, updates, and techniques. Home New Designs Stock Designs Cruising Cats ... professional builders who build my designs; and answers to frequently asked questions. It is over 235 pages long and is sent Priority Mail ...
We have plans to build our own catamaran. And we're going to take you through the process on how it's done!Using a Schionning 1200 as an example, we walk yo...
Fast forward through 3 year's work - in 3 minutes, the building of a 40ft catamaran.An overview — building a DIY homemade 40ft catamaran.
STEP 1. The first step to building your dream catamaran begins with a strongback - this is a square frame used to position the temporary frames that will be used to form the hull shape. This frame will be set up and must be square and accurate, a string or laser level can be used to achieve this.
Make sure that the rigging is properly tensioned and secured. Once all of these steps are complete, your catamaran boat is ready to sail. With the right amount of patience and attention to detail, you can build your own catamaran boat in no time. Hardware & Paint. The last step in building a catamaran boat is to add the hardware and paint.
Building your own boat can be a daunting prospect, however to demonstrate each step in the kit assembly process, we've created this guide for you to study. ... The first step to building your dream catamaran begins with a strongback - this is a square frame used to position the temporary frames that will be used to form the hull shape. This ...
catamaran sailing. DIY boat projects on Pure Majek from new navigation equipment, anchoring systems, rewiring yacht electronics diagrams, AIS and much more. Its been ten great years since launch and we look at things that have worked and those we would change. Join us and be inspired.
Spirited Designs driven by Innovation. to suit DIY enthusiasts. We help you create your own dream catamaran with clever and accurate kit packages. Kit boats that deliver exciting performance, full customisation and a sophisticated modern look. All of our catamaran kits use modern cutting-edge materials to provide the best weight-saving advantage.
Everything you need to build your own sea-going catamaran: 3 steps. Familiarise yourself with our range of designs and their unique qualities. For more detailed information read the Wharram Design Book which reviews each self-build boat model and offers a detailed introduction and understanding of the world of self-build catamarans.; Order one or more sets of our Study Plans and immerse ...
Building Catamarans and Trimarans; Share Your Experience, Learn From Others. In partnership with The Coastal Passage. This site will feature building projects from as great a variety of materials and build methods as possible. If it's a multihull or any project that relates or enlightens we want to feature it here.
The Fusion 40 "Kit Cat" is revolutionising the boatbuilding industry. This vessel has been designed from the beginning as a high performance cruising catamaran that can be stacked into 40 foot containers and freighted anywhere in the world. This photograph shows the infusion moulded components as they would appear when removed from the container.
Building an Aluminum Performance Cruising catamaran.Join Jamie as he goes back a few years to describe the build process of Jupiter2, a Mumby design, which b...
Now that you know what a cutting-edge catamaran features, let's look at how to create the perfect cruising catamaran layout. Build a Larger-Sized Catamaran. The early catamarans ranged between 36-42 feet (10.9-12.8m). At the time, this appeared to be a good size in terms of safety and ease of handling.
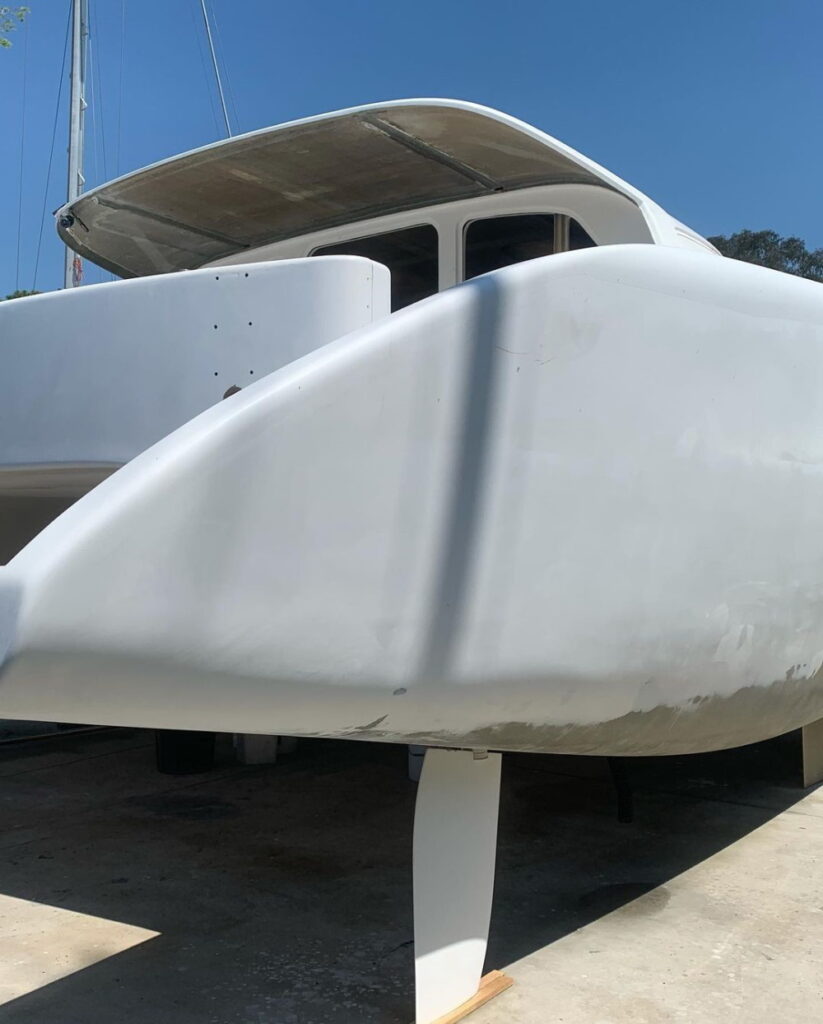
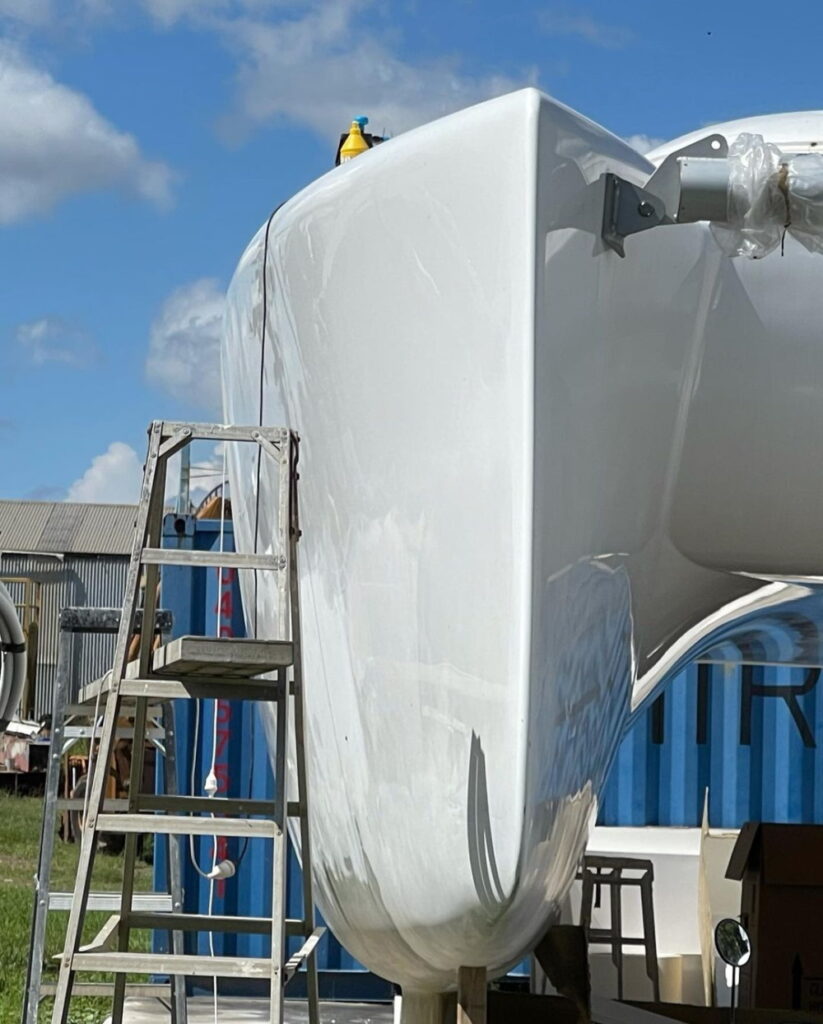
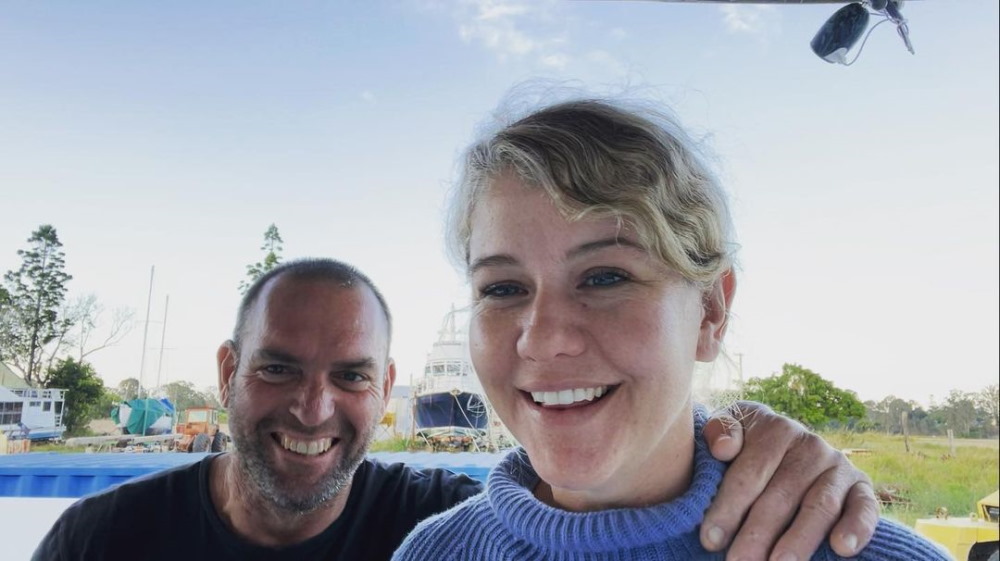
Many thanks to Shane and Carmen, who are building a Fusion 40 in Australia, for agreeing to share their experiences on the project. Fusion Catamarans design and sell a modular marine construction kit of components: resin infused, gelcoat and fibreglass components that enable you to build your own performance cruising catamaran or outsource the ...
We design modern high performance sailing catamarans, trimarans and power cats. Contact us to find the right professionals and resources for your project, or to create a custom design to empower your vision for time on the water.
A new edition of The Coastal Passage has just been posted. Click on the image at right to download the PDF. Covid Cruising! From Tasmania to Greece with a boat built by the editor. For more information on this boat, see and check out The BareBones project. The $21,000, 30 foot+ Catamaran! "PLANS" NOW FREE!
We're only 48 hours into having the first set of components for our catamaran, and she's already starting to come together and look like a boat!Follow along ...
You might be wondering why yachts makes the best escape solution. Well, it is because you can find live aboard yachts for $15,000, $15-million, and everywhere in between. They serve as your home and they provide inexpensive transportation around the world. For a transcript of this podcast, click "read more" below.
The header image is a vibrant picture of Ascension's catamaran yacht, immediately indicating the company's value proposition of chartering a private boat. The following sections build on this value proposition, describing how the product's supreme comfort creates a relaxing atmosphere for your family and friends.