
Repairing Fiberglass On Boats (Complete Beginner’s Guide)

Fiberglass boats are arguably the best kind of boats you can own. They’re lightweight, fun to use, and easy to maintain.
They’re even easy to repair, and in this post on repairing fiberglass boats, we’ll tell you exactly how to do just that.
Let’s get started!
Table of Contents
Fiberglass Basics You Should Know

Fiberglass is a wonderful material that can be used to repair all sorts of things.
Learn how to work with fiberglass, and you can repair boats, vehicles, bathtubs, and many other items.
You can even learn to create your own parts, canoes, and even coolers. An entire lifetime could be spent learning how to build and repair things using fiberglass.
But first, you need to know how fiberglass works as well as what it is. Fiberglass by itself is just a sheet of glass fibers woven or matted together. By itself, it is not hard, waterproof, or useful for anything.
However, once you apply a chemical resin to the fiberglass, it becomes waterproof, hard, and incredibly durable. It also remains lightweight, which makes it great for applications such as aircraft, automobiles, and boating.
The type of resin you use, the type of fiberglass you use, and the core material you use will determine just how hard and durable the constructed fiberglass becomes.
Types of Fiberglass Cloth
There are many different types of fiberglass cloths out on the market today.
Some of these cloths include chopped strand mat, biaxial mat cloth, woven roving cloth, continuous roving cloth, carbon fiber cloths, and the list goes on and on.
This being said, there are two types of fiberglass cloths that you’ll be working with:
- Fiberglass fabrics, or cloths
- Fiberglass mat.
The fiberglass fabrics will be your main structural material, but you may end up using a fiberglass mat to help you work around turns and to help waterproof low-stress areas like the live wells.
With these fabrics, you’ll also have different weights.
These weights will help determine how thick and strong the material is. Popular boating fabric weights are 10 ounces, 6 ounces, 4 ounces, and 1.5-ounce cloths. These fabrics are sold by the yard and generally come in widths between three and five feet.
The type of fiberglass fabric you choose will be determined by the application you’re using it for.
Also, lighter cloths can be applied in multiple layers, so if you need more reinforcement, you can always combine a 4-ounce cloth and a 6-ounce cloth in two different layers to provide the thickness and strength of a similar 10-ounce cloth.
Types of Resin
There are a lot of different resins out on the market these days, but the two you’ll most likely be working with are either epoxy resin or polyester resin. Epoxy resin is more expensive than polyester resin, but it is often considered stronger. It is also more versatile as the epoxy resin will bond well over polyester resin, but polyester resin may not work well over an epoxy.
This being said, different epoxy materials will work better with different core materials.
For example, the polyester resin will melt some foams and plastics. I found this out the hard way when I mixed some epoxy resin up in a plastic cup. The resin started leaking right through the bottom of the cup, and I was very thankful that I had decided to play with the fiberglass outside.
Some other types of resin you might run into are polyurethane resin and silicone resin. These resins are even more expensive than epoxy resin, and it doesn’t really make sense to use them for boat repairs anyway.
Core Materials
The core material is just the material that is encapsulated by the fiberglass cloth and resin. Core material on boats is usually balsam wood or a foam core. However, almost any material can become a core material.
For example, I’ve applied several different types of fabric with polyester resin over the top of pieces of cardboard. The fiberglass and resin are so strong that it turns the cardboard into a hard shell that you can use to make many different things, including small boats.
If you ever need to do a small one-off project that does not require structural support, think about using cardboard as a cheap and easy alternative to creating a mold or using traditional core material.
This being said, your best bet is to use a core material that is meant for your particular application. For obvious reasons, being out on the water in a damaged balsa wood and fiberglass boat is a whole lot safer than being out there in a damaged cardboard boat.
Also, keep in mind that you don’t always need a core material. Sometimes you can create a mold that simply holds the fiberglass and resin together until they dry and become components themselves. Many fiberglass hulls are built using molds that consist of a thick layer of fiberglass and resin, and they are designed to be very strong with many layers of built-up woven fabrics and mats with no core material.
Camper shells are also built this way without any core material. If you’re curious about what this looks like, just do a quick search for fiberglass campers on this website, and you’ll see plenty of examples.
When you’re doing repairs on an existing fiberglass boat, you may not be using any core material either.
This is especially true if you’re just repairing a crack or hole in a non-load-bearing area. In this case, you’ll just be applying cloth over the crack and sealing it with resin.
How Is The Fiberglass Applied?
There are a few different ways that fiberglass can be applied.
- Roll it on with a paint roller
- Paint it on with a brush
- Spray it on with a spray gun.
When doing fiberglass boat repairs, you’ll most likely be painting or rolling it on in small batches.
The way you’ll do this is you’ll mix up a small amount of resin that you can successfully paint on over the fiberglass within about 15 to 20 minutes. This is about how much time you’ll have before the resin begins to dry and harden. If you mix too much resin, you’ll end up wasting it, so it’s important to start small until you get a feel for working with it.
Also, keep in mind that all of your fiberglass should be laid out over the area you’re repairing before you begin mixing your resin.
Once your resin becomes active, you won’t have time to go back and cut out pieces of fiberglass.
General Tips for Working with Fiberglass

As we alluded to earlier, fiberglass must be mixed before it can become active. This is usually done with a hardener. The manufacturer will tell you just how much hardener needs to be added to the resin.
Gel coats can also be added to the resin, but this shouldn’t be done until you are on your final layer.
If you apply the gel coat too early, you’ll end up having to sand the layer down before you can add any additional layers.
Also, keep in mind that fiberglass resins are meant to be used at different ambient temperatures. If the temperatures are too high or too cold, the resin will not cure properly.
You’ll know the resin didn’t cure correctly if the fiberglass feels tacky afterward.
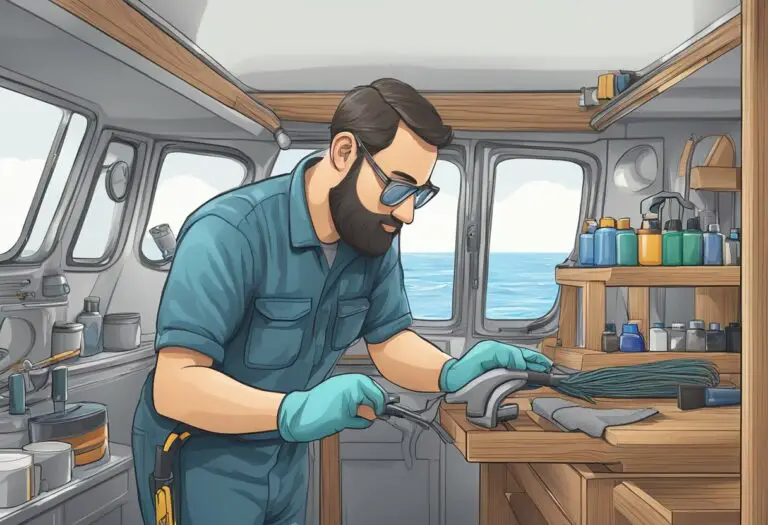
Safety Tips for Working with Fiberglass
Fiberglass resins and hardeners can be toxic, and it’s important to keep them off of your body and out of your lungs.
Personally, I only work with fiberglass outside, but any well-ventilated area will do.
Also, if you’re working with polyester resin, you’ll want to wear a respirator. Not only is polyester resin toxic to breathe, but it smells awful. The smell is so bad that I won’t even leave the closed bottle of polyester resin inside my house for fear that it will make the house smell bad.
You don’t want to get resin on your skin or your eyes either. Wear protective clothing, gloves, and safety glasses to prevent this from happening.
For additional protection, you can also get a lotion that will work to coat your hands. This way, if the resin gets through your gloves, you’ll have an extra layer of protection between the resin and your skin. If the resin does end up getting on your skin, be sure to wash it off immediately.
People have been known to develop allergies to epoxy resin, and once you get this allergy, you’ll never be able to be around epoxy resin again.
Fiberglass Buying Tips
- Always buy fiberglass by the roll. Unfortunately, many people will try to sell you folded pieces of fiberglass because it is cheaper and easier to pack, ship, and store it this way. Sadly, folding fiberglass cloth can weaken the strands, so when you buy fiberglass that is folded, you’re buying cloth that is already damaged.
- Buy the hardener with the resin. It’s always easier just to buy the hardener and gel coats with the resin. Different resins will need different amounts of hardener, and the manufacturer will usually sell the two as a kit.
- Get good mixing cups. A poorly mixed resin will not work properly. Get good mixing cups so that you can accurately mix the resin and get the most benefit from it.
- Buy it locally (at first). A local marine store owner can often offer you valuable tips for working with fiberglass, and they can help tell you where you went wrong when you run into trouble. You’ll probably end up paying a bit more for your resin, but you’ll often end up with some good and free advice.
- Buy the right fiberglass for the job. When you go to buy fiberglass, you’ll notice right away that chop strand mat is dramatically cheaper than all of the other types of fiberglass. There is a reason for this. Fiberglass mat is not very strong, and it can be difficult to work with. Only use fiberglass mat when the job specifically calls for it. Resins are expensive, so there isn’t any point applying them over inferior fiberglass cloths.
Repairing The Hull
Before you decide to repair your own boat hull, you may want to do a reality check.
Is the boat hull severely damaged? Is your boat an ocean vessel that is going to be put under a lot of stress?
If you answered yes to these questions, you might want to save this project until you have a lot more experience with fiberglass repair. In this situation, a bad repair job could put your life in jeopardy, so the money you save will never be worth it.
This being said, there are a lot of small hull repairs that you could tackle yourself without much risk. For example, a small hole in a small boat that you only take out on the lake shouldn’t be too much for you to handle. Small cracks or holes in the areas above the water line might not be a big deal either, but please use your best judgment.
Repairing Holes in The Hull
To repair a hole in the hull, you may need to get some new core material. Try to match the new core material with the existing core material. Make sure the remaining core material is dry.
Once you have the core material, you’ll need to fit it into the hole. Next, measure and cut your fiberglass cloth. Lay the fiberglass over the area, using fiberglass tape if you have to. Once everything is in place, mix up your resin and apply it over the damaged area. You may need to do multiple layers.
For professional repairs of ocean-going hulls, the surrounding fiberglass is ground back on a slope of 1:12 to make a large area to be repaired; a 1/2″ thick fiberglass structure would be ground back 6″ in every direction from the hole.
The patch is then built-up with increasingly larger pieces of fiberglass mat and resin. Again, you need experience before trying this.
Your final coat should be a gel coat that matches the color of your boat.
Alternatively, you could repaint the boat after the repairs have been made.
Repairing Cracks
Be careful when repairing cracks in your hull, as they could be a sign of bigger structural issues.
For example, a balsa boat with cracks in it could have rotten wood inside the hull.
However, if you just see some cracks from when you accidentally backed into a tree last week, feel free to try to take on the repairs yourself. You probably won’t need any new core material, but you will need some fiberglass and some resin to patch up the crack.
Measure, cut, and layup your fiberglass before mixing your resin, and you shouldn’t have any trouble with the repair.
One thought to keep in mind with a repair like this is that you’ll probably spend more time sanding and painting than you will be doing the actual repairs. The more time you spend sanding, the better the boat will look when you’re done.
Repairing The Floor and Deck
The first thing you should do before making any repairs to the deck or the floors is to check to see how severe the damage is.
Often-times, decks and floors are made from wood, and if they are spongy or have holes in them, the wood is probably rotten underneath.
Before making any repairs to the fiberglass, you’ll need to take out this rotten wood and replace it. What seems like a small repair, in the beginning, can often end up being an extensive repair. If you don’t believe me, just look at all the free “project boats” listed on Craigslist.
Oftentimes you’ll see that the person giving it away received the boat for free himself, thinking that he could do the repairs and get a free boat.
Once he started to tear the boat apart, he realized just how much work and money would be needed and decided to give up on it.
Once you do know what you’re in for, start replacing the decking and flooring, making sure to keep the materials dry until they are encapsulated with new fiberglass and resin. Also, be sure to make a note of where the different pieces of hardware are connected to the deck, as you’ll need to put them back on when your repairs are complete.
If you’re careful, you can use the old decking that you pull off the boat as a template for creating your new decking.
Once your new flooring is complete, secure it to the boat and begin placing the fiberglass cloth over it. Be sure to use a good amount of fiberglass as the decking will need to be strong enough to support people walking over it. Mix up your resin and apply it in small batches.
If you have a large area to do, you’ll be tempted to make larger batches but don’t do this as you’ll only end up rushing the job or finding the resin sets up prematurely.
Flooring Alternatives
Another thought to keep in mind is that you don’t always need to replace your wood flooring with wood. Some people will skip the fiberglass altogether and simply install an aluminum floor instead.
This can be useful in certain applications but not very useful in others, so you’ll need to analyze your particular situation before you decide to make any changes.
If you do decide to skip the fiberglass, just be careful to find out what changes this will have on the weight of your boat. Making a heavier boat could reduce your boat’s max capacity and affect the way your boat sits in the water.
Repairing The Keel
The keel is an integral part of a boat. On a sailboat, the keel keeps the boat upright in the water and helps to keep it stable in heavy winds.
Being at the bottom of the boat leaves it much more vulnerable to scraping the ground and running into rocks. For this reason, a keel can often take damage even when the rest of the boat remains trouble-free.
The question is, do you want to repair this damage to the keel yourself?
If you have a small recreational boat that you can easily bring up on land, I’d say go for it. You can flip the boat over in your backyard and spend as much time as you need applying a new resin and gel coat to the keel.
For boats that you know will be scraping the bottom again, you may want to apply a keel guard as well. This will help protect your keel, so you don’t have to constantly make repairs each season.
Repairing The Transom
A solid transom will ensure that your boat’s engine doesn’t fall into the water. If you’re going to make this repair yourself, make sure you’re prepared to do it properly.
Oftentimes the core of the transom needs to be replaced, and you’ll want to make sure you replace it with a material that is as strong or even stronger than the original. This is especially true if you’ve upgraded the original boat engine to something bigger and heavier.
Once you’ve replaced the core material, the steps for making the repair remain the same.
Apply your fiberglass boat cloth and use as many coats of resin as you need to get the job done.
This repair includes a lot of hard edges, so you may need to overlap your layers of fiberglass at the top to get a good seal. Take your time and make sure the fiberglass wraps properly, or you’ll end up having to do a lot of sanding at the end of the job. Also, be careful to account for where the engine will be mounted so that you can match the hardware appropriately.
Repairing Hatches
Hatches are easy repairs, and they’re great for getting started with fiberglass.
When replacing a hatch, use the existing hatch to make a template for the new one.
The new hatch should be easy to make, and you won’t have to use a lot of thick fiberglass cloth since it won’t be the main structure of the boat.
The main thing to keep in mind when doing this repair is that the hatch will need to be sealed properly afterward. Oftentimes, people will do a great job repairing or replacing the fiberglass hatch, but they won’t seal it properly afterward, and they end with a leaky hatch.
Repairing Scratches
Scratches in the fiberglass usually don’t require extensive repairs, and the cost is usually minimal.
The reason for this is that the fiberglass does not need to be replaced, and the core material is not yet affected.
Unfortunately, some deep scratches in the gel coat can end up creating a lot of prep work. You’ll end up needing to do a lot of sanding to get the boat to look new again.
You’ll also need to do a good job matching the color.
If your boat is new, this may not be a problem, but if your boat has been out in the sun for a while, you won’t be able to use the original boat color as it will end up being too dark.
You’ll have to color match the boat, or you’ll have to resign yourself to painting the entire boat over again.
DIY Costs vs. Professional Costs
Doing repairs yourself will usually save you money, and they can sometimes even save you on time.
However, some jobs are too big to be done by beginners, and some jobs just take too much time for the DIY repair to be worth it.
I’ll try to give you a breakdown of some of the costs here so you can decide for yourself whether or not the repair is worth paying for or doing yourself.
Example costs from FiberGlassSite.com:
- 6-ounce fiberglass cloth 50” wide and 5 yards long. – $25.00
- 1 gallon of polyester resin with hardener. – $39.00
With this much cloth and resin, you could do a lot of small repairs of cracks and holes.
A simple hole or crack repair might cost you $50.00 each, so you’d definitely save money on smaller repairs, and you may even have some extra fiberglass left over for the future.
For a balsa core deck repair, you might want ¾ inch core. This costs about $50.00 for a 2’x4’ piece. You’ll also need a 10-ounce fiberglass cloth and polyester resin.
This repair might end up costing you a couple of hundred dollars, but it could save you a thousand.
Foam core used for repairing heavy damage to the hull of a sea-going vessel will need to be very strong. Not only this, but you’ll need to consult with a marine technician to determine what the best combination of foam, resin, and fiberglass should look like.
Between material costs and consulting costs, you’ll end up spending thousands of dollars. You’ll also end up spending a lot of time, and you may devalue the worth of the boat since a buyer might not feel safe buying a boat that was repaired by an amateur.
In this case, you may be better off paying a professional boat repair company to do your repairs.
Final Thoughts
Working with fiberglass can be tricky, but it can also be a lot of fun.
Learn how to work with fiberglass, and you’ll find an almost endless number of projects to take on.
Just keep in mind that working with fiberglass is not cheap or easy to get into. If you decide to take on fiberglass projects, be prepared to spend some time and money doing so.
Also, be prepared to mess up a few projects while you’re learning.
Click to share...
Please verify you are a human
Access to this page has been denied because we believe you are using automation tools to browse the website.
This may happen as a result of the following:
- Javascript is disabled or blocked by an extension (ad blockers for example)
- Your browser does not support cookies
Please make sure that Javascript and cookies are enabled on your browser and that you are not blocking them from loading.
Reference ID: aa0be83e-74d6-11ef-b190-9f03b6013893
Powered by PerimeterX , Inc.

- Boat Repair
- Fiberglassing Tools and Supplies
- Woodworking
- Random Posts
- Shop Our Amazon Store For Fiberglass Materials And Supplies!
- Check Out Our Fiberglass Guides Here!
Structural Fiberglass Repair Part 1
- 0 Shares Share 0
This is part 1 of a 3 video series outlining how to repair structural damage to your fiberglass boat. Make sure to watch all 3 in order! Otherwise you will be totally lost 🙂 These video’s are leading into the gelcoat series which is coming!
Please ‘Like’ or ‘Share’ above and join the discussion below in our comments section!! Also, please remember that there are extended ad-free versions of these video’s available for Patreon supporters! Please click below to find out more.
Materials, Tools, & Suppliers
- 1.5oz CSM Fiberglass
- 1708 Bi-Axial Fiberglass
- Polyester Resin
Join the discussion 12 Comments

Your the best.

On the grinder, what kind of grinder wheel do you use? Thanks for the videos and keep ’em coming. I need to learn more!!!

It’s a 36 grit ‘flap disk’.. I’d have to look up the invoice for the brand, but I’m thinking that a quick google search should pull something up for ya ;-)… If not, let me know. Only thing I can think of to note would be to make sure that the arbor size of the wheel fits your grinder..

Hello I have a 18 foot fiberglass boat (hydrostream v-king) that has six holes in a 1.5 foot square area, the holes are the same size as the one in the video. my problem is if i repair the holes the way you show in the video most of the repairs will be over lapping each other is this ok or should I remove the section of the bottom and replace it ?
You should be fine to overlap the repairs. Since it’s such a small area I would probably do the final couple glass layers over the entire area, then fair the repair for gelcoat..

I can’t do a two-sided repair as you suggest. I’m repairing a sailing dinghy, and the inside is inaccessible – a very narrow space between the hull and cockpit.
I was all set to buy the laminating resin when I realized I won’t be able to coat the inside with the mold release. In this situation, it seems I must use the pre-waxed resin. Is that correct, or is there an alternative?
Hey Greg, I think I understand your situation but if you could please email (or post on Facebook) a couple pics of the repair area I’ll be able to give better advice 🙂 Thanks!

Aloha Andy I have to say I have been in the composit industry for 20+ years and your videos are awesome. I know for me the understanding is super clear, but the way you go about explaining things is great for someone to tackle there own repairs and fiberglass project. Thank you for sharing your knowledge it is rare in our industry for people to be open and informative. Great job aloha Mike Storm maui, Hawaii

In repairs where there is no access to the interior surface of the hull would a repair completely from the outside not work fine… where you copy the thickness of the hull over say an circle area of say 8 inches in diameter with a taper around the hole so that succeeding larger pieces of biax and mat are used to match the thickness of the hull ?
I ask this as it seems to be published in West’s fiberglass pamphlet and other places using epoxy. I’m wondering if using only polyester to repair would require a stronger engineering approach…
Also, I wonder if you only applied a “form” piece of plastic glued to the inside surface of the hull covering the hole as a stop gap for your repair… then ground out the entire area the thickness of the hull in a gradual bevel and did the entire repair from the outside … would this not be just as strong as your illustrated method considering the pressures from use would be from the outside inward? … with water etc.
I really enjoy your website and youtube videos… thanks for such a good source for information. I’m wondering what bedding compound you use to re-bed older aluminum or stainless ports …. life caulk (polysulphide) over silicone I’m presuming…. comments welcomed.

Hey Andy – Your vidoes have encouraged me to get into fiberglass and gelcoat repair on my old sail boat that I wouldn’t have tried otherwise. I have also been sharing them with members of our yacht club and on sailing blogs. Really appreciate your great work!
Thank you very much Mark! I really appreciate it 😉
Leave a Reply Cancel Reply
Recent videos.

Recent Blog Posts
- There’s been a lot of changes with Boatworks Today over the past year!! November 28, 2022
- Getting your boat ready for Fall? Get a 5% discount on Totalboat products! September 21, 2019
- A New Fiberglass Guide And New Website! October 2, 2017
- Applying Gelcoat, Spray or Brush? November 18, 2013
- What’s been going on?? April 16, 2013
Legal Disclaimer
Because Boatworks Today, its owners or partners cannot control how the information provided through these videos is applied, we will not be held liable for any damages; incidental or consequential.
© 2024 Boatworks Today. | Developed by Fortiris Group LLC
I AM NOW AN ONLINE RETAILER FOR ALEXSEAL OFFERING SALES AND SUPPORT! HTTP://WWW.MILLERBOATWORKS.COM Dismiss
Step-by-Step Guide to Repairing Your Fiberglass Boat: From Small Holes to Structural Issues

Fiberglass boats are a popular choice for recreational boaters due to their durability and longevity, but even the toughest boats can experience damage from time to time. Whether you have a small hole from a stray rock, a drilled hole from installing hardware, or a larger structural issue, repairing a fiberglass boat can seem daunting. But with the right tools, materials, and a step-by-step approach, anyone can make a successful repair.
In this comprehensive guide, we will walk you through the process of repairing your fiberglass boat, from cleaning and sanding the surface, to applying fiberglass filler, gelcoat, and more. Whether you’re repairing a small hole or a large structural issue, we’ll provide you with the knowledge and techniques you need to make a professional-looking repair that will help extend the life of your boat. So, let’s get started!
Fiberglass boats are a popular choice among boaters due to their durability and lightweight nature. However, with time, use and exposure to the elements, your fiberglass boat may start to show signs of wear and tear, such as cracks, holes, and dings. In this blog post, we’ll take a look at the steps involved in repairing the bottom of a fiberglass boat, repairing a drilled hole, repairing a screw hole, and repairing large and small holes in the fiberglass boat hull.
Table of Contents
Repairing the Bottom of a Fiberglass Boat
- Clean the area: Start by thoroughly cleaning the damaged area with soap and water to remove any dirt, grease, or oil. Use a solvent-based cleaner if necessary to remove any stubborn stains.
- Sand the area : Use sandpaper to rough up the surface around the damaged area. This will help the repair material adhere better to the surface.
- Fill the area : Use a two-part epoxy resin to fill the damaged area. Mix the two parts according to the manufacturer’s instructions and apply a thin layer to the bottom of the boat using a putty knife.
- Smooth the surface: Use a plastic spreader to smooth out the surface of the epoxy resin. Make sure the surface is level and flush with the surrounding area.
- Sand the surface : Once the epoxy resin has cured, sand the surface to make it smooth and level with the surrounding area.
- Apply gelcoat : If the gelcoat on your boat is damaged, apply a fresh layer to protect the repair and give the boat a smooth finish.
Repairing a Drilled Hole in a Fiberglass Boat
- Fill the hole: Use a two-part epoxy resin to fill the drilled hole. Mix the two parts according to the manufacturer’s instructions and apply a thin layer to the hole using a putty knife.
- Smooth the surface : Use a plastic spreader to smooth out the surface of the epoxy resin. Make sure the surface is level and flush with the surrounding area.
Repairing a Screw Hole in the Boat Hull
- Clean the area : Start by thoroughly cleaning the damaged area with soap and water to remove any dirt, grease, or oil. Use a solvent-based cleaner if necessary to remove any stubborn stains.
- Fill the hole: Use a two-part epoxy resin to fill the screw hole. Mix the two parts according to the manufacturer’s instructions and apply a thin layer to the hole using a putty knife.
- Sand the surface: Once the epoxy resin has cured, sand the surface to make it smooth and level with the surrounding area.
Structural Fiberglass Repair
- Apply fiberglass mesh : Cut a piece of fiberglass mesh to fit over the damaged area and lay it over the surface. Use a two-part epoxy resin to cover the mesh and fill any gaps.
Repairing Fiberglass Boat Hull from the Outside
- Apply fiberglass cloth : Cut a piece of fiberglass cloth to fit over the damaged area and lay it over the surface. Use a two-part epoxy resin to cover the cloth and fill any gaps.
Repairing Large Holes in Fiberglass
Repairing small holes in the fiberglass boat hull.
- Apply fiberglass filler : Mix a small amount of fiberglass filler and apply it to the damaged area using a plastic spreader. Make sure the filler is level and flush with the surrounding surface.
- Sand the surface : Once the fiberglass filler has cured, sand the surface to make it smooth and level with the surrounding area.
In conclusion, repairing a fiberglass boat can seem intimidating, but with the right knowledge and approach, it can be a simple and rewarding process. Whether you have a small hole, a drilled hole, or a larger structural issue, by following the steps outlined in this guide, you can make a successful repair that will help extend the life of your boat and keep it looking great.
It’s important to remember that a proper repair starts with proper preparation, so take the time to clean and sand the surface, and use high-quality materials to make sure your repair is strong and durable. With a little patience and attention to detail, you’ll be able to make a repair that will make your boat look and perform like new. So, grab your tools and get started on your next fiberglass boat repair project!
Emily Smith
Emily Smith is a passionate sailor and travel enthusiast, who has spent the last 8 years exploring the world by boat. From the tranquil waters of the Great Lakes to the roughest oceans, Emily has sailed it all and decided to share the knowledge on Sailingbetter.com blog. With a keen eye for detail and a talent for storytelling, Emily offers readers an insight into the thrilling world of sailing and the beautiful destinations it can take you to. When she's not out on the water, Emily calls Chicago, Illinois home and enjoys sharing her love for sailing with others. Join her on her journey as she continues to discover new horizons and inspire others to live life to the fullest.
Recent Posts
Lagoon vs Leopard Catamaran: Which Sailboat Is Right for You?
Introduction When it comes to cruising on the open waters, catamarans have gained immense popularity for their stability, space, and comfort. Two of the leading catamaran manufacturers, Lagoon and...
How to Determine Sailboat Weight: A Comprehensive Guide
Introduction Sailing is a thrilling and adventurous activity that has captivated humans for centuries. Whether you are a seasoned sailor or a novice looking to set sail for the first time,...
- (678) 322-7877
- 9605 Jot Em Down Rd. Gainesville, GA 30506.
How to Repair Boat Fiberglass
Did you know you can repair holes in the hull or deck of your fiberglass boat? To make these strong and to near cosmetic perfection, visit a shop that specializes in boat fiberglass and gelcoat repair. A DIY enthusiast can also achieve good results with fiberglass and gelcoat repair. Learn the techniques and materials that are used to get the best results.

A hole in the side of this Boat was permanently repaired to cosmetic perfection by choosing the right fiberglass materials and applying the proper repair techniques.
What is Fiberglass and What Gives Fiberglass Strength?
Fiberglass is from two components: resin and fiber. It is called fiberglass because the structural fiber used is actually woven with tiny flexible strands of glass. The fiber is then saturated with resin, stretched into place, and when it cures through a chemical reaction, the result is a hard and durable material. The strength of the fiberglass largely depends on the weight of the structural fabric that is used. There are different weave patterns to the fabric that render it useful for different applications. The resin component is either polyester resin or epoxy resin. Epoxy resin is stronger. If the repair area is large and is in a high-stress part of a boat below the waterline, epoxy resin is the superior choice. This is because it has excellent bonding properties to an existing surface and is strong. Polyester resin is commonly used. However, one drawback is that it shrinks as it cures and thereby diminishes its adhesive qualities. This shrinkage is insignificant in small repairs, even in high-stress areas. But because of the shrinkage and reduced adhesion, there are limitations to using polyester resin for large repairs in high-stress areas. However, outside of large structural repairs, polyester resin is the material of choice and is used in the bulk of fiberglass repairs.

For small fiberglass repairs, polyester resin is used in combination with mat or chopped cloth mixed in resin to make a sturdy repair.
Fiber Choices For Fiberglass Repair
The most common type of fabric is plain weave cloth. It is easily recognized as it is woven at 90 degrees, and it looks like cloth. It comes in different weights, and a thicker cloth is stronger. One limitation of plain weave cloth is that it doesn’t conform to complex shapes or curves. It’s best applied on an even plane. For complex shapes and compound curves that require strength, the best fabric is modified twill. Its weave appears to be diagonal, but in reality, it is also woven at 90 degrees and is a looser weave with flexibility. It can conform to complex shapes without wrinkling. The most flexible fabric is called a mat. It has hair-like strands going in every direction. Mat is bonded with glue that dissolves in polyester resin, enabling it to conform easily to complex shapes or compound curves. However, it has less strength and is often used in cosmetic applications unless built up in many layers. Lastly is a fabric called roving. This is a fabric that has course bundles of strands in its weave. It is a very heavy fabric for the strongest of applications. It will be used in combination with layers of mat to give a smooth final surface.

Structural fiberglass cloth and cosmetic mat are used in combination with resin to make a strong fiberglass repair.
Repairing a Hole With Fiberglass
When repairing a hole with fiberglass, repairs are best made by access from both the inside and the outside of the repair. However, access from the interior may not always be possible because a floor or interior wall may block access. If it’s a serious structural repair in a high-stress area, you’ll have little choice but to cut a hole through the floor or wall to access the inside of the repair. However, doing a repair from the outside only is possible for small repairs or repairs in low-stress areas. The first thing to do is assess the damage carefully by cleaning the exterior with acetone. This will make hairline cracks evident, and you’ll want to grind all the way back until the crack terminates. First, using a 4-inch grinder with 80-grit sandpaper, grind or cut away any broken material in the perimeter of the hole that lacks structural integrity. Then with the grinder, taper the edges of the hole using a 12:1 rule. That is, taper back the edge of the hole at an angle that is 12 times the overall thickness of the fiberglass material.
Checkout marine product sales online for all your boat repair equipment.

To repair a hole, use a 4-inch grinder and coarse sandpaper to grind away any broken material that lacks integrity. Then taper back the edges of the hole.
If it’s a repair from both the inside and outside, the taper will be centered on the thickness of the fiberglass and taper back on both inside and outside, resembling the cutting edge of an ax. If the repair is done from the exterior only, then the taper will start at the bottom of the thickness of fiberglass and taper toward the outside, resembling the cutting edge of a carpenter’s chisel. Next, after the taper from the edge of the hole outward is complete, grind back toward the perimeter to where the hairline cracks ended. Now the entire repair area has been defined. Repeat the same on the inside of the repair if you’re doing a two-sided repair. Clean all surfaces with acetone to be free of dust so the resin will adhere.
For a two-sided repair, next, you’ll cut a piece of fabric that extends to the outer margin of the repair. Mix up resin and hardener, and on a scrap piece of cardboard, lay your piece of fabric, and use a brush to saturate the cloth with resin. Turn the fabric over and coat the other side. Next, take the brush and apply resin to the interior repair area. Then carefully stretch the resin-soaked fabric over the hole, so it’s on a smooth plane and wrinkle-free. Use the brush to press out any air pockets, so the patch sits flat against the existing interior surface. Once the interior fiberglass patch has been set up and is somewhat hard, have already cut a piece of cloth or several layered pieces of cloth that will fill the thickness of fiberglass to near the surface plane of the exterior. The outermost layers will be a resin-soaked mat, so it will be smooth and not show the texture of the cloth.
Let the patch dry. Once it is dry, grind down the high spots with 80-grit sandpaper until it is on the plane with the finished surface. At this point, clean off the sanded area, and assess the low spots. If there are still high spots, continue to grind them down. Next, you’ll use a resin that’s mixed with chopped strands of fiberglass. This is a cosmetic layer, as the structural layers are already in place. This will fill the low spots and bring the repair up to plane with the exterior surface. Once the chopped strand layer is set up and hard, grind down the high spots until in plane with the finished surface. The next step is to mix up what is referred to as “peanut butter .”This is resin and thickener and is the consistency of smooth peanut butter. Using a plastic applicator, apply the peanut butter resin mixture to give the final surface all the way to the perimeter of the repair. If it is a curved surface, use a metal, plastic, or plywood flex board to smooth the final contour. Once this layer is dry, grind it down so you’re perfectly on the plane with the exterior surface. Now there should only be some minor pits and pinholes to fill. Use a skim coat resin and hardener and apply using a plastic applicator. Once dry, sand to perfection using fine sandpaper.
Spray the Gelcoat
The Gelcoat is the shiny hard finish surface on the boat exterior. Once the color is matched, spray on the finish coats of gelcoat. Once the topcoat dries, use 600-grit wet sandpaper and higher to seamlessly blend the new gelcoat with the original finish. Lastly, use wax to give the final buff to make the repair invisible.

Gelcoat is the shiny cosmetic finish to Fiberglass repair. It is sprayed on and built up in multiple applications to create a glossy topcoat.
Repairing a Minor Chip or Gouge in the Gelcoat
In this case, the structural fiberglass has no damage, and it’s just the finish layer of gelcoat that needs repair. Grind the repair with a Dremel tool to expose clean fiberglass and bevel back the repair edge. Mix up the correct color of gelcoat with hardener, and take a small brush and create a slightly raised puddle of gelcoat that entirely fills the void and extends just past the margins of the repair area. Let the puddle dry hard, then using 600-grit wet sandpaper, sand until flush with the finished surface. On a flat surface, use a sanding block to create a perfect plane. End with a coat of wax to make the repair blend in perfectly.
Repairing fiberglass is a multi-step process. However, even the most unsightly damage from hitting a rock, bumping into a dock, or even a collision can be repaired to look just like new. Lakeside Marine offers professional boat fiberglass repair from minor dings to major structural repairs. We also handle fiberglass repairs for boat insurance claims, making the repair and insurance reimbursement process seamless. We even do boat modifications and restorations.

Lakeside Marine does fiberglass repairs for boat accident insurance claims, classic boat restorations, and custom high-performance boat modifications.
For professional results for your boat fiberglass repairs, call email [email protected] or go to our webpage and learn about our [fiberglass repair services], and read customer testimonials about how Lakeside Marine performed outstanding fiberglass repair while providing exemplary customer service.
Book a Boat Fiberglass and Gelcoat Repair
NEVER MISS A POST
Sign up for free and be the first to get notified about updates

Pre Winterization Maintenance Tips
Oct 27, 2022
Your boat served you well over the past boating season. However, with normal wear and tear, your boat requires attention. Maintain your boat as service needs arise, and keep its value and performance at its peak. Reasons to perform boat maintenance in the fall and...

Boat Fire Prevention and What to do in case of Fire
Aug 2, 2022
Boat fires are serious, and here’s how to maximize your safety. We discuss the common causes of boat fires, how to prevent them, and what action to take if a boat fire breaks out. What are the common causes of Boat Fires? Electrical fires Explosive gas or propane...

Spring Boat Checklist and Guide For Boat Maintenance, Repairs, and Upgrades
Nov 26, 2021
Every boat owner is excited for the spring launch. Visual inspections and on-time scheduled boat maintenance ensure a trouble-free season opener. Follow this boat-prep spring boat checklist and know that you’re prepared and ready to throw some spray on that first...
Submit a Comment Cancel reply
Your email address will not be published. Required fields are marked *
Save my name, email, and website in this browser for the next time I comment.
Submit Comment
Fiberglass Boat Repair Techniques: Quick and Effective Fixes
Understanding Fiberglass Boat Repair
With 20 years of boating experience , I’ve learned that maintaining the integrity of a fiberglass boat is essential. The repair process involves several crucial steps which require attention to detail and a systematic approach.
Firstly, assessing the damage is critical. Fiberglass boats can suffer from a range of issues, from minor scratches to major holes. As someone who’s handled many such repairs, identifying the extent of the damage dictates the repair strategy.
Here are the basic steps I follow:
- Inspect the affected area carefully to understand the depth and extent of the damage.
- Prepare the repair site by cleaning the area and removing any damaged or loose material.
- Sand the damaged area to create a rough surface for better adhesion of repair materials.
Next, selecting the materials is just as important as the repair technique itself. Epoxy resin is my go-to due to its strong adhesion and long-lasting repair qualities. Here’s a guide on basics of selecting repair materials .
Applying the repair materials involves layering fiberglass cloth and resin. The fiberglass cloth provides strength, while the resin, when cured, restores the integrity of the hull.
Remember, practice makes perfect. Working with fiberglass can be daunting, but with patience and care , a meticulously completed repair is indistinguishable from the original structure. Each repair I’ve completed over the years has reinforced my precision and skill, ensuring lasting results that keep my vessel seaworthy.
Materials and Tools Required
In my 20 years of boating experience, I’ve found that having the correct materials and tools is crucial for a successful and durable fiberglass boat repair. Knowing what to use will save you time and ensure the integrity of your boat’s structure.
Essential Materials
- Fiberglass Cloth: A foundational element for any repair, providing strength and stability to the damaged area. The quality of the cloth directly affects the repair’s resilience.
- Resin (Epoxy or Vinyl Ester): Acts as a binder for the fiberglass cloth. Epoxy resin is preferable for its strong bond and water resistance.
- Gelcoat: For aesthetic touches and to protect the repair from UV rays and water intrusion, gelcoat is applied as the outermost layer.
Recommended Tools
- Sandpaper (Various Grits): Starting with coarser grits for shaping and finer grits for finishing provides a smooth surface for repair.
- Acetone: Essential for cleaning the repair area and ensuring that contaminants do not compromise the bond.
- Brushes and Rollers: For applying resin evenly. Brushes are used for detail work and rollers for larger areas.
- Mixing Sticks and Cups: Necessary for preparing and mixing the resin before application. Accurate measurements are key to achieving the desired cure and bond strength.
Assessing the Damage
In my 20 years of boating experience, I’ve come to understand that thoroughly evaluating the type and extent of damage is critical before undertaking any repair work on a fiberglass boat.
Types of Damage
Structural Damage: This occurs to the supporting framework and influences the boat’s overall integrity. A cracked hull, for instance, compromises the vessel’s safety and needs immediate attention.
Cosmetic Damage: These are surface-level issues, such as gelcoat cracks and scratches, that do not affect the boat’s seaworthiness, but restoring the appearance is important for maintaining value.
Damage Assessment Process
Visual Inspection:
- Examine the hull and deck for any obvious signs of impact or wear.
- Look for hairline cracks, which could indicate more severe damage beneath the surface.
Tap Testing:
- Gently tap the fiberglass with a plastic hammer.
- An area that sounds hollow or different could be suffering from delamination or water intrusion.
Moisture Readings:
- Use a moisture meter to detect any water retention within the fiberglass.
- Higher readings signify potential problems with the laminate that could lead to further deterioration.
Assessing the damage with precision sets the stage for an effective and necessary repair. While smaller repairs may be DIY-friendly, significant structural damage often requires professional intervention.
Preparing for Repair
With 20 years of boating experience, I’ve learned that successful fiberglass boat repair starts with meticulous preparation. Whether you’re patching a small chip or mending a larger gash, setting the stage correctly is crucial for a long-lasting fix.
Surface Preparation
Before any resin or gelcoat is applied, the area must be clean and properly prepped. First , the damaged spot should be sanded down to remove any jagged edges and create a receptive surface for bonding. Then , washing the area with a dewaxing solvent is essential to eliminate any wax or mold release, which could compromise the repair. I’ve found that skipping this step can result in weak adhesion of the new material. Visit Repairing Fiberglass On Boats for a comprehensive guide on working with fiberglass.
Safety Measures
Fiberglass repair requires handling hazardous materials, so safety cannot be taken lightly. Always wear:
- Gloves : to protect your hands from sharp fiberglass strands and chemicals.
- Respirator mask : to avoid inhaling hazardous dust and fumes.
- Safety goggles : to shield your eyes from debris.
Moreover, maintaining a well-ventilated workspace is non-negotiable to dissipate fumes from resins and solvents. This minimizes the risk of respiratory issues and ensures a safer working environment.
Fiberglass Repair Techniques
With 20 years of hands-on boating experience, I’ve developed a deep understanding of fiberglass repair techniques that are essential for sustaining the integrity and appearance of your vessel. The key to successful repair lies in identifying the scale of the damage and employing the correct method.
Minor Repairs
Minor damages to a fiberglass boat, such as small scratches or chips, can often be repaired with simple DIY solutions.
- Materials Needed : For such repairs, you’ll need resin, hardener, fiberglass cloth, sandpaper, and a suitable gelcoat.
- Process : Begin by cleaning the area thoroughly and sanding down any rough edges. Cut the fiberglass cloth to size, mix the resin with hardener, and apply it to the affected area. Once the resin cures, sand it down to a smooth finish and apply the gelcoat for aesthetic appeal.
To illustrate, fixing a hairline crack would typically involve cleaning the area, applying a mixed resin, and laying down a piece of fiberglass cloth. After the resin has cured, I’d sand the area flush and then apply a gelcoat to match the boat’s original finish.
Major Repairs
For more significant damage, such as holes or structural weaknesses, the repair process is more complex and may require professional intervention. However, I’ve tackled such challenges myself when possible.
- Materials Needed : A list of materials includes thicker fiberglass matting or cloth, epoxy resin, a release agent, and reinforcing materials.
- Process : The area in need of repair must be ground away to remove any damaged material and to create a beveled edge where new material can be applied. Next, layers of fiberglass and resin are built up until they fill the area. It’s critical to ensure no air pockets are trapped, as this could compromise the repair’s integrity.
For example, repairing a hole in the hull involves placing a backing material behind the hole, then layering fiberglass and resin until the repair is level with the hull surface, finishing with sanding and gelcoat application. Each layer must cure properly before the next is applied, ensuring a bond as strong as the original hull.
By applying these techniques, I’ve been able to extend the lifespan of boats and maintain their value and performance.
Finishing the Repair
In my 20 years of boating experience, I’ve learned that achieving a flawless finish on a fiberglass repair is crucial for both aesthetics and the boat’s integrity. Accurate sanding, followed by meticulous buffing and polishing, are the final steps to ensure a repair blends seamlessly with the boat’s original surface.
First Pass: Coarse Grit. I start with a coarse-grit sandpaper to remove the excess cured fiberglass, working my way towards the repair margins. Care is taken not to gouge the surrounding area, which could require additional repairs.
Second Pass: Medium Grit. Once the high points are leveled, I switch to a medium-grit sandpaper. Gradual transitions are essential to avoid noticeable edges or low spots in the final product.
Final Pass: Fine Grit. To prepare for finishing, I use fine-grit sandpaper. This smoothens the surface further, removing any scratches left by coarser grains and creating a surface ready for polish.
Buffing and Polishing
Buffing Stage. After sanding, I buff the area with a rubbing compound to remove any fine scratches. This process requires a gentle touch and a steady circular motion to achieve a uniform shine without creating swirl marks.
Polishing Stage. The final step is applying a high-quality marine polish. This not only enhances the shine but also adds a protective layer against UV rays and saltwater. For the best results, I apply polish in thin layers, allowing each to dry before buffing it to a high gloss.
Gelcoat Application
In my 20 years of experience with fiberglass boats, I’ve learned that the key to a superior gelcoat finish lies in meticulous mixing and precise application methods. Ensuring the mix is correct and the application is smooth will greatly affect the longevity and appearance of the boat’s surface.
Gelcoat Mixing
Before applying gelcoat, it’s crucial to prepare the mix accurately. I always start with a clean mixing container to avoid contamination. Then, I add the gelcoat base, followed by a catalyst—typically methyl ethyl ketone peroxide (MEKP)—at a precise ratio, which is often around 2% of the volume of the gelcoat. Mix thoroughly for at least 2 minutes, ensuring a uniform color and consistency with no streaks.
Gelcoat Application Methods
When applying gelcoat, I use two main methods: brushing and spraying. Each has specific advantages, so I choose based on the repair’s nature and size.
- Ideal for small repairs or areas that are not easily accessible.
- Use a high-quality brush for an even coat and to avoid brush marks.
- Preferred for larger areas to achieve a more consistent finish.
- Requires a gelcoat spray gun and personal protective equipment to prevent inhalation of fumes.
Regardless of the method, it’s important to maintain a wet edge to avoid visible lines in the finish and apply multiple thin layers rather than one thick one to reduce the likelihood of sagging or running. After application, curing times can vary, but I usually wait a minimum of 24 hours before sanding or polishing.
Curing and Post-Cure Procedures
With two decades of handling boats, I’ve learned that meticulous attention during the curing and post-cure phases is critical for dependable fiberglass repair.
Curing Process
The curing process is when the resin hardens and bonds with the existing fiberglass. I ensure that the temperature is between 70-80 degrees Fahrenheit, as too cold or too hot can affect the cure. When I apply resin, I layer it with a catalyst, make sure the area is well-ventilated, and keep it free from dust. I use plastic film or PVA as a seal over the last resin layer to ensure a thorough cure without any tackiness.
Post-Cure Inspection
Once the resin has fully cured, my next step is a thorough inspection. I feel for imperfections such as bumps or air pockets. Any found imperfections are then addressed with gelcoat paste and allowed to cure fully. After it has cured, the patch should be sanded smoothly and polished to match the surrounding area, restoring the boat to its original condition.
Maintenance Tips

With my 20 years of boating experience, I’ve learned that regular upkeep and a proactive approach to maintenance can save you from costly repairs in the long run. Let’s dive into what I consider essential practices.
Routine Maintenance
Inspect and Clean: Every time I return from the water, I make it a practice to inspect my boat thoroughly for any signs of damage or wear, especially on the hull. I pay close attention to scratches or cracks that can worsen over time. After inspection, a thorough cleaning with soap and water helps identify any new issues that may have been obscured by dirt or debris.
- Simple Repairs: For minor scrapes that haven’t penetrated the gelcoat, I apply a marine polish to protect the area. It’s a simple but effective method to maintain the integrity of the fiberglass. However, if the damage is deeper, I make sure to apply a patch at the earliest opportunity to prevent water infiltration.
Preventive Measures
Regular Waxing: I ensure that twice a year, my boat receives a good layer of quality marine wax. This acts as a barrier against UV rays, salt, and pollutants that may harm the fiberglass. It’s an effective way to extend the boat’s aesthetic appeal and structural integrity.
- Storage and Cover: When not in use, I store my boat in a dry and shaded area. A sturdy cover is essential to protect it from the elements. I’ve learned that proactive covering minimizes the exposure to sun, moisture, and temperature fluctuations that can lead to fiberglass degradation.
Remember, a well-maintained boat ensures not just longevity but also safety and reliability. It pays to adopt a meticulous care routine.
Frequently Asked Questions
Drawing from my 20 years of boating experience, I’ve compiled a list of frequently asked questions relevant to fellow boaters looking to repair their fiberglass vessels. These inquiries cover the essentials of materials, procedures, and costs involved in keeping your boat seaworthy.
What type of epoxy is best for repairing boat hulls?
In my experience, marine-grade epoxy is the most reliable for repairing boat hulls due to its strong adhesion, resilience to water, and ability to bond with fiberglass. It’s crucial to select an epoxy that cures hard and can be sanded and painted over for a uniform finish.
What steps are involved in repairing large gelcoat damage on a boat?
Repairing large gelcoat damage typically involves cleaning the damaged area, removing any loose material, applying a gelcoat matching your boat’s current color, and then sanding it smooth. The repair area should be thoroughly dewaxed before applying new gelcoat. After curing, I always recommend polishing to restore shine and protect the repair.
How can you fix a serious gouge in a fiberglass boat’s surface?
To fix a serious gouge, I first clean the area with a dewaxing solvent, then fill the gouge with a fiberglass filler or resin. It’s important to apply the filler in layers and sand smoothly between applications. Once filled, the area should be finished with gelcoat, epoxy, or paint as necessary.
Is it possible to repair structural damage to a fiberglass boat by oneself, and what materials are needed?
Yes, it’s possible to manage structural repairs, but it requires careful planning and quality materials, including fiberglass mat, resin, and hardener. For internal structural damage, it may be necessary to use a thicker fiberglass mat for added strength when layering over the damaged area.
What is the average cost to repair a hole in a fiberglass boat?
The cost to repair a hole in a fiberglass boat can vary significantly based on the size and location of the damage, with DIY repairs typically ranging from $75 to $300 for materials. Professional repairs can escalate well into the thousands depending on the extent of the damage.
What are the most effective methods for fixing a leak in a fiberglass boat hull?
For fixing a leak in a hull, it’s effective to identify the source, dry the area, and then apply a marine-grade epoxy or fiberglass patch kit. The patched area must be adequately sealed to prevent future water ingress. In leaks where the damage is extensive or structural, professional assessment and repair are recommended for safety.

Leave a Comment Cancel reply
Save my name, email, and website in this browser for the next time I comment.
Keep in mind that we may receive commissions when you click our links and make purchases. However, this does not impact our reviews and comparisons. We try our best to keep things fair and balanced, in order to help you make the best choice for you.
As an Amazon Associate, I earn from qualifying purchases.
Vanquish Boats
500 Lewis Drive Carolina Beach, NC
+1 910-707-3599
© Vanquish Boats
- CREATE AN ACCOUNT
- Boat Cover Finder
- Bimini Top Finder
- Boat Propeller Finder
- Engine Parts Finder
- Anchor & Dock
- Watersports
- Clothing and Footwear
- Engine Parts
- Cabin and Galley
- Covers and Biminis
- Electronics
- Paint and Maintenance
- Pumps and Plumbing
- Anchor Chains & Ropes
- Boat Fenders
- Boat Mooring
- Boat Protection
- Dock Storage & Protection
- Ladders, Steps, & Platforms
- Top Sellers

- Fishing Rods
- Fishing Reels
- Fishing Rod & Reel Combos
- Fishing Tools & Tackle Boxes
- Fishing Line
- Fly Fishing
- Fishing Bait & Fishing Lures
- Fishing Rod Holders & Storage Racks
- Fish Finders, Sounders & Sonar
- Trolling Motors
- Fishing Nets
- Fishing Downriggers & Acessories
- Fishing Outriggers & Acessories
- Fishing Kayaks
- Fish Cleaning Tables

- Inflatable Rafts
- Paddle Boarding
- Paddles & Oars
- Wakeboard, Wakesurf & Ski
- Wakeboard Towers
- Tow Ropes & Handles
- Life Jackets & PFDs
- Snow Sports
- Roof Racks, Carriers, Dollies

Men's Clothing
- Accessories
Men's Footwear
- Atheltic Shoes
- Water Shoes
Women's Clothing
- Dresses & Skirts
Women's Footwear
- Fuel Systems
- Sacrificial Anodes & Zincs
- Generator Parts
- Inflatable Boats
- Propeller Parts & Accessories
- Boat Manuals
- PWC Parts & Accessories

- Fishing Boat Seats
- Offshore Boat Seats
- Ski Boat Seats
- Pontoon Boat Seats & Furniture
- Boat Seat Pedestals & Hardware
- Boat Seats by Manufacturer
- Boat Tables & Hardware
- Boat Seat Covers
- Boat Seat Vinyl
- Floating Boat Cushions

- Barbeque Grills
- Boat Drink Holders
- Cabin Accessories & Hardware
- Boat Ventilation
- Interior & Cabin Lighting
- Marine Teak Products
- Carbon Monoxide & Smoke Detectors
- Binoculars & Telescopes

Boat Bimini Tops
- Bimini Top Accessories
- Pontoon Bimini Tops
- Other Biminis
- RV & Trailer Covers
- Boat Shrink Wrap & Accessories
- Boat Shelters
Boat Covers
- Boat Cover Accessories
- Boat Lift Canopy Covers
- Other Covers
- Boat Wiring & Cable
- Marine Batteries & Accessories
- Marine DC Power Plugs & Sockets
- Marine Electrical Meters
- Boat Lights
- Marine Electrical Panels & Circuit Breakers
- Power Packs & Jump Starters
- Marine Solar Power Accessories
- Marine Electrical Terminals
- Marine Fuse Blocks & Terminal Blocks
- Marine Switches
- Shore Power & AC Distribution

- Marine Audio & Video
- GPS Chartplotters & Accessories
- Electronic Navigation Charts & Software
- Digital Instruments
- Display Mounts
- VHF Radios & Communication
- Marine Radar
- Auto Pilot Systems
- Action Cameras

- Fiberglass & Epoxy Boat Repair
- Boat Paint & Varnish
- Marine Adhesives, Sealant, & Caulking
- Marine Engine Maintenance
- Boat Cleaners & Waxes
- Boat Cleaning Supplies

- Fresh Water Boat Systems
- Bilge Pumps
- Marine Plumbing Parts
- Wash Down Pumps
- Livewell Aerator Pumps & Live Bait Wells
- Toilet & Waste Pumps
- Marine Pump Replacement Parts

- Tires, Rims, & Hub Kits
- Boat Trailer Winches
- Boat Motor Supports & Transom Savers
- Boat Trailer Guides & Rollers
- Boat Trailer Fenders
- Boat Trailer Lights
- Boat Trailer Hardware
- Boat Trailer Jacks
- Boat Trailer Brakes & Axles
- Boat Trailer Tie Downs
- Couplers, Mounts, Hitches, & Locks

- Boat Deck Harware
- Marine Nuts, Bolts, & Screws
- Boat Handles, Pulls, & Rings
- Prop Nut Kits & Hardware
- Boat Cabin Hardware
- Marine Fasteners
- Boat Windshield Parts
- Boat Tubing & Rails
- Boat Mirrors
- Marine Tools & Tool Kits
- Boat Lettering

- Women's Clothing Deals
- Men's Clothing Deals
- Fishing Deals
- Anchor & Dock Deals
- Electrical Deals
- Electronics Deals
- Paint & Maintenance Deals
- Pumps & Plumbing Deals
- Boat Seats Deals
- Trailering Deals
- Camping & RV Deals
- Dealer Login

- Forums Login

- Search forums
- The iboats forum moderators are excited to announce that at this time it appears the iboats forums posting pictures function is working once again. Though we cannot promise for how long, we're hoping for indefinitely.
- Boat Repair and Restoration
- Boat Restoration, Building, and Hull Repair
How to fix or repair a keel that has exposed or pitted fiberglass
- Thread starter Sailor98277
- Start date Aug 28, 2013
Sailor98277
- Aug 28, 2013
How would I go about fixing a keel that has its gel coat missing from being grounded on a beach? Would you first fill in the divits with small pieces of fiberglass and resin, then rough sand and put on gel coat or would you just fill in the divits with gel coat? I will take pics tomorrow and post them here to give you a better idea of what I am refering to. Thanks all for your help. Vr, Michael

- Aug 29, 2013
Re: How to fix or repair a keel that has exposed or pitted fiberglass Quite honestly, if it is still watertight and you intend to continue to beach, I would "repair" by installing a keelshield or keelguard strip. I abused the heck out of a previous boat for one season by beaching it multiple times. by the end of the season the gelcoat had worn completely down to where you could see the cloth. I just sanded everything smooth and installed the keelguard over the worn gelcoat. When I installed the keelguard I sealed it all around the edge with 5200, and for two more seasons of boating/beaching I never had an issue. Keelguard looked practically brand new when I sold the boat at the end of last season. When I purchased my new boat, the first thing I did was install a keelguard. Good luck Eric

Woodonglass
Supreme mariner.
Re: How to fix or repair a keel that has exposed or pitted fiberglass Yup ^^^ sound advice. If no more beaching will occur then mix up some thickened resin using resin, cabosil, and some copped up CSM to fill the divots then sand and shape. Use some 3M premium filler for final fairing, then us a Preval Sprayer to spray on 3-4 coats of Gelcoat. Sand and Polish. DONE
Re: How to fix or repair a keel that has exposed or pitted fiberglass Thank you eavega for the information. I had asked this very question to some guys over at West Marine about using a keel guard to fix this and was told that it would not stop the water from leaking through the keel into the bottom of the boat. This was because when water is in contact for an extended period of time, water will seep through the fiberglass and into the inside of the boat. I do not know if that is true or not, hence my reason for asking you experts here. Thank you again for your help. I will be doing what you recommended. Vr, Michael
Re: How to fix or repair a keel that has exposed or pitted fiberglass Thank you woodonglass for your help as well. I will be sure to do as you said and put the keel guard over the patch. It will take me a bit of time as I still have to figure out a way to get the boat raised up so that I can work on the bottom of it and the trailer out from under it. Thanks again. Vr, Michael
Re: How to fix or repair a keel that has exposed or pitted fiberglass If the keel is damaged bad enuf to expose the glass and water can penetrate then it for sure needs to be repaired prior to the installation of a keel guard.
- Aug 30, 2013

Re: How to fix or repair a keel that has exposed or pitted fiberglass Yup, I'd be grinding that down, filling all major gouges and laying 2-3 layers of 1.5oz CSM over all of it and then 3-4 coats of gelcoat with a Preval Sprayer. If you are going to continue beaching her then by all means a Keel guard is in your future!!! What kind of boat is this?
Re: How to fix or repair a keel that has exposed or pitted fiberglass Thank you Woodonglass, I have never had this boat in the water. My brother-in-law convinced my wife it was a great boat for us to use on Puget Sound to go fishing and crabbing in. The floor was soft so that when you stepped into it you felt like you were gonna fall through, the motor wont start even though it has good compression, and the keel is all torn up from beaching. I won't be beaching the boat when completed, but I will be installing a keel guard to protect it none the less. If I remember right, it is an 18' 1967 Las Vegas Sierra Tri-Hull. I have done so many searches for information on this particular boat it is not funny, but have come up snake eyes. I planned on picking up some CSM tomorrow so that I can use it to put down the initial layer of glass and resin on the floor joints then cover that over with woven mat. I am using West Marine Polyester Boaters Resin that I bought in (2) 1 gallon cans. I believe that should be enough to do the joints in the floor and sides where the floor meets the gunnals. I hope that it will also be enough to do one layer on the floor of just resin but we will see as I also have to buy the pour in foam yet this coming Sept. I would love to have the floor all done before the rains hit here in a few weeks. Vr, Michael
Petty Officer 1st Class
- Aug 31, 2013
Re: How to fix or repair a keel that has exposed or pitted fiberglass Did you pay much for the boat? The reason that I ask is that soft floors are quite often indicative of other structural issues, namely wet or rotted stringers and bulkheads. Once you get the floor up, you are likely find that you've opened up a major can of worms. If that happens then you have to decide whether to do a half assed repair, go all the way on a restoration, or scrap it and try to recoup your money. I'm not trying to sound negative, just being realistic as I stumbled into the same situation and now have 36 days straight on my renovation.

Re: How to fix or repair a keel that has exposed or pitted fiberglass Hello Bakerjw and grub1grub2, I paid $500 for the boat which included a 80 hp merc outboard that would not run, though the guy said it did. My brother-in-law convinced my wife like I had said and there was nothing I could really do about it as she had her head set on getting it. I pulled up the soft floor, took out close to 800 lbs of water logged foam, and found that one cross member was rotted out. The long stringers seemed solid at the back end of the boat but I had no way of taking the cap off the boat so I could pull out all the stringers and start from scratch. I intend to put 2 lb flotation foam back in which will give it some structural support as well as the obvious floatation requirements. I'm not sure if I will keep the boat or not but I will fix it up all the same as is. It is at best just a temp boat that when I have more money, I will buy a decent boat (like this will ever happen). However, it is only for doing some basic salmon fishing in pretty much calm waters, and wont be taken out into the heavy chop. I still need to fix the motor and find a way to lift the boat up so I can fix the keel with the recommendations from above. It's not the boat I wanted to get but the wife would not let me spend more even though this one will cost me about $1000 just to get it back to seaworthy status and that does not include a functioning motor. Oh well, what is a guy to do? I like being on and around the water so I will make do. When I have the floor done or further along with its first coat of glass, I will take a pic of it. Vr, Michael
Re: How to fix or repair a keel that has exposed or pitted fiberglass Thanks Woodonglass, I have checked part of the stringers where the foam was the wettest and the stringers were ok there, however that does not mean the whole of them are fine. As for the transom, it is solid. The motor on it will not be the one staying on it. the control arm that turns the motor left and right comes into contact with the left side of the troff in the top. I will most likely down grade the motor if I keep the boat to about a 50 hp. I have a neighbor who wants to buy the boat for $500 or so to include the trailer. I have been giving that serious thought. I do not have the funds to pull the whole bottom apart and redo as necessary being I am on such a limited income. However others might and this guy would most definately have the cash. Then again, who knows. Thanks for the tips and information as it is greatly appreciated... it is also a very good learning experience. Vr, Michael
Re: How to fix or repair a keel that has exposed or pitted fiberglass Did you actually drill into the stringers and the transom to inspect the shavings or just do an outward visual inspection and some tapping around with a hammer and such??
- Sep 2, 2013
Re: How to fix or repair a keel that has exposed or pitted fiberglass It was a drill as I made a pilot hole when I put the new cross member in toward the rear of the stringers. When I screwed the floor down, the screws again had pilot holes to follow, and the ones at the back were or seemed fine, but the others might have been a bit to easy going in now that I think of it.

Petty Officer 3rd Class
Re: How to fix or repair a keel that has exposed or pitted fiberglass repair with a kevlar reinforced epoxy paste - you can use glass with it , but sounds like you don't need to google wet dry 700 epoxy Paul Oman - MS. MBA A.K.A. “Professor E. Poxy” Internet Epoxy Confederation (IEC) Homepage epoxies since 1994 Member: NACE (National Assoc. of Corrosion Engineers) -- SSPC (Soc. of Protective Coatings)
Sailboat Bottom Cleaning - Complete DIY Guide

Sailboat bottom cleaning is an essential part of regular hull maintenance, but it doesn't have to be a serious hassle.
Sailboat bottom cleaning can be done in or out of the water. The most important tools include marine gloves, various scrapers, and brushes. A coat of high-quality bottom paint can reduce cleaning intervals and marine buildup.
In this article, we'll go over how to clean a sailboat bottom in or out of the water. We'll cover the best methods and give you a rundown of all the tools you'll need to do the job. Additionally, we'll go over the importance of bottom paint and the best methods to reduce the headache of hull maintenance.
We sourced the information used in this article from sailors with bottom cleaning experience. Additionally, we gathered facts about hull cleaning from reliable sailboat maintenance guides.
Table of contents
What Happens to a Sailboat Hull in the Water?
A clean sailboat hull doesn't stay clean for long, but any skipper can tell the difference between a freshly scraped hull and a neglected bottom. As soon as you drop the boat in the water, marine gunk starts to slowly accumulate on all submerged surfaces.
First, bacteria and microorganisms start to accumulate and build up a slime. Anti-growth paints slow this buildup, but it eventually overpowers the paint. At this stage, a simple hosing down could do the trick. But over time, the slime forms a protective layer onto which larger and more sensitive organisms can begin to thrive.
Within a month or two, even the most well-maintained sailboat bottom will start to accumulate your local species of barnacles, mussels, and sharp sea trash. The bottom is now its own micro-ecosystem.
Soon, all of that annoying and injurious sea garbage will begin clogging intakes, exhaust ports, drains, and jamming up rudder components.
How Often Should You Clean a Sailboat Bottom?
Bottom cleaning should be done regularly, regardless of how you use your boat. That said, it's a more urgent task for some sailors who get underway often.
People who cruise regularly or over long distances should clean the bottom once every month or two, whereas the twice-per-year sailor can get away with a biannual cleaning.
The Importance of Sailboat Bottom Paint
Bottom paint is specially formulated to slow or stop the growth of marine life. Traditionally, 'red lead' paint was used to inhibit barnacles and other gunk from taking refuge on the hull. Red lead is just that—red paint with high lead content. Lead is poisonous to marine life, and it's extremely effective at preserving the bottom.
Red lead comes with hazards, and it's difficult to obtain in some areas. Today, its use is limited to wooden boats and historical restorations.
In the 21st century, numerous less toxic paint alternatives exist. They're costly, but modern bottom paints can last for years without significant repairs.
It's essential to keep your hull covered in a strong layer of bottom paint, regardless of the age or condition of the vessel. High-quality bottom paint can drastically reduce hull growth and cleaning intervals, which is why it's a key priority for long-range cruising skippers.
Why is Bottom Cleaning Necessary?
Bottom cleaning is absolutely necessary if you want your boat to work well and last a long time. Marine life grows rapidly on sailboat hulls, and it can add weight to your hull and cause damage.
The biggest issue with marine growth is drag, as it adds a rough texture to an otherwise smooth sailboat hull and slows it down. Additionally, marine life can seize rudders and clog seacocks.
What Happens if You Don't Clean the Hull?
Here's a typical scenario to consider. Let's say that your sailboat has been sitting in a slip at a marina for about a year, and you decide to take it out sailing on the water. You can see an unseemly buildup of marine gunk on the bottom of the hull, but you decide to go sailing anyway.
You start the engine to pilot the boat out of the slip, and before long, your diesel inboard is overheated, and you're left dead in the water and drifting. It's not a good situation and a potentially expensive mistake too.
The reason the engine overheated is that barnacles and sea plants clogged the cooling water intakes on the bottom of the hull. This is why powerboats are pulled out of the water after use and why frequent bottom cleaning is necessary.
Can You Clean a Sailboat Bottom in the Water?
Absolutely, many people clean the hull of their sailboat while it's still in the water. In fact, you may not even have to get in the water to do it. There are special brushes available that allow sailboat owners to clean the bottom from the dock.
These brushes have a long angled handle that allows you to reach under the boat from above. This method works great for round-bottom boats, though special care must be taken to clean the keel and the rudder.
If you're willing to get in the water, you can also clean the bottom using scuba gear or a snorkel. If you do, be sure to choose a safe location that doesn't have any marine traffic.
How to Clean a Sailboat Bottom
Cleaning a sailboat bottom is pretty self-explanatory, and anyone can do it in a reasonable amount of time. That said, you'll need the proper tools and techniques to do it safely and effectively.
Here is a list of the best tools to grab before cleaning the bottom. You don't necessarily need them all, but it's best to have a full set of implements at your disposal.
It's also a good idea to buy purpose-made marine tools, as you need the right scraper thickness to avoid damaging the hull. If you have a friend with marine tools, borrow them or bring them along to a hardware store to find comparable scrapers.
Gloves are an important and often overlooked tool for bottom cleaning. Ever try to walk along a rocky shoal barefoot? You probably didn't get far. Barnacles and shells are hard and extremely sharp, and a slip of the hand can result in a trip to the urgent care clinic and a few stitches.
Specially-made marine gloves allow good mobility and excellent protection from sharp marine growth.
2. Scrapers
You'll need scrapers of various kinds to remove the harder gunk such as barnacles and mussels. These come in multiple shapes and sizes. You should have more than one size available to help clean odd spaces, such as around your propeller shaft and rudder assembly.
3. Scrubbers
Scrubbers are useful tools for using outside the water. They're usually large, round brushes that attach to a motor or a power drill. While scrubbers usually aren't useful for removing severe growth, they're excellent for finishing the hull after scraping the stone-like barnacles off.
4. Pressure Washer
A pressure washer with a specialized marine nozzle is an excellent choice for getting work done quickly. Larger boats benefit most from a pressure washer, as it can blast off all kinds of marine growth. Just be careful, as the jet is extremely powerful and concentrated.
Brushes are an essential tool for cleaning a sailboat bottom. There are literally hundreds of marine brushes to choose from, and they're available in all shapes and sizes. Some brushes are handheld and small, while others have long handles for dockside cleaning.
Bottom Cleaning in the Water
Bottom cleaning in the water is the least costly way to do it, as you don't have to pay for a boat crane or a place to park your trailer. Plus, with no jack stands in the way, you can clean the entire hull.
First, make sure you're a good swimmer. Even if you don't get in the water, it's essential to be prepared if you fall in. The most common way to clean the bottom in the water is to grab some goggles and a snorkel and go for a swim.
Start by scraping the larger marine growth with a scraper. If there isn't any hard growth, such as mussels or barnacles, you can begin with a heavy brush and start removing the gunk.
Use extra care around intake ports and moving parts, as it's especially important that these items be clean.
Check Anodes
Most sailboats have bolt-on sacrificial zinc anodes around certain metal parts. These anodes 're-route' corrosion. They corrode instead of your metallic boat parts, but once they get badly pitted, they stop functioning. Check the anodes and make sure they're in good condition. If not, replace them promptly.
Out-Of-Water Sailboat Bottom Cleaning
It's easy to clean the bottom of a sailboat out of water and generally less physically taxing. Here, you can use power tools (such as a power drill scrubber) and pressure washers to expedite the process.
Use the same care to avoid scraping off paint and damaging the hull. Once out of the water, you can inspect the condition of the bottom paint and repair hull damage.
General Rules of Sailboat Bottom Cleaning
Bottom cleaning is a regular and relatively unpleasant task, but it doesn't have to be difficult. Here are a handful of helpful tips to make sailboat bottom cleaning as safe and easy as possible.
1. Pull the boat out of the water if you can.
Pulling the boat out of the water makes life a whole lot easier when you need to clean the bottom. It allows you to work on land and get a full, well-lit 360-degree view of the hull.
2. Avoid harsh chemicals (if possible).
There are lots of quick-fix chemicals available to make hull cleaning easier, but it's best to consider the potential consequences of using them. Many of these chemicals contain harsh compounds and solvents, which are harmful to your health and damaging to the environment.
It doesn't take much to cause problems. Just a pint of petrochemicals can contaminate an acre of water or more, and a gallon of chemicals can contaminate over a million gallons of water. When possible, use biodegradable chemicals and safe paints.
3. Use secure boat jack stands.
If you pull the boat out of the water, be sure to use high-quality boat jack stands that are rated for the weight of your vessel. Take into account the extra weight of tanks and additional items aboard. Also, ensure that the jack stands are in good condition and not corroded.
4. Buy better brushes.
Buying high-quality hull brushes can make a world of difference when cleaning the bottom. High-quality brushes are built better and less likely to damage the bottom of your boat or scrape off your paint. Also, avoid using brushes that aren't designed for hull cleaning.
5. Clean the hull in a safe location.
If you must dive under the boat while it's in the water, be sure to do so in a safe area without marine traffic. Use a flag and markers to alert other boats that you're in the water, as they may not be able to see you when motoring around.
Related Articles
Daniel Wade
I've personally had thousands of questions about sailing and sailboats over the years. As I learn and experience sailing, and the community, I share the answers that work and make sense to me, here on Life of Sailing.
by this author
Repairs and Maintenance
Most Recent

What Does "Sailing By The Lee" Mean?
October 3, 2023

The Best Sailing Schools And Programs: Reviews & Ratings
September 26, 2023
Important Legal Info
Lifeofsailing.com is a participant in the Amazon Services LLC Associates Program, an affiliate advertising program designed to provide a means for sites to earn advertising fees by advertising and linking to Amazon. This site also participates in other affiliate programs and is compensated for referring traffic and business to these companies.
Similar Posts

How To Choose The Right Sailing Instructor
August 16, 2023

Cost To Sail Around The World
May 16, 2023

Small Sailboat Sizes: A Complete Guide
October 30, 2022
Popular Posts

Best Liveaboard Catamaran Sailboats
December 28, 2023

Can a Novice Sail Around the World?
Elizabeth O'Malley
June 15, 2022

4 Best Electric Outboard Motors

How Long Did It Take The Vikings To Sail To England?

10 Best Sailboat Brands (And Why)
December 20, 2023

7 Best Places To Liveaboard A Sailboat
Get the best sailing content.
Top Rated Posts
© 2024 Life of Sailing Email: [email protected] Address: 11816 Inwood Rd #3024 Dallas, TX 75244 Disclaimer Privacy Policy
How to Articles | Bottom Paint Store
Learn more about boat paint applications and marine supplies.

How to Repair a Fiberglass Boat: A Step by Step Guide
If you’re a boat enthusiast, you know that there’s nothing quite like the feeling of cruising out on the open water. But what do you do when your beloved vessel starts to show signs of wear and tear? If you have a fiberglass boat, you’re in luck. In this blog post, we’ll walk you through everything you need to know about repairing your fiberglass boat , from small cracks to large holes. So, whether you’re a seasoned pro or a complete novice, read on for our step-by-step guide on how to repair a fiberglass boat.
KEY TAKEWAYS
- Clean the Area The first step in boat fiberglass repair is to clean the area that needs to be repaired. This step is important because it will allow the repair materials to bond properly with the existing fiberglass. Use a mild soap and water solution to clean the area, and then dry it thoroughly with a clean cloth.
- Cut Out the Damaged Area Once the area is clean, use a sharp knife or razor blade to cut out the damaged area. Be sure to cut away any loose or damaged fiberglass so that you have a clean, smooth surface to work with.
- Apply the Repair Material There are a variety of repair materials that can be used for boat fiberglass repair. The type of material you use will depend on the size and severity of the damage. For small repairs, you can use a fiberglass repair kit; for larger repairs, you may need to use a sheet of fiberglass cloth and some resin. Follow the instructions that come with your chosen repair material to apply it to the damaged area.
Repairing Small Cracks and Scratches
One of the most common problems that boat owners face is small cracks and scratches in the hull. While these may not seem like a big deal at first, they can quickly turn into larger problems if left unaddressed. The good news is that small cracks and scratches are relatively easy to fix with some basic supplies.
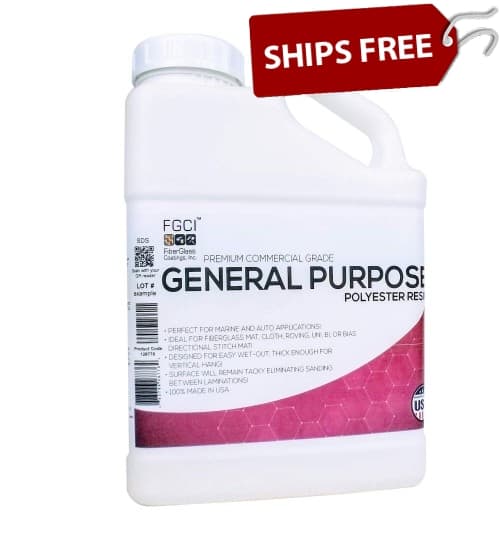
Here’s what you’ll need:
-Fiberglass cloth -Resin - Hardener -Sandpaper -Putty knife or spreader -Measuring cup -Gloves -Eye protection
Once you have all of your supplies, follow these steps to repair small cracks and scratches in your fiberglass boat:
- Clean the area around the crack or scratch with sandpaper to rough up the surface and allow the resin to adhere better.
- Cut a piece of fiberglass cloth to size and lay it over the crack or scratch.
- Mix together the resin and hardener in a measuring cup, according to the application guidelines.
- Use a putty knife or spreader to apply the resin mixture over the fiberglass cloth, making sure to work it into any crevices.
- Allow the resin to cure for 24 hours before sanding down any excess material.
- Your fiberglass boat is as good as new!
Fixing Large Holes in Fiberglass Boats
While small cracks and scratches are relatively easy to fix, large holes can be much more challenging—but not impossible! With some patience and elbow grease, you can patch up even the biggest holes in your fiberglass boat hull. Here’s what you’ll need:
-Fiberglass cloth -Resin mixture (resin and hardener ) -Putty knife or spreader -Sandpaper -Measuring cup -Gloves -Eye protection -Plywood (optional)
Follow these steps to repair large holes in your fiberglass boat hull:
- If necessary, use plywood to create a temporary patch for the hole until the resin has cured. This will help keep water out of the hole while you’re working on it.
- Cut a piece of fiberglass cloth to size and lay it over the hole.
- Allow the resin to cure for 24 hours before sanding down any excess material and removing any plywood patches.
Conclusion:
No matter how experienced you are as a boat owner, sooner or later you’re going to need to make some repairs—and if you have a fiberglass boat, that means getting familiar with some basic repair techniques. In this blog post, we’ve walked you through everything you need to know about repairing small cracks and scratches, as well as large holes in your hull. So, whether you’re dealing with cosmetic damage or something more serious, now you know how to fix it!
If you have any questions about how to repair your fiberglass boat, please feel free to reach out to the Bottom Paint Store technical assistance team by phone at 888-505-2313, or via Live Chat found on the website . We have a wide selection of fiberglass and gelcoat putties, resins, restoration solutions, repair kits, and tools/materials .
ACTIVE STORM TRACKER Hurricane and Tropical Storm Information Learn more
Service Locator
- Angler Endorsement
- Boat Towing Coverage
- Mechanical Breakdown
- Insurance Requirements in Mexico
- Agreed Hull Value
- Actual Cash Value
- Liability Only
- Insurance Payment Options
- Claims Information
- Towing Service Agreement
- Membership Plans
- Boat Show Tickets
- BoatUS Boats For Sale
- Membership Payment Options
- Consumer Affairs
- Boat Documentation Requirements
- Installation Instructions
- Shipping & Handling Information
- Contact Boat Lettering
- End User Agreement
- Frequently Asked Questions
- Vessel Documentation
- BoatUS Foundation
- Government Affairs
- Powercruisers
- Buying & Selling Advice
- Maintenance
- Tow Vehicles
- Make & Create
- Makeovers & Refitting
- Accessories
- Electronics
- Skills, Tips, Tools
- Spring Preparation
- Winterization
- Boaters’ Rights
- Environment & Clean Water
- Boat Safety
- Navigational Hazards
- Personal Safety
- Batteries & Onboard Power
- Motors, Engines, Propulsion
- Books & Movies
- Cockpit Confessions
- Communication & Etiquette
- Contests & Sweepstakes
- Colleges & Tech Schools
- Food, Drink, Entertainment
- New To Boating
- Travel & Destinations
- Watersports
- Anchors & Anchoring
- Boat Handling
Gelcoat Blister Repair
Advertisement
The discovery of hull blisters elicits a mental "oh no!" from most boat owners. But in many cases, the solution is simple and inexpensive.

Don't let a few blisters on your hull intimidate you this spring! (All illustrations: ©2013 Mirto Art Studio)
Most of us react emotionally to the slightest blemish on our hulls, and blisters often announce themselves as lots of blemishes. Those little bumps become a source of worry, even dread. Why my boat? How much time do I have before hull integrity is compromised? If I spring for a "cure," how many thousands of dollars will it cost? Take a deep breath: Blisters are a symptom, not a disease. It is estimated that one in four fiberglass boats develops hull blisters. Most will never be more than a cosmetic concern, particularly if they're treated rather than ignored.
Fiberglass hulls blister because the shiny exterior, the gelcoat layer, is not 100-percent impermeable to water. Seeking equilibrium, the water on the face of the gelcoat is drawn to dry voids on the back side — air pockets in the original lay-up or adhesive failures between laminates (particularly between the gelcoat and first layer). This attraction is intensified by loose soluble materials in the laminate, with which the water combines into larger molecules, too large to pass back through the gelcoat. Worse still, the solutions created are acidic, which can attack the resin and release more soluble material that attracts yet more water. The pressure that necessarily builds is released by expanding the volume of the void, pushing the gelcoat into a dome.
Blisters might signal a major defect due to either inferior materials or poor techniques when the hull was built, but absent a blistering history with other boats from the same builder, you should be slow to draw such a dire conclusion. Blisters also occur because an inattentive worker may have failed to apply the gelcoat uniformly; because fluctuations in the mix from the resin sprayer may have created spots of soft gelcoat; because features in the mold may have induced thinner coverage; because the gelcoat may have been sanded to excess by the owner or yard; because chemical stripper may have been used on the bottom; because contaminants in the water may have attacked the gelcoat; or a dozen other reasons.
No one looking at a bottom with a few blisters can tell you with certainty the cause, the gravity, or the most appropriate treatment. For that reason, a bit of wait-and-see when blisters are first discovered is likely to be the better and often the least costly course, particularly if your boat spends time out of the water.
That doesn't mean you should simply ignore a few blisters. To the contrary, the acid pus they can contain is not doing the laminate any good, no matter what the cause, so blisters should be attended to as soon after discovery as practical. But ignore advice, whether well-meaning or avaricious, that you must immediately strip all the gelcoat off the bottom and replace it with different barrier coat. That might turn out to be exactly the treatment your boat requires, but it also might not. If your boat comes out of the water covered stem to stern with blisters, you're going to need the advice of a professional, preferably one without a conflict of interest. However, blisters develop slowly, laminate damage slower still, so if the bottom exhibits a few blisters, whether in a cluster or scattered, initially treat them individually.
Repairing individual blisters also cures them. The objective of replacing all of the gel-coat is to inoculate the entire bottom against future blistering, but if 99 percent of the original bottom is already resisting blisters, that makes 99 percent of your investment wasted. Individual blister repair is where to start until it becomes clear whether your bottom has pimples or pox.
Tech Support
Degree Of Difficulty: Moderate
Tools and Materials:
- Disc sander
- Water hose and nozzle
- Scrub brush
- Scotch-Brite scrubber pads
- Sanding block
- Disposable natural-bristle paintbrushes
- Isopropyl alcohol
- Freezer bags (or other thick clear plastic)
- Epoxy (West 105 or equivalent)
- Colloidal silica (West 406 or equivalent)
- Fiberglass cloth (6-10 ounces for large blister)
Find And Grind
Blisters can deflate in as little as an hour after a boat is lifted from the water, so it's best to examine the bottom immediately to avoid drawing a false conclusion. Even after shrink-in, blisters will normally be higher than the surrounding surface. If you're not there for the haul-out, a useful trick later is to scuff the bottom lightly with a coarse sanding block to locate and mark high spots.

Figure 1: Break open each blister.
There's nothing complicated about blister repair. It starts with breaking open every blister. Pressurized acidic liquid often sprays out, so wear eye protection and use the corner of a sharp chisel at arm's length (Figure 1) . Damage can extend beyond the dome, so reverse the chisel and use the handle as a plastic mallet to tap the laminate all around each blister or blistered area. Solid laminate will sound sharp, voids will sound dull. Mark the perimeter of suspect areas. After all blisters are open, wash the hull to flush away acidic trickles.

Figure 2: Grind away the broken dome of the blister.
Once the hull dries, grind away the remains of the broken dome with a two-inch sanding disc (Roloc) or some other sanding or grinding bit in a drill or rotary tool (Figure 2) . Chamfer the perimeter of every blister to transform it into a shallow dimple. Typically you'll be removing only gelcoat, but if you discover damaged laminate, you'll need to grind this away until you reach healthy laminate. Wetting laminate with a trigger sprayer can help you to differentiate. Damaged or dry laminate will show white fibers while healthy laminate will appear dark and translucent with the fibers not evident.
Whether a depression ends up spoon-, saucer-, or plate-size will be determined by how far out you have to grind to encounter a solid bond between gelcoat and laminate. Anywhere the exposed edge exhibits separation between gelcoat and laminate, keep expanding the perimeter. Open any separate voids your sounding discovered and treat these the same way as a blister, dishing them into shallow depressions.
Know Your Enemies
Figure 3: Scrub until squeaky clean with a stiff brush.
Loose debris is one enemy, so scrub the prepared blisters squeaky clean with a stiff brush and plenty of water (Figure 3) . Another enemy is moisture. If you've waited to do the job after hauling the boat for the off-season, this is where to stop. By waiting to fill the blisters right before you launch next season, you take maximum advantage of the potential for the exposed laminate to dry out. But if the boat isn't going to stay out of the water, you'll need to dry the laminate before filling the blisters. Grinding will remove much of the wettest material. Blot-wiping each cavity with isopropyl alcohol-soaked paper towels will draw out much of the remaining moisture. Completely wet the laminate with rub-big alcohol, then wipe away contaminants it brings up. Repeat with soaked, fresh paper towels until they come away clean.
Normally this will leave the cavity both clean enough and dry enough to fill, but you can check for moisture content by taping squares cut from zipper freezer bags over a few of the blisters. Seal the entire perimeter of the clear plastic squares to the hull with duct tape, and then take a three-day break. If the weather is warm enough for a sensible person to be working on a boat and there's still moisture in the laminate, it will con-dense onto the inside of the clear plastic. In the likely event that the plastic is dry, you're good to go. If it's fully coated with condensation, your repair will benefit from giving the open blisters at least a couple of low-humidity weeks to dry out.
Get Your Fill
When you restart the repair, whether after a few days or a few months, vigorously wash the blisters a final time using a stiff brush and as much water pressure as you can bring (Figure 3) . This is to flush away any contaminants that drying has brought to the surface. It will not raise the water content of the laminate.
The only resin choice for individual blister repair is epoxy resin, and not the kind hang-in on the pegs at your local hardware store. You need a high-performance epoxy such as West System 105. If the ambient temperature allows, use the regular hardener (for example, West 205), which delivers slightly better moisture exclusion than a slower hardener. You'll be filling the blisters in two or perhaps three steps, and it's essential that each happens before the previous application reaches full cure so that they join together chemically.
You should initially attempt to fill just a few blisters to get a feel for how long each step requires and how much curing time to allow.

Figure 4: Paint the inside of each cavity with epoxy resin.
The first step is to mix up a small amount of epoxy without any additive. Using a small disposable brush, paint the interior of each blister cavity with the epoxy (Figure 4) . It is this coat that forms the bond with the existing laminate, so you want the epoxy to completely saturate fibers and penetrate pores and crevices. If you go immediately to the next step, your filler is going to skid on the wet epoxy and slide out of the cavity. To avoid this, wait up to an hour to allow the wet-out coat to partially cure. When it has stiffened but remains tacky, the blister is ready for filling.

Figure 5a: Replace fiberglass as needed.

Figure 5b: Then, saturate the cloth with epoxy resin.
Thickened epoxy resin alone is suitable to replace the gelcoat and the first layer or two of the underlying laminate, but where a blister involves deeper layers, it's good practice to replace the fiberglass reinforcement that you ground away. It's not necessary or even particularly desirable to try to match the original lay-up schedule when repairing blisters. Binders in fiberglass mat often make it incompatible with epoxy, so the best choice is six- to 10-ounce fiberglass cloth. Cut the cloth into discs slightly larger than the flat part of the depressions and press them into the tacky wet-out coat. Saturate the cloth with epoxy resin, thickening the resin slightly with colloidal silica if you experience difficulty with the resin draining out of the weave. Add and saturate as many layers of cloth as necessary to restore the laminate to its original thickness (Figure 5) . Allow this lay-up to cure for around 30 minutes before filling the remainder of the cavity with silica-thickened epoxy.

Figure 6: Trowel the filler into the cavity, smooth it, and then fair it.
For this you want to again mix up a small amount of epoxy resin, and then stir in colloidal silica (West 406, Aerosil/Cabosil, for instance) to thicken the resin to the consistency of creamy peanut butter. The filler in this case is also the barrier coat, and colloidal silica will not compromise the resin's resistance to moisture penetration. Use a flexible plastic spreader to trowel the filler into the cavity and smooth and fair it (Figure 6) .
Learn to curve the spreader with thumb pressure to copy any curvature of the hull, and take extra time to try to match the surface of the fill perfectly to the hull. As colloidal silica makes the cured filler resist sanding, extra time here pays generous dividends. Epoxy does not shrink, so there's no need to overfill. A topcoat of unthickened resin after partial cure of the filler can improve the fairness of the repair.
The Final Hurdle
That's it! Let the epoxy cure overnight, then use a Scotch-Brite pad and plenty of water to remove the waxy amine coating. Follow that with a bit of block sanding with 100-grit paper to fair and scuff the surface of the epoxy, and you're ready for bottom paint. Fixing existing blisters is the first step toward figuring out whether a more extensive and vastly more expensive repair will be required. At the very least, repairing individual blisters puts off a more costly response for another year. At best, it avoids that expense altogether. Repairing a few new blisters every year can be a low-cost, long-term strategy.
Related Articles
The truth about ceramic coatings for boats.
Our editor investigates the marketing claims of consumer-grade ceramic coatings.
Fine-Tune Your Side Scan Fishfinder
Take your side-scanning fishfinder off auto mode, and you’ll be spotting your prey from afar in no time
DIY Boat Foam Decking
Closed-cell foam flooring helps make boating more comfortable. Here’s how to install it on your vessel
Click to explore related articles
Contributor, BoatUS Magazine
Don Casey has been one of the most consulted experts on boat care and upgrades for 30 years, and is one of the BoatUS Magazine's panel of experts. He and his wife cruise aboard their 30-footer part of the year in the eastern Caribbean. His books include Don Casey's Complete Illustrated Sailboat Maintenance Manual, and the recently updated This Old Boat, the bible for do-it-yourself boaters.
BoatUS Magazine Is A Benefit Of BoatUS Membership
Membership Benefits Include:
Subscription to the print version of BoatUS Magazine
4% back on purchases from West Marine stores or online at WestMarine.com
Discounts on fuel, transient slips, repairs and more at over 1,200 businesses
Deals on cruises, charters, car rentals, hotel stays and more…
All for only $25/year!
We use cookies to enhance your visit to our website and to improve your experience. By continuing to use our website, you’re agreeing to our cookie policy.

Boating Basics Online is reader-supported. When you buy via our links, we may earn a commission at no cost to you. Learn more
How to Repair a Fiberglass Boat Hull From the Outside? – 7 Steps
Written by J. Harvey / Fact checked by S. Numbers

Did your ride recently take a hit? I know the feeling.
Whether it’s just a teeny tiny scratch or a crummy crack, we want to fix our babies asap. I mean, who can endure those unsightly blemishes on them anyway?
However, DIY fiberglass boat repair can be challenging because extensive damage sometimes requires access to both sides of the hull.
I’ll teach you how to repair a fiberglass boat hull from the outside with this post, meaning it’s best applied to minor damage to the hull only. I’ve revealed some strategies to achieve stellar results every time.
Table of Contents
Grab a Couple of These Tools First
Mind and follow these steps, 1. grind back the damaged area., 2. decide the number of fiberglass mat layers., 3, lay the fiberglass mat on top of the hole, then trace and cut out its shape., 4. wipe down the damaged area with solvent wash and the resin or epoxy., 5. lay the layer/layers of mat on the hole., 6. apply the topcoat and start sanding., 7. wipe down the sanded surface, apply a fairing compound, then sand it again., tips to find a leak in a fiberglass boat, step-by-step guide on how to repair a fiberglass hull from the outside.
- 1708 and chopped fiberglass mats
- Disc sander
- Medium-grit sanding disc
- Polyester resin or epoxy
- Solvent wash
- Fairing compound
- 80-grit sandpaper
- Gelcoat with wax
- Cutting tool for fiberglass mat
- Thickened polyester resin (optional)
Let me first be clear about the steps I’ve shared here. You should think twice if you’re planning to do this on a major fiberglass repair boat.
Repairing a hull solely from one side (i.e., outside) can only go so far. I usually only reserve it for instances like I need to repair fiberglass boat hull crack and small holes, as these don’t require a demolition job.
If you’re dealing with an undeniably large hole, especially if it’s below the waterline, it’s almost always better to do fiberglass hull repair from both sides. Trust me; you’ll only get a better and safer result that way.

Obviously, every case is different. You may need to repair deep scratch in boat hull or a tiny hole.
Whether I repair chips in fiberglass boat hull or minor holes, I always grind the damaged area first, gelcoat included. This allows me to check the actual extent of the damage, clean the area, and make the overall repair job more successful.
To grind back the hull, use a disc sander with a medium-grit disc and gently go around the damaged area. Don’t forget to put on your face mask before grinding.
Take note: when I’m repairing fiberglass boat hulls from the outside, I tend to taper out to a larger area, 18:1 or 24:1 ratio, instead of the typical 12:1. That means for every inch of the laminate you repair, you need to sand or taper out to 18 or 24 inches.
That former ratios, to me, are the best ways to ensure a more solid, stable result that can handle future stress better, so much so that it can rival a more thorough fiberglass boat bottom repair done from both sides.
More often than not, a single layer will do, especially as I’ve already assumed that you’re only doing a minor repair.
However, it doesn’t hurt to do a combination of chopped strands and 1708 fiberglass. For example, you can use one layer of 1708 fiberglass first and then lay two layers of chopped strand mat on top since that sands more smoothly.
- For me, though, as for other professional boat repairers, the chopped strand is more for cosmetics, while 1708 is better for making the actual structural repairs. In short, anytime you need strength or aesthetics, go for the latter or the former, respectively.
- The downside of 1708 is that it often leads to print-through issues, but that’s not the case for chopped strands, making it a better option for stabilizing the surface.

Once you’ve decided on a setup, lay the first layer of the mat on the hole, then trace its outline using the pen. Cut out what you’ve traced with either scissors, a utility knife, a rotary cutter, or anything you have at your disposal that can cleanly cut a fiberglass mat.
For every subsequent mat layer you cut out, make the succeeding one an inch or two larger than the one that preceded it. That is, of course, assuming you’re going for multiple layers of fiberglass.
Feel free to follow the recommendation I shared above (1 layer of 1708 below 2 layers of the chopped strand). That’s what I found to be the optimal mix for most of the structural fiberglass repair jobs I’ve done.
Grab the rag, then dab it with a couple of drops of the solvent wash. Afterward, wipe it on the surface you’ve ground.
Mix and/or thicken the polyester resin or epoxy as it needs to be. If you bought a repair kit, it may have come with a mixing measuring cup and stirrer, so don’t hesitate to use those.

I won’t give any exact recommendations, as I’ve found that it’s best to stick to the manufacturer’s own instructions. As for applying:
- You can actually use both (i.e., use polyester on the first layer, then settle for repair epoxy as the undercoat for the final paint layer).
- Other old salts stick to just epoxy mixed with Visqueen, as they attest to it adhering better.
I don’t like to nitpick between the two, as I’ve found both to be reliable when patching fiberglass boat that’s only been marginally damaged. Ultimately, it’s your choice.

Use the paintbrush to generously slather each layer of fiberglass mat you’ve cut out with the resin and epoxy.
Read more: The most suitable paint for fiberglass boats.
Carefully pick up the epoxy-laden mats, then lay them on top of the hole. If you’re laying down multiple mats, be sure that the intended first layer is the one to cover the hole.
Aim for good adherence on the edges of the hole.
You may see some dimpling in the middle, especially if the hole is big enough. Be sure to minimize that risk by refraining from pushing down the mat as you’re laying it down.

You can then use the paintbrush to straighten the mat out by tapping the areas covering the edges of the hole ever so carefully. Once that’s done, just wait for the resin to harden (around an hour).

Anyway, you still need to apply an even layer (or more) of the thickened resin before doing the topcoat. The more layers you make, the more sanding you’ll inevitably do, though.
Once you’re done with that, it’s a matter of waiting a day for it to dry.
The topcoat can be PVA or gelcoat mixed with wax. Apply either based on the manufacturer’s recommendations.
- I find the latter to be better overall for these cases where I’m doing minor fiberglass patches for boats, and it’s also guaranteed to result in a thicker, tougher laye
- Be sure you don’t expose the wax to sunlight, though.
Then, put that mask on again.

When sanding, you don’t have to beat yourself up and be a perfectionist. You just want to get the edges down and the surface to be as even as you can get it.
That being said, it certainly doesn’t hurt to exert extra effort for it to be close to perfect. I usually start on the perimeter and then work my way to the middle.
Check all the uneven protuberances of paint and epoxy that are still visible and knock them down. Be sure not to go overboard, so you won’t get a lot of low spots – if at all.
Wipe the damaged area to get rid of the sanding dust.

Once done, prepare the fairing compound. Use the spreader to apply an even not-too-thick layer of the compound.

Afterward, use a sander to even it out again. Wait for the fresh layer to dry. Then, sand it down with the 80-grit. If the colors of the repaired spot and the rest of the hull are mismatched, spray-paint the area.

And, you’re basically done repairing after that! Give yourself a pat on the back for a job well done and the dough you’ve saved.
Incidentally, if you’re wondering how much you’ve saved, the cost to repair fiberglass boat hull nowadays is close to $500.
- Double-check areas where holes often rear their ugly heads, such as any area at the bottom of the boat, above and below the waterline, areas near the thru-hulls, scupper hoses, etc.
- Seal all the holes and ports on your vessel. Then use a leaf blower to pressurize its
- Sprinkle some baby powder on areas where you suspect there are holes. The powder will often create water tracks that will reveal the hole for you.
- Give any nook and cranny a thorough scrubbing. You’ll never know when a black “patch” of dirt will actually turn out to be a gaping crack or hole.
How did you like my guide on how to repair a fiberglass boat hull from the outside? Think you’re up for it? Of course, you are!
These are everything you’ll need to go through:
- Grind and clean the damaged area.
- Select the number of fiberglass layers, then cut them out to fill in the hole.
- Apply the solvent wash and the epoxy on the mat.
- Lay it correctly on top of the hole.
- Brush the topcoat on, then sand as needed.
We hope this article clears things up for you. Good luck with your repair!

“My intention from the first day establishing Boating Basics Online is to provide as much help as possible for boaters who want to experience a first safe and convenient trip. So feel free to join us and share your beautiful journeys to the sea!”
- THE PRINCESS PASSPORT
- Email Newsletter
- Yacht Walkthroughs
- Destinations
- Electronics
- Boating Safety
- Ultimate Boating Giveaway
How To Repair Minor Fiberglass Damage on Your Boat
- By Lenny Rudow
- September 16, 2024

All boaters will bump pilings, kiss rubrails or make an errant screw hole here or there, and those are just a few of the ways minor fiberglass damage can occur onboard. Anytime there’s significant damage to a vessel’s fiberglass, you’ll want to call in a pro, but fixing the minor stuff is actually easy and straightforward. If the damage is limited to the gelcoat, and you know there are no structural issues to worry about, cosmetic repairs can be made in a matter of minutes.
Fixing Chips, Dings and Holes in Fiberglass Gel Coat
Stage one in fixing this type of fiberglass damage is to clean out the divot. This includes removing any loose chips or fragments, sanding the surface with a fine-grit sandpaper, then wiping the surface down with Interlux 202 or acetone to remove all contaminants. If you’re filling in an old screw hole, be sure to sand the edges and roll up a small piece of the sandpaper so you can insert into the hole and sand the inside edges too. Do the same with a rag and the 202 or acetone to clean it out. Now, you’re ready to fill in that blemish.

Gelcoat paste will do the trick, and you can use a regular putty knife to create a smooth surface that fills all the gaps. But there’s a complicating factor: you’ll need to color-match the paste with your boat’s original gelcoat. There are literally hundreds of shades and tones of gelcoat, and you’ll have to custom mix your own batch. Start with a neutral white gelcoat paste, then add small amounts of pigment and mix it in. Most gelcoat repair kits will come with several coloring agents allowing you to mix up just about any combination, so if your boat is anything but plain white, it’s usually best to get a kit rather than buying a single pigment and trying to match the correct shade.
Here’s the kicker: when the gelcoat dries, the color often changes slightly. So, what looks like a perfect match upon mixing may turn out to be slightly off when it hardens up. To combat the issue, carefully mix several batches with slightly different paste/pigment ratios that create slightly different shades, allow them to dry, then compare them with your boat’s existing gelcoat. When you find a match you can live with (getting a perfect match is virtually impossible), remix it. Now, you’re ready to spackle it into the damaged area. Make sure to overfill it just a bit and don’t leave any air pockets. When you’re satisfied, cover the gelcoat paste with plastic wrap or a similar film (often included in kits) because gelcoat cures best when it’s not exposed to the air.

After it dries completely, lightly sand the area with extra-fine sandpaper until the overfilled area matches up with the pre-existing surface. Then wet-sand with a super-fine grit sandpaper until the surface is completely smooth. Finally, give the area a couple of coats of paste wax.
Fixing Cracks in Fiberglass
Fixing cracks is a bit tougher, because they don’t have enough surface area for the gelcoat paste to adhere; you can’t just smoosh it in there and hope for the best. First, you need to open up the cracks with a Dremel tool. Use a silicon carbide or tungsten carbide bit shaped like a cone, and be sure to grind deep enough to expose the uncracked fiberglass beneath. Keep in mind that adding lots of pressure to a Dremel won’t produce the best results. Instead, run it along the cracks multiple times with light pressure.
When the cracks have all been ground away, sand the exposed areas with fine-grit sandpaper to remove any burrs or jagged edges. Then wipe down all the areas with Interlux 202 or acetone to eliminate contaminants.

From here on out the repair process is the same as for chips and dings. However, if the cracks surround a high-stress area like the attachment point for a rail or a T-top support, there’s a good chance the cracks will reappear over time. It may be necessary to add backing plates or some other form of structural support to prevent a recurrence.
What about making repairs when the raw fiberglass cloth beneath the gel coat has been damaged? At that point, it should really be considered major as opposed to minor. So, if shards of matt or woven roving are showing call in the pros.
- More: Boat Repair , Fiberglass , Gear , Maintenance , Yacht Maintenance , Yacht Repair

Sunreef Yachts and North Sails Champion Eco-Friendly Build Materials

Marine-Friendly Sunglasses

Garmin Quatix Upgrade

Dockmate’s Dynamic Positioning Upgrade

Superyacht For Sale: Amels 180 “Galene”

Alia Yachts to Debut SAN Superyacht in Monaco
Top Bar Harbor Maine Sights For Visiting Cruisers

Always In Style: Ocean Alexander 85E For Sale
- Digital Edition
- Customer Service
- Privacy Policy
- Terms of Use
- Email Newsletters
- Cruising World
- Sailing World
- Salt Water Sportsman
- Sport Fishing
- Wakeboarding
Dyna-Ski Boats custom builds outboard powered water ski boats for recreational skiers and show ski clubs. We have customers all over the world including Malaysia, the Caribbean, Moscow, Russia, the Cayman Islands and Canada. This blog is used to keep readers informed about what is going on at Dyna-Ski and answers questions that are frequently asked. You can also visit www.dyna-ski.com for more information about our boats. Contact Dyna-Ski at [email protected] or call 715-854-7501.
Thursday, January 9, 2014
The true cost of restoring an old 18' hydrodyne or 20' hydrodyne.

No comments:
Post a comment.
- PaddleWays App
Suggestions
More Products »
Repairs Department

Northwest River Supplies
The NRS Repair Department is here to help from our Moscow, Idaho headquarters. Read on for details on general repairs, pump repair options, latex dry wear gasket replacements, pressure testing, and more.
- General Repairs
- Gasket Replacement & Pressure Testing
- Pump Repairs
- Inflatable Boat, Raft & SUP Repair Facilities
GENERAL REPAIR
Does your NRS gear or apparel need a little TLC? Give us a call and we can let you know whether we can repair your stuff!
International Customers: If you are outside of the United States, please contact us before sending anything our way.
General repairs EXCLUDING shipping: $35.00 per hour
For repair needs or questions, please contact us .
GASKET REPLACEMENT & PRESSURE TESTING
If you would like NRS to repair your gaskets or test* for pinholes or potential leaks in your dry suit, please add the desired items below to you cart and checkout.
Agency Customers: If you are sending in multiple dry suits for an agency department, please use our Agency Dry Suit Intake Form .

Latex Neck Gasket Repair Service for Dry Wear

Latex Wrist Gasket Repair Service for Dry Wear

Latex Sock Repair Service for Dry Suits

Latex Ankle Gasket Repair Service for Dry Suits

Leak Evaluation and Repair Service for Dry Suits
*Note: the leak evaluation service is only available for dry suits. Semi-dry suits featuring a neoprene neck closure (e.g.: Explorer, Navigator, Spyn, Nomad, Ascent SAR, Kokatat Supernova) or neoprene wrist closures (e.g.: Ascent SAR) are not compatible with this leak evaluation service.
U.S. customers: shipping is included in the purchase price of the repair. After your order is submitted, you will receive an email with a shipping label and instructions for shipping your dry wear to NRS.
International customers: shipping your dry wear to/from NRS in the United States will be your sole responsibility.
Squeaky-Clean Repair Policy
We are happy to repair your clean NRS gear, so be sure to rinse, dry and remove all dirt/sand/debris from the interior and exterior of your dry suits. (We’re lookin’ at you, sandy socks!) Any gear sent in for repair that has not been cleaned will result in a $30.00 cleaning fee.
For additional dry suit gasket needs or questions, please contact us.
DIY Gasket Repair
Gasket repair kits and an instruction video are available if you’re feeling adventurous.
PUMP REPAIR
Looking for some tips on what you can do to fix your own pump? Read about how to maintain and repair NRS Barrel Pumps . Replacement pump parts are available for purchase.
For additional pump needs or questions, please contact us.

Wonder Pump 6 Hose

Bravo High Pressure Pump Replacement Hose

Scoprega GP 5 Foot Pump Hose

Foot Pump Nozzles

Big Blower Nozzle

NRS Super Pump Adapter Set
More Pump Parts »
BOAT & SUP REPAIR FACILITES
We do not repair boats and SUPs, but are happy to refer you to some awesome folks who do! Visit the state- and region-specific list of NRS suggested boat repair facilities . You can also contact us for additional information.
Stay up to date on new arrivals, email exclusives, sales and more.
By providing this information, you are opting to receive email communications from nrs.com and agreeing that you have read our privacy & cookie policies.
877.677.4327
Give us a call.
Send an Email
Drop us a line anytime.
Find a Dealer
Locate our retail partners.
Learn Center
How-to articles, videos and more.
Flagship Store
Showcasing the best of NRS in Moscow, ID.
Let them pick exactly what they want.
- Duct Tape Diaries Blog
- Discount Programs
- International
- NRS Pro Deals
Customer Service
- Free Shipping*
- Rock Solid Guarantee
- Return Instructions
- Warranty Registration
- Detect Fraud Websites
- Notice at Collection
- Terms & Conditions
- Privacy & Security
- Cookie Policy
- Sun Protection
- Base Layers
- Jackets & Hoodies
- Splash Wear
- Life Jackets
- Safety Equipment
- Cleaning & Maintenance
- Apparel & Gasket Repair
- Warranty Info
- Logo T-Shirts
- Whitewater Kayaking
- Kayak Touring
- Stand-Up Paddleboarding
- Packrafting
- Dry Duffels
- Map & Electronic Cases
- Yakima Racks
- Locks & Security
- Foam Rack Kits
- Whitewater Paddles
- Touring Paddles
- SUP Paddles
- Raft Paddles
- Canoe Paddles
- Paddle Accessories
- Rescue PFDs
- Fishing PFDs
- Low-Profile PFDs
- Women’s PFDs
- Kids’ PFDs
- Accessories
- Knives & Tools
- Rope & Webbing
- Carabiners & Rescue Hardware
- Touring Safety & Accessories
- Rescue Kits
- Medical Kits
- Safety Accessories
- Chairs & Tables
- Hammocks & Shelters
- Sleeping Pads
- Stoves & Firepans
- Camp Kitchen
- Purest Duffels & Bags
- Ground Mats
- Toilet & Waste Systems
- Water Filters
- Toys & Fun
- Lights & Headlamps
- Audio & Accessories
- Waterproof Cases
- Expedition Series
- Otter Series
- Otter Livery Series
- Slipstream Fishing Series
- Approach Fishing Series
- Outlaw Series
- Select Series
- Starlite Series
- NRS Catarafts
- STAR Catarafts
- AIRE Catarafts
- Cataraft Accessories
- Tributary IKs
- IK Accessories
- Raft Frames & Parts
- Oars & Accessories
- Outfitting & Accessories
- Dry Bags & Cases
- Inflatable SUP Boards
- SUP Accessories
- Fishing Rafts
- Fishing Raft Frames & Parts
- Personal Fishing Inflatables
- Fishing Outerwear
- Fishing Apparel
- Kayak Outfitting
- Roof Racks & Transport
- NRS Apparel
- Chaco Footwear
- STAR Inflatables
- Used Apparel
- Used Inflatables

FIND IT, PLAN IT, PADDLE IT
COMMENTS
I purchased the boat with the scrape on the bottom. I fixed it using marine tex. This product is stronger than fiberglass. If you are just fixing gel coat, t...
I knocked a Chunk out of the bottom of my Boat! That's ok, I'm going to show You how to fix it. Gelcoat and Fiberglass repair can seem intimidating if you ha...
The experts at Metan Marine Restoration show how to repair a small section of damaged hull, right down to the new gelcoat application. Check out the full art...
Fiberglass boats are arguably the best kind of boats you can own. They're lightweight, fun to use, and easy to maintain. They're even easy to repair, and in this post on repairing fiberglass boats, we'll tell you exactly how to do just that. Let's get started!
This article applies to all fiberglass hull repair, including work on Sunfish and Laser Sailboats. If you carefully follow the directions put forth in this article, you can have the nicest hull in your fleet. First, you must acquire the proper...
Few things are more disheartening to the boat owner than staring at the fuzzy edge of broken fiberglass. However, the repairability of fiberglass is one of its best characteristics. The most horrifying hole in a fiberglass hull is quickly healed with a bit of glass fabric, a supply of resin, and equal parts skill and care.
You can start with 220-grit sandpaper and, for a really slick surface, finish with at least 400- or 600-grit. Finally, apply a coat of high-quality marine polish and your repair is complete. Keep your gelcoat looking its best! Visit West Marine to learn about the tools, materials and techniques required to repair gelcoat dings and cracks.
This is part 1 of a 3 video series outlining how to repair structural damage to your fiberglass boat. Make sure to watch all 3 in order! Otherwise you will be totally lost :-) These video'
Fiberglass boats are a popular choice for recreational boaters due to their durability and longevity, but even the toughest boats can experience damage from time to time. Whether you have a small hole from a stray rock, a drilled hole from installing hardware, or a larger structural issue, repairing a fiberglass boat can seem daunting. But with the right tools, materials, and a step-by-step ...
Here are secrets to expert boat fiberglass repair in this comprehensive guide! Learn step-by-step techniques, and pro tips to restore your boat's durability and shine.
Understanding Fiberglass Boat Repair With 20 years of boating experience, I've learned that maintaining the integrity of a fiberglass boat is essential. The repair process involves several crucial steps which require attention to detail and a systematic approach.
How would I go about fixing a keel that has its gel coat missing from being grounded on a beach? Would you first fill in the divits with small pieces of fiberglass and resin, then rough sand and put on gel coat or would you just fill in the divits with gel coat? I will take pics tomorrow and...
Sailboat bottom cleaning is an essential part of regular hull maintenance, but it doesn't have to be a serious hassle. Sailboat bottom cleaning can be done in or out of the water. The most important tools include marine gloves, various scrapers, and brushes. A coat of high-quality bottom paint can reduce cleaning intervals and marine buildup.
How to Repair a Fiberglass Boat: A Step by Step Guide If you're a boat enthusiast, you know that there's nothing quite like the feeling of cruising out on the open water. But what do you do when your beloved vessel starts to show signs of wear and tear? If you have a fiberglass boat, you're in luck.
Boat Pox Boat pox is a much more serious condition, related to the occasional blister like acne to the occasional pimple. If the bottom of your boat is covered with blisters, filling them won't cure the problem. Pox is a systemic condition indicating that the hull is saturated.
If your boat comes out of the water covered stem to stern with blisters, you're going to need the advice of a professional, preferably one without a conflict of interest. However, blisters develop slowly, laminate damage slower still, so if the bottom exhibits a few blisters, whether in a cluster or scattered, initially treat them individually.
This step-by-step guide outlines how to repair a fiberglass boat hull from the outside. Learn some nifty tips for the best results.
GELCOAT and FIBERGLASS HOW-TO- Repair EVERYTHING YOU NEED TO KNOW to fix gel coat damage on a boat Fish Bump TV 53.3K subscribers 295K views 1 year ago ...more
Even after a very careful repair job, you can still see the slightly off-color nature of this repair to a helm station. If you don't get a perfect match, don't be too hard on yourself. Courtesy Lenny Rudow. Gelcoat paste will do the trick, and you can use a regular putty knife to create a smooth surface that fills all the gaps.
Dale's Boat Services Dale's Boat Services is located at 2211 S Main St in Moscow, Idaho 83843. Dale's Boat Services can be contacted via phone at 208-882-2124 for pricing, hours and directions.
The true cost of restoring an old 18' Hydrodyne or 20' Hydrodyne? We fix and restore fiberglass boats in the boat shop. Keep in mind that most of the time the biggest cost is labor! Over the years we have done everything that you can imagine from simple buffing to complete rebuilding. Transom, floors, stringers, little holes and real big holes . . . . real big holes!
Boat Maintenance Repair in Moscow on YP.com. See reviews, photos, directions, phone numbers and more for the best Boat Maintenance & Repair in Moscow, ID.
Learn how to fill a hole in your boat. If your fiberglass hull has screw holes, fiberglass damage, a hole under the water line, or anything like that, this v...
Repairs Department The NRS Repair Department is here to help from our Moscow, Idaho headquarters. Read on for details on general repairs, pump repair options, latex dry wear gasket replacements, pressure testing, and more. Jump To: